Content
- Introduction
- Requirements
- Installation Procedure
- Conclusion
Introduction
Kubernetes is an open source container-based platform used to manage cloud resources and develop web applications. The platform can help you scale your applications or system infrastructure, automating, and deploying, among other useful things. Also, it runs on all operating systems, including windows. This means all your clusters can be managed under cloud environments regardless of your computer operating system.
This guide offers you a complete walkthrough on how to install Kubernetes for Windows 10 users. Also, the tutorial shows you how to deploy the official web GUI dashboard, to allow you to monitor and manage everything.
Let’s get started!
Requirements
In order for you to install Kubernetes in your computer system, you should pay attention to the software and hardware requirements discussed below.
Software requirements
- Docker Desktop
- MAC address
- Product UUID for nodes
- Hype-V
Hardware requirements
- Worker node
- Master node
- Monitor navigation i.e mouse and keyboard
Is a must to the above requirements to have in check in order to make the installation process of the platform successful.
Installation Procedure
Step I: Set up Hyper -V
Hyper -V is a Windows virtualization software that allows you to manage your virtual machines using the command line or Microsoft GUI tool. It is simple to enable Hyper - V in your system. Follow the following steps below:
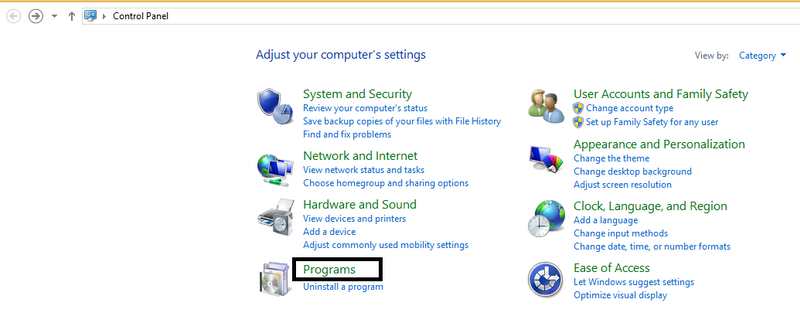
1.Open your Windows Control Panel.
2.On the left side, select Programs.
3.Then, after selecting Programs, go to Programs and features and click on Turn Windows features on or off
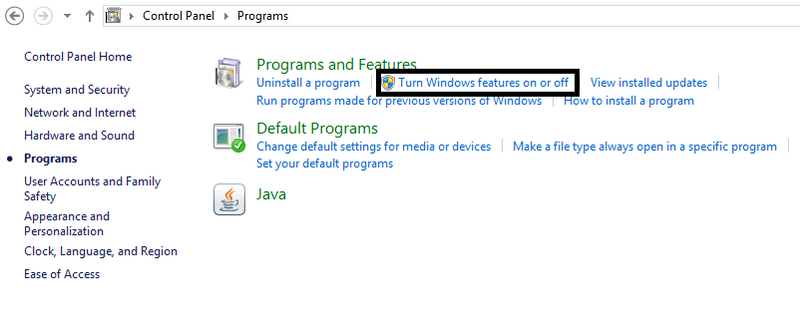
4.Check or click to tick on Hyper-V and the Hypervisor Platform for Windows
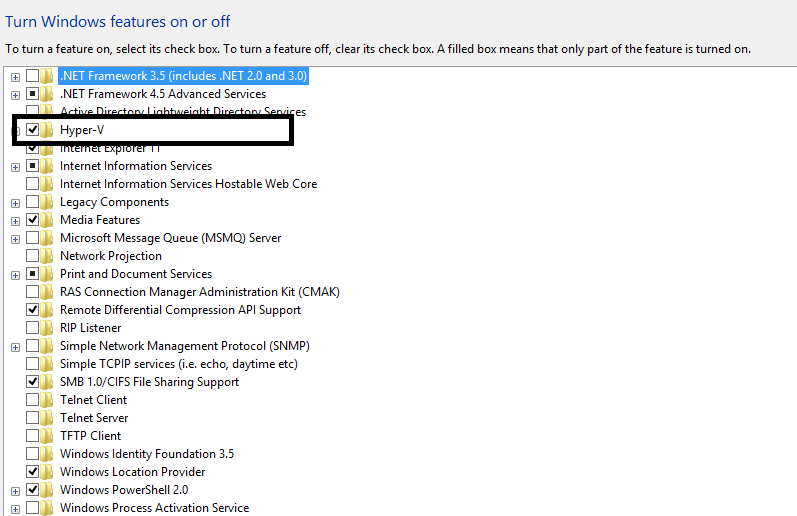
5.Select Ok
Do not worry if you do not see anything after selecting Ok. Your system is installing the Hyper- V in the background.
To confirm if Hyper -V is enabled, open your Windows PowerShell and run the below commands.
Run as Administrator
PS C:\Windows\system32>
The command:
Get-WindowsOptionalFeature -Online -FeatureName Microsoft-Hyper-V
If it is enabled, you’ll see an output like this:
FeatureName: Microsoft-Hyper-V
DisplayName: Hyper-V Platform
Description: Provides the services that you can use to create and manage virtual machines and their resources.
RestartRequired: Possible
State: Enabled
CustomProperties:
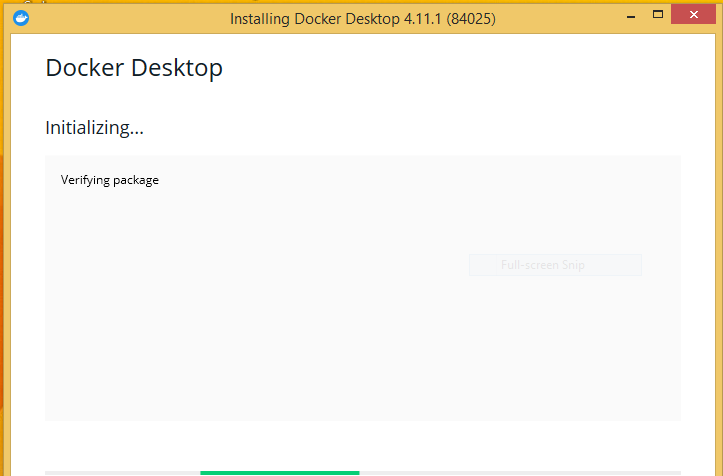
Step II: Downloading Docker for Windows
Kubernetes is a container system built on Docker. This means Kubernetes is a tool that interacts with Docker, allowing you to manage your operations efficiently.
To download Docker, simply >>click<<
After downloading Docker, double-Click the Docker.exe file for windows to run its installer. Once the Docker installation process is complete, it will start automatically.
Step III: Installing Kubernetes
Docker allows you to enable Kubernetes because of its Graphical User Interface (GUI) interface.
To install Kubernetes, follow the below instructions:
1.Right-click the Docker tray icon and select Properties.
2.Select "Settings" from the drop-down menu.
3.On the left panel, select “Kubernetes”
4.Enable Kubernetes and click "Apply"
Then, wait for the docker to add some dependencies and packages. ‘Installation complete!’ will pop up on your screen to proof the installation was successful.
Step IV: Installing Kubernetes Dashboard
Unfortunately Kubernetes web-based UI is not set up by default. However, it can be deployed using the CLI tool kubelctl, which enables you to interact with your cloud and manage different Pods, Clusters, and Nodes. YAML configuration file is perhaps the easiest resource to use to run Kubernetes. Get it here!
Follow the below commands to deploy the YAML configuration file:
1.Paste this to deploy it
. kubectl apply -f .\recommended.yaml
2.Then, run the following command to confirm the YAML configuration file is up
kubectl.exe get -f .\recommended.yaml.txt
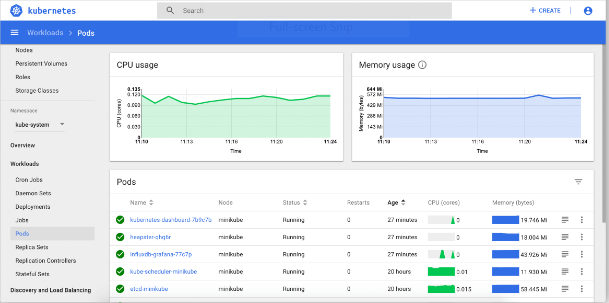
Step V: Accessing the Kubernetes dashboard
The dashboard can be accessed by using a default token generated during the Kubernetes installation process.
Follow the steps below:
1.Paste this command on PowerShell
((kubectl -n kube-system describe secret default | Select-String "token:") -split " +")[1]
Don’t forget to copy the generated token on the “token” part from the command
2.Run
kubectl proxy.
3.Open the below link on your favorite browser
http://localhost:8001/api/v1/namespaces/kubernetes-dashboard/services/https:kubernetes-dashboard:/proxy/
4.Sign in
5.Finally
Conclusion
In this tutorial, I have explained how to install Kubernetes on Windows 10. Also, I highlighted the process of enabling Hyper-V, installing Docker, and enabling the YAML configuration file.
Kubernetes offers you a great chance to monitor your systems or applications effectively. This means it is important to ensure the cluster of nodes is fully functional to Kubernetes works properly. Make sure you follow the steps properly to have an easy installation process.

Top comments (1)
This helps anyone to get started with Kubs :) using his or her Windows 10 OS... hit me up incase of future challenges