It is Day 9 of my learning journey into Git. So far on my learning journey has taken me on the following path:
- What is version control?
- What is Git?
- Installing Git
- Basic Git commands to get started
- Inspect a Git repository
- Git File Operations
- Undoing commits and changes
- Rewriting history
Today I am going to dive into what branches are and how they can be used.
What are Git branches?
Branches are an everyday part of the process when using Git. Effectively they are a point to your changes. You might create a new branch when you want to work on a new feature, or bug fix and keep those changes completely separate until you are ready to release them.
There are a few commands that you can use to work with branches, let's take a look at them.
Create a new branch
If you have a copy of a repository and you want to make changes then creating a new branch is best practice. Do create a new branch you can run the command:
You can now start to work on your changes and commit them there.
See what branch you are on
When you are working within a repository, and you want to check what branch you are on you can use the following command:
Switch to a local branch
If you have a branch within your local repository that you've created then you can easily switch to it using the following command:
Switch to a branch that's came from a remote repo
If you have cloned a Git repository from a remote location and it's come with a bunch of branches, then you can use the following command:
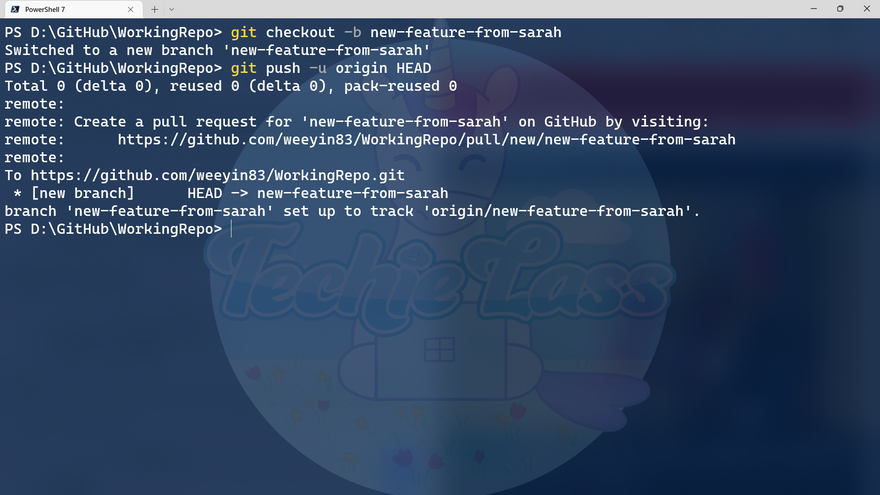
Push a branch
When you create a branch on your local copy of the repository it won't automatically create within the remote location. When you come to push your changes to that remote location you can't just use the git push command you need to use a slightly different command, _either _of these:
Referencing HEAD saves you from having to type out the exact name of the branch.
Of course, if your branch already exists in the remote location, you can just run git push.
Merge a branch
So, you've created a branch, and you are ready to merge that branch into the main one, ready for production or the next step in your development phrase. How can you do it?
The first thing you need to do is switch to the branch you want to merge your changes into. In this example I want to merge my changes from the branch "new-feature-from-sarah" into my main branch. So I type the command:
Now I am in the branch I want to merge my changes into I type:
When you issue this command you may receive merge conflicts, we will be looking at how to deal with them in Day 13 of 14 days of Git.
I now have to push this merge from my local repository to my remote repository, I do that with the command:
Delete a local branch
If you are finished with a local branch, either you've merged your changes or you've decided that the changes aren't right. Then you can use one of two commands. Both commands are very similar but there is a subtle difference.
If you want to delete a branch that has already been merged you can use the command:
If you want to delete a local branch regardless of whether it has been merged or not, then the command to use is:
There is a subtle difference, the capital D is really a shortcut for --delete --force.
Command line or GUI?
Working with branches within a command line seems straight forward, but it could be tricky if you forget which branch you are working in and merge or push changes to the wrong location.
It may be easier to work with branches within a graphical user interface (GUI) such as Visual Studio Code or GitKraken.
I think however, it's important to understand what a GUI is doing though, so learning these commands is important and working through them.
14 days of Git
Tomorrow will see me on Day 10 of my 14 days of Git learning journey and I will be looking at merging! Be sure to subscribe and join us for that step in the learning journey!
You can follow along here: https://github.com/weeyin83/14daysofgit

Latest comments (0)