In this series of
Build Better CI CD Pipelines, we will understand concepts around CI CD and build pipelines by actually making them.
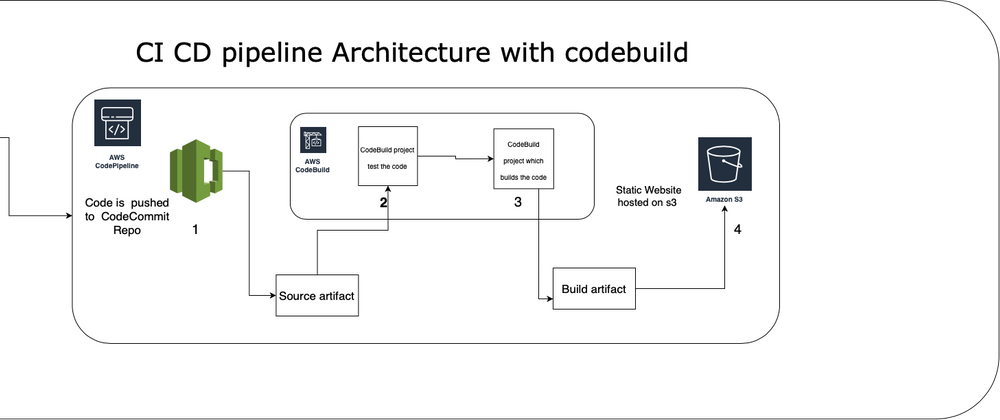
In this continuous series I will add blogs with different CI CD tools and deploy various AWS services using the pipeline.This is the second blog in the series. In this blog, we are going to trigger our pipeline with a commit in the CodeCommit repository followed by a building code and running test actions before deploying it to s3 as a static website.
Prerequisites
- Basic knowledge of AWS fundamental services like s3, ec2, and cloud formation.
- Working with git and CodeCommit.
- Basic knowledge of dockers.
- Fundamental knowledge of CI-CD concepts. You can read my previous blogs where I have covered CI CD 101 with GitLab, CD pipeline with S3
Motivation
The idea for this blog comes from one of the amazing udemy courses by Emre Yilmaz. This course is a great course not only for beginners but also for experienced DevOps Engineers.
Emre Yilmaz covers all the important concepts around CI CD AWS services at the most 101 level with advanced concepts along with hands-on which reinforces the concepts.
What is CodeBuild?
- In the simplest terms, AWS CodeBuild allows you to run commands on your project. It acts as a command line in your pipelines.
- Its serverless, scalable and fully managed service.
How does CodeBuild execute commands?
- CodeBuild uses the Docker container for the build environments. Inside these containers, you can execute commands desired for building or testing code.
- Commands are mentioned in a YAML file usually called buildspec.yml(default name), if the user defines a custom name they need to mention it so that CodeBuild can find the YAML file.
- We can use docker images provided by AWS or public images on the docker hub or custom images uploaded to ECR.
Note:-
- We can use a standalone codebuild project and trigger than console, sdk or cli.
- We can also schedule codebuild projects using cloudwatch events
- Uses IAM service roles to execute codebuild project
- Data in transit is encrypted and at rest using CMK managed by AWS KMS.
Let's Build the Pipeline
1. Create a CodeCommit Repository
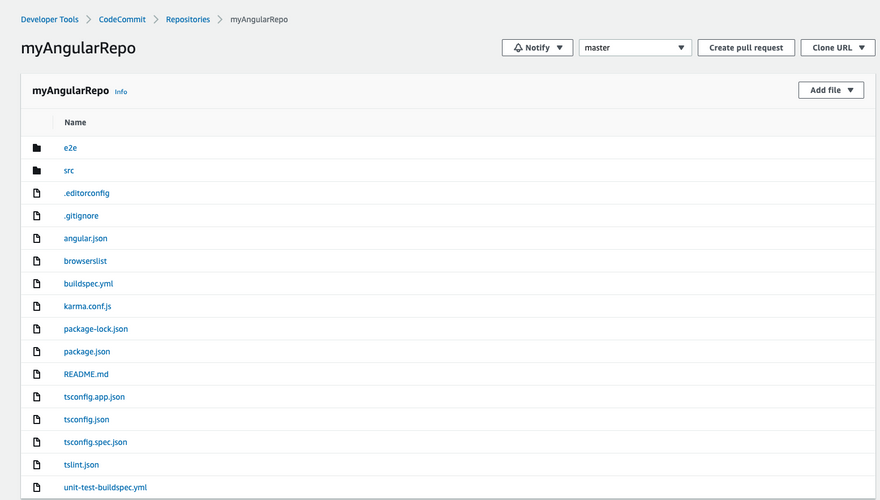
- Create a CodeCommit repository and push the sample angular application to this repository.
- You can find the angular code in this repository. All thanks to Emre Yilmaz.
2. Create the Pipeline for build and unit testing
Configuring Source for the Pipeline
- Under the same pane select codepipeline and add name and role name for the pipeline.
- Moving forward, we need to select the source which will trigger the pipeline, this will be our code commit repository created in the previous step.
- For trigger we are choosing the recommended option of using Cloudwatch Events.
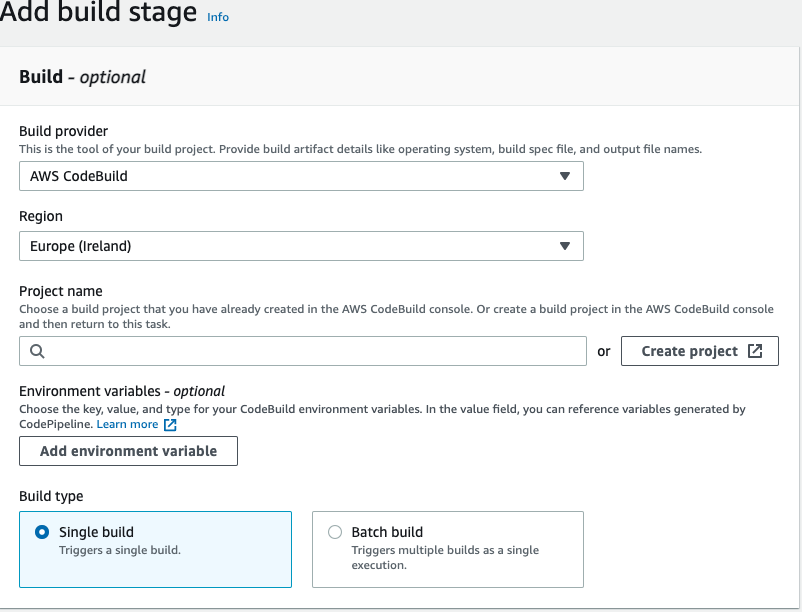
Configuring Build Provider for the Pipeline
- For the Build Provider we will use AWS CodeBuild.
- Here we will create a new CodeBuild Project for building the angular application.
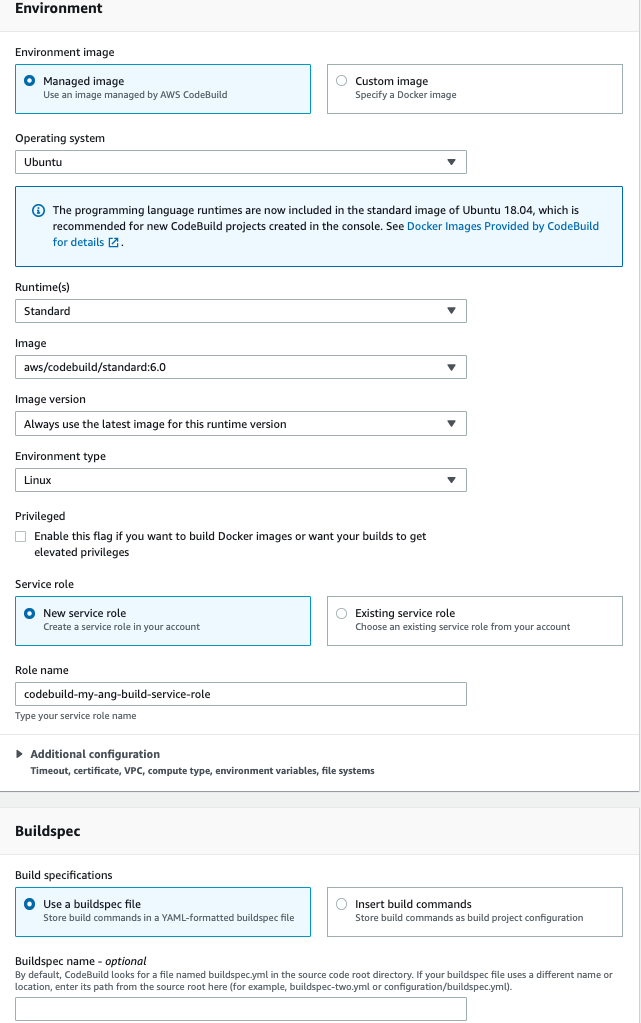
- Under the new window, we will configure our codebuild project settings like docker image, OS, IAM Role, and Buildspec.
- Here we are choosing Amazon managed image. provided by AWS with ubuntu as the operating system. For the Building project, we are specified to use a buildspec file which will be found by codebuild if the name is buildspec.yml by default. The structure of buildspec file is explained later.
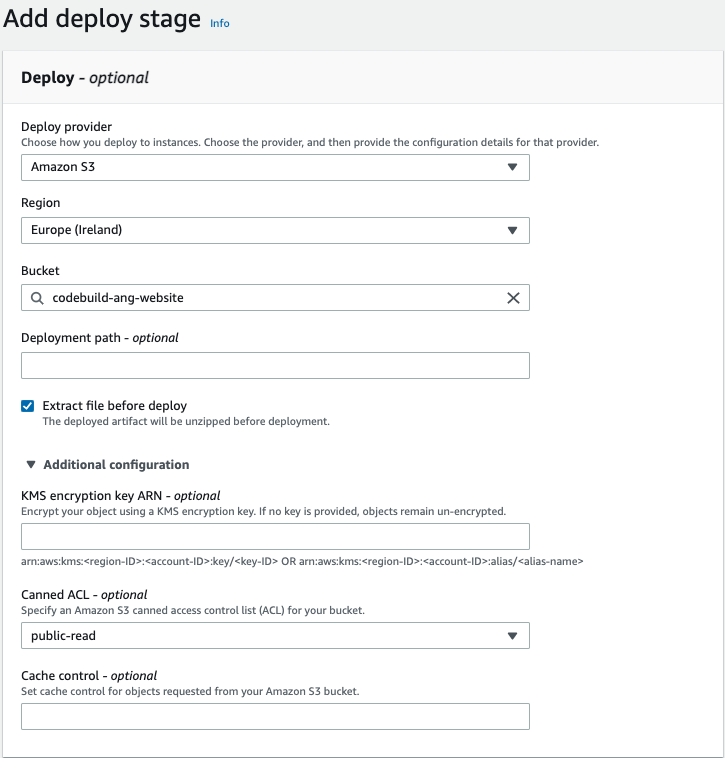
Deploy the build app to s3
Just like the previous blog, create a production s3 bucket, we will create a bucket, enable static website hosting and configure it in the Deploy stage of CodePipeline.
3. Understanding Buildspec structure + unit testing
Before creating the pipeline, it is very important to understand how codebuild will use buildspec.yml file to build the code which means how to write the buildspec.yml file.
buildspec.yml for building angular code
- A YAML file containing your commands and runtime env settings.
- Can be a separate file in the source code or we can mention commands in the console.
- Commands can be defined and executed in phases like install, pre_build, build, post_build
- Can define multiple runtimes for commands like nodejs, ruby or python or 2.0 for amazon Linux. If you don't define runtime it will use the default runtime of the image.
- Artifact configuration can also be defined in buildspec which tells which files and directories will be included in artifact.
- Environment variables can also be defined as key-value pairs, but can also be referenced using the Ec2 parameter store or secrets manager.
- Environment variables can be set outside buildspec for the entire project and use in your commands, which helps in reusing buildspec files across different codebuild projects.
- [Imp] We can also use different buildspec files in the source code repository for different code build projects
version: 0.2

phases:
  install:
    runtime-versions:
      nodejs: 16
    commands:
      - npm install -g @angular/cli@9.0.6
  pre_build:
    commands:
      - npm install
  build:
    commands:
      - ng build --prod
    finally:
      - echo final block echo

artifacts:
  base-directory: dist/my-angular-project
  files:
    - '**/*'
Buildspec Phases
Install
- Commands executed for installing packages in build env
- During installation
- Best Practice: runtime version are also defined in this phase
Prebuild
- Commands run before the build
- Use for installing dependencies, signing into ECR, docker hub etc.
- If you are building Docker Images, use this phase for signing into ECR.
Build
- Use for running builds and tests.
PostBuild
- Command after build.
- For example: sending SNS notifications using aws cli.
- Pushing images to the docker repository after building it.
artifacts
- This section tells codebuild where to find the artifact created by build command and use as build artifact.
- We are using wildcards to recursively include all directories and their files for the build base directory
Phases are optional but one must be defined in buidspec
Adding Unit Testing to Pipeline Using CodeBuild
why do we need to add tests to pipelines?
- Because we can break the logic and bad logic can ship to the product.
- So ideally we should run unit tests in our code and then run the build command after them.
How to add tests in the CodePipeline
either add unit test command either in the build phase in the buildpec.yml OR the preferred way by separating unit test with build process by adding another buildspec.yml file as another codeBuild Project.
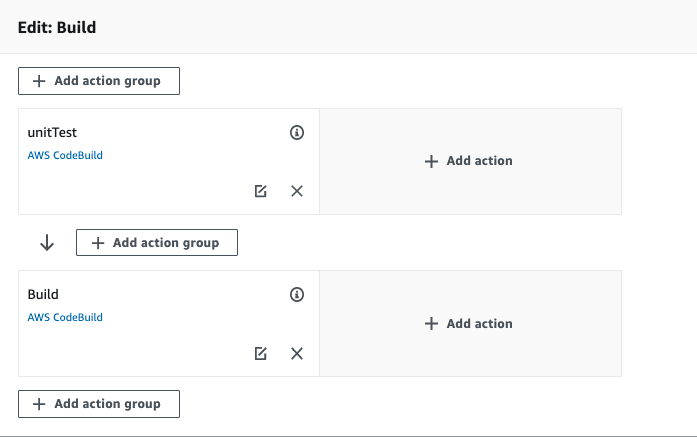
Since we want testing to take place before building we will add the action just before the build action group in the CodePipeline ( this logic has been explained in the previous blog)
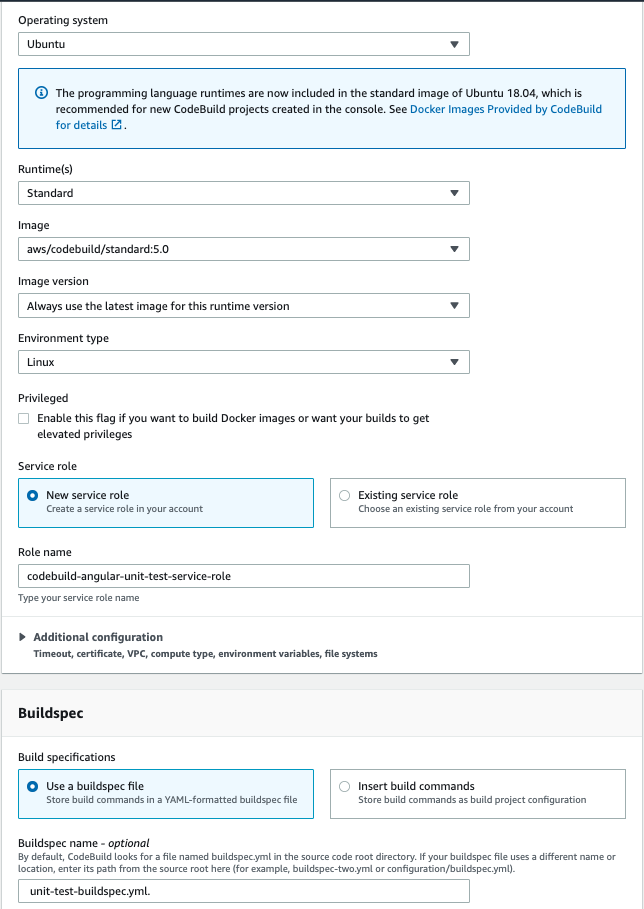
- Note: For testing, we are creating a separate CodeBuild Project with a different buildspec.yml file dedicated to testing, hence we need to specify the name of the buildspec file during project creation unit-test-buildspec.yml. Here we are using Managed docker image from aws but the version is 5.0 not 6.0 as earlier.**
- Unit Testing Buildspec.yml
version: 0.2

phases:
  install:
    runtime-versions:
      nodejs: 14
    commands:
      - npm install -g @angular/cli@9.0.6
  pre_build:
    commands:
      - npm install
  build:
    commands:
      - ng test --no-watch --no-progress --browsers=ChromeHeadlessCI
Interesting things about buildspec.yml
How to simulate a failure in build
Sometimes we need to simulate a failure in our builds for that we can simply return a non zero value before build command
If the error happens before the build phase the execution switches to the final phase. If execution happens in the build phase it continues to the remaining phase.
 build:
    commands:
      - exit 1
      - ng build --prod
Run command irrespective of whether pipeline fails or passes
 build:
    commands:
      - ng build --prod
    finally:
      - echo final block echo
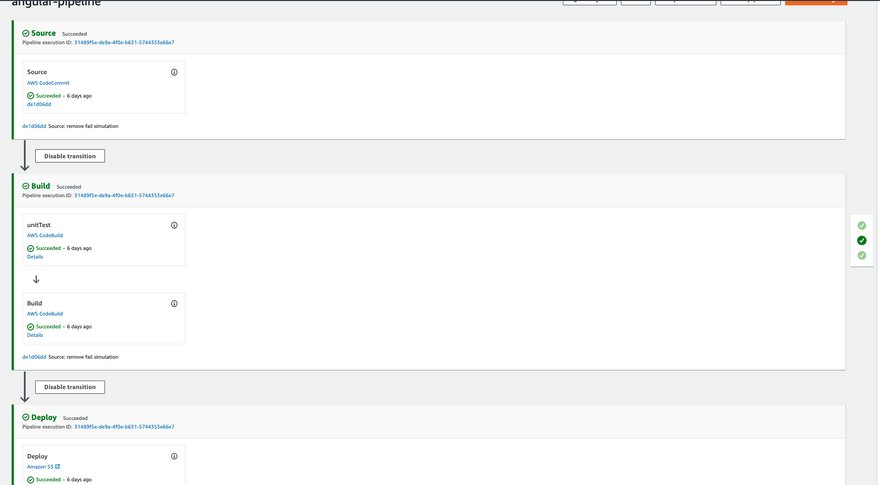
Testing Pipeline
- Upload the code to CodeCommit Repository. The pipeline will run.
- Finally, verify Deployment by going to the s3 website URL.
From DevOps Perspective.
- In this Blog, we understood how CodeBuild works and uses docker containers to act as a command line for our code when running in CodePipeline.
- We understand how we can add testing to Codepipeline
- We understood how to write buildspec.yml and its various syntax.
In the next blog, we are going to learn CodeDeploy to deploy the code to ec2 instances and add further automation.
Till then, Happy Learning !!!
Feel Free to post any comments or questions.




Top comments (0)