AWS uses EC2 to reduce the training cost of deep racer. Practical operation of deepracer-for-cloud
The official AWS Deepracer-for-Cloud blog document:
The direct link:https://aws.amazon.com/cn/blogs/china/use-amazon-ec2-to-further-reduce-the-cost-of-deepracer-training/
comes first
** As the blog has written a specific program, here will be extracted from the script, and the corresponding problems to solve **
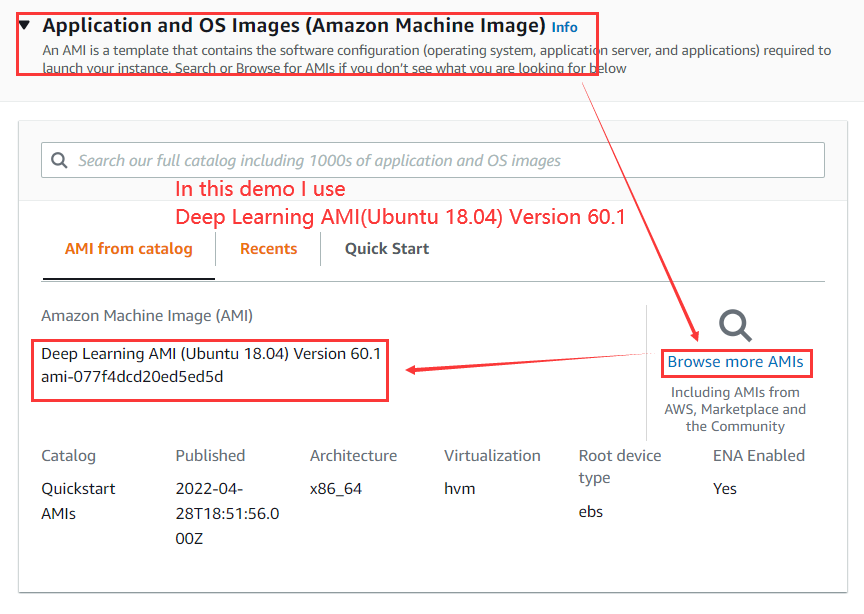
Deep Learning AMI (Ubuntu 18.04) Version 60.1 is used
Example preparation, I see the article mentioned using G and P system instances, as follows:
g4dn.2xlarge:Cost-effective training method, based on GPU acceleration, training speed slightly faster than DeepRacer Console training
p3.2xlarge:Training speed is much faster than DeepRacer Console training, fast iteration model, achieve training results
g4dn.2xlarge is used again in this practice
So I'm using the spot request instance instead of the on-demand, which reduces the cost by 70% or more,But also can appear some problems, it is US - area of the US-EAST-1 G and P series of serious shortage of instance, may be running for a while will be stopped, so we could start with the basic environment deployment good, direct Make AMI, so can quickly pull up instances when used in the back, do not need to be on the basis of environment too much
Note that you need to check your EC2 limit, by default there is no capacity for G and P series, you need to submit the case to raise limit, do not submit too many requests when submitting the limit, it may be rejected by you
For convenience, I made an EC2 startup template here, which is also a foundation for the subsequent training, so as not to have to manually configure each time
Article directory structure:
- One、Create IAM roles for EC2
- 1.Access the IAM console
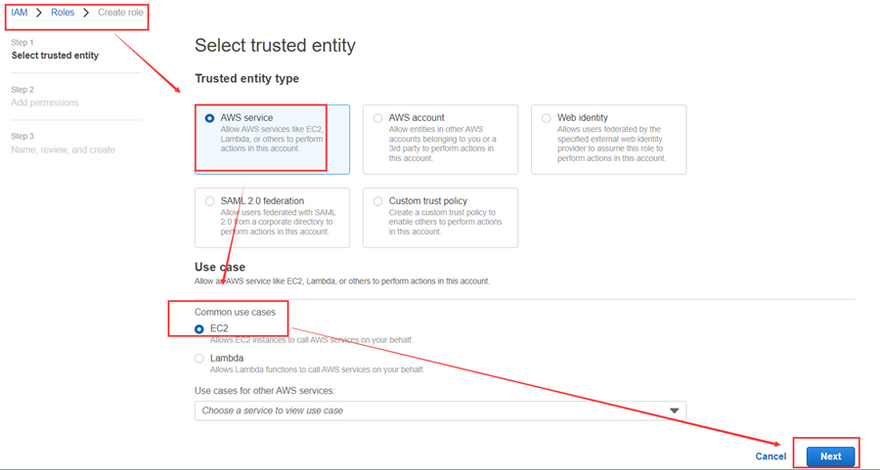
- 2.Select EC2 and click Next
- 3.Add permissions
- 4.Name, view, and create
- 5.View the created role
- Two、Create a storage bucket
- 1.Access the S3 console
- 2.Create a storage bucket
- 3.View the created storage bucket
- Three、Create a Lanuch template
- 1.Define the template name
- 2.Select a mirror
- 3.Set the instance type and key pair
- 4.Define subnets and security groups
- 5.Configure storage
- 6.Advanced details
- 7.View the summary and create a template
- Four、Create an instance
- 1.Select start the instance from the template
- 2.View spot requests
- Five、Connect instances and build the base environment
- Basic.Connect to your instance
- ①.SecureCRT Imports the key
- ②.SecureCRT connection example
- Next, the setup of the base environment
- Step-1.Pull code from Github
- Step-2.Install the base components required for DeepRacer local training
- Error scenario 1, solution
- Error scenario 2, solution
- Step-3.Reconnect the EC2 instance and execute the second-stage environment initialization code
- Step-4.Load the scripts required to train DeepRacer
- Step-5.Edit reward function, training information, vehicle information
- Step-6.Edit the environment file run.env
- ①.Add bucket information
- ②.Edit track information
- Step-7.Update the Python version
- Step-8.Update the configuration
- Step-9.Upload dr-upload-custom-files to S3 buckets
- Step-10.Start training
- Six、Follow-up Operations (retraining)
- 1.If the instance terminates, pull the instance again and continue the last training
- ①.Modify the run.env file
- ②.Updates the configuration to take effect
- ③.If you have modified the custom_files file, run the following command to upload the custom_files file again
- ④.start training
- Seven、Parameter and command definition
- Eight、Problems encountered
- 1.NO PUBKEY
- 2.Python3.6 fails and the Python version is updated
- 3.The lock cannot be obtained
- 4.Sagemaker is not running
The following is the specific operation scheme
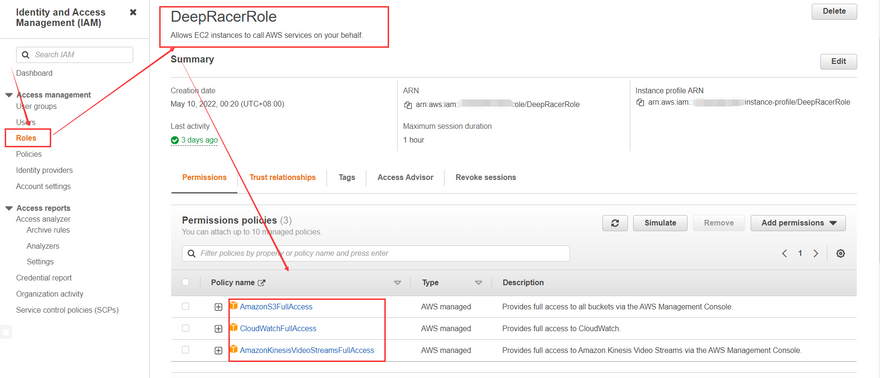
One、Create IAM role for EC2
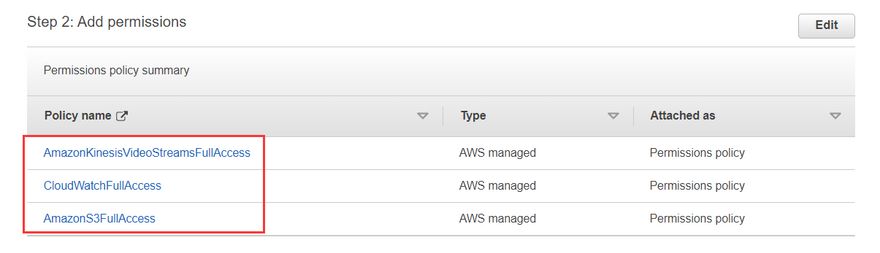
As stated in the official AWS blog, we use EC2 to train models using the following three services
AmazonKinesisVideoStreams
CloudWatch
S3
So here is a demonstration of creating a new EC2 role and empowering it
1. Access the IAM console
IAM_console:https://us-east-1.console.aws.amazon.com/iamv2/home#/roles/create?step=selectEntities
2. Select EC2 and click Next
3. Add permissions
Search S3, cloudwatch and Amazon kinesisvideostreams in turn, as shown in the following figure
You need to select the end of fullaccess to represent full access
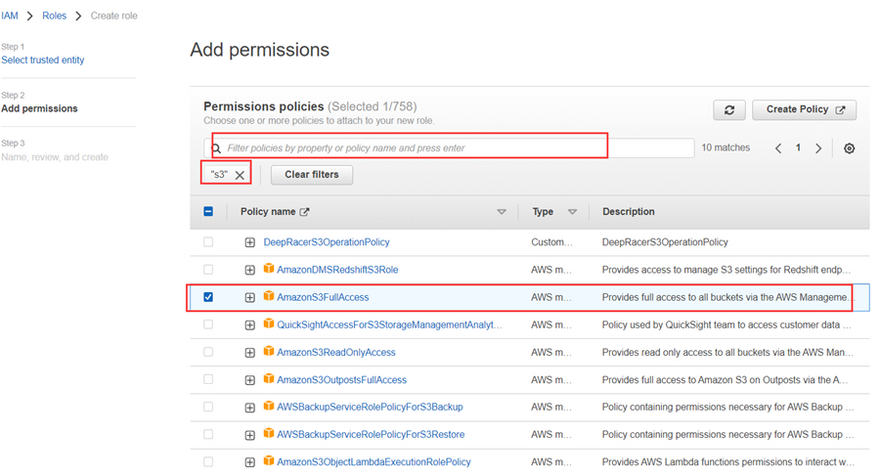
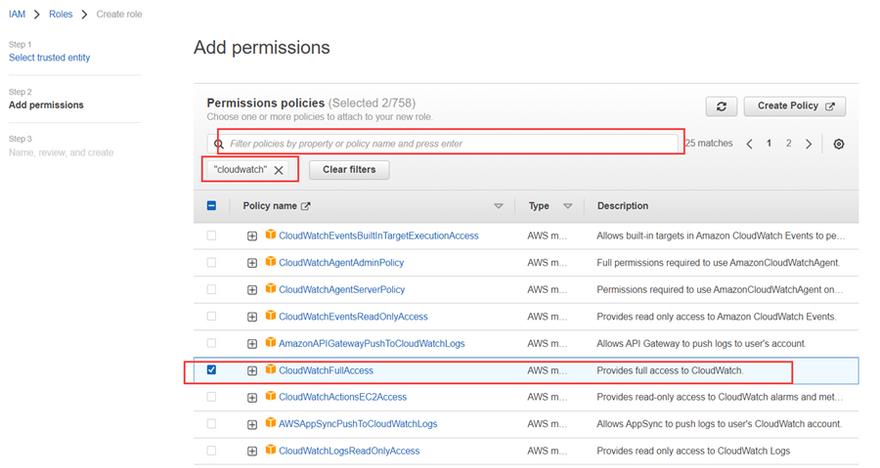
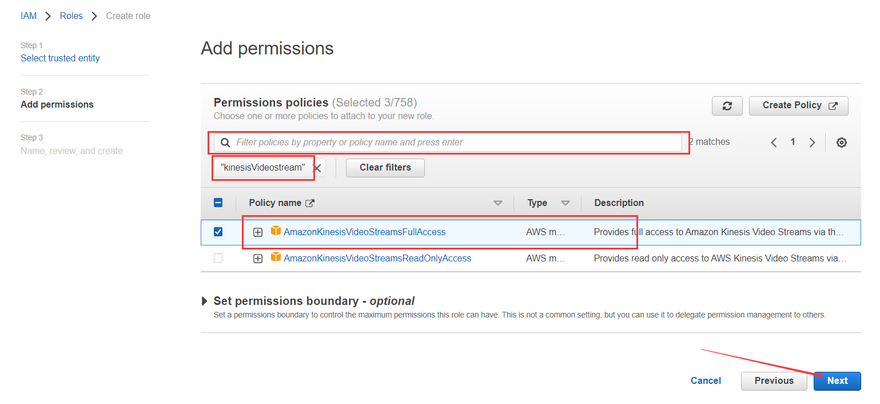
After adding all three permissions, click next
4. Name, view, and create
①.Setting the Role Name
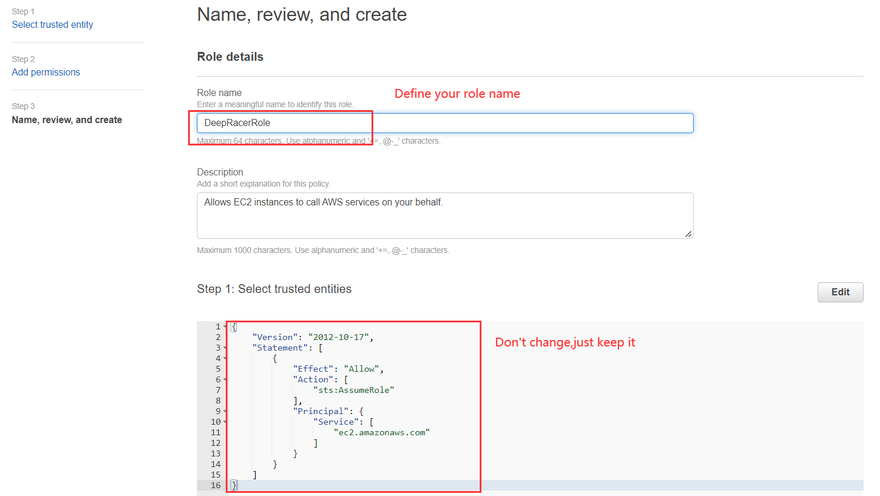
②.View the additional rights of a role
③.Ready to create
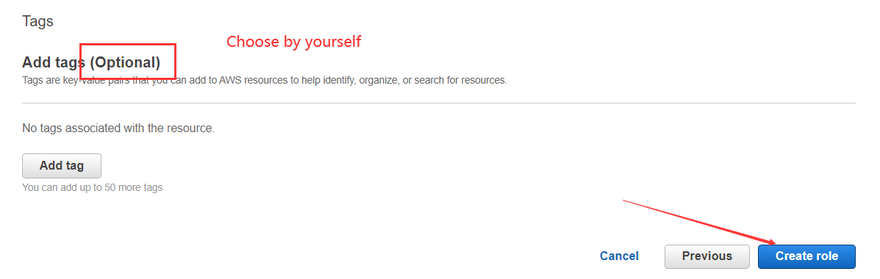
Whether to add labels according to their own needs (optional)
5.View created roles
Two、Creating a Storage Bucket
1.Accessing the S3 Console
S3 Bucket control panel:https://s3.console.aws.amazon.com/s3/
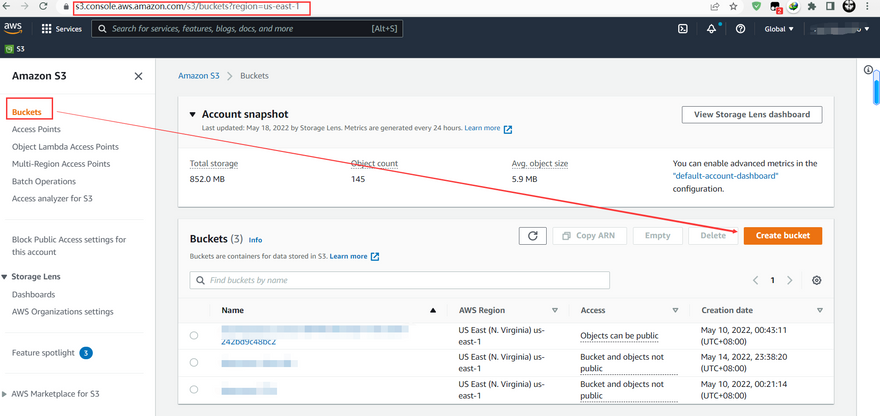
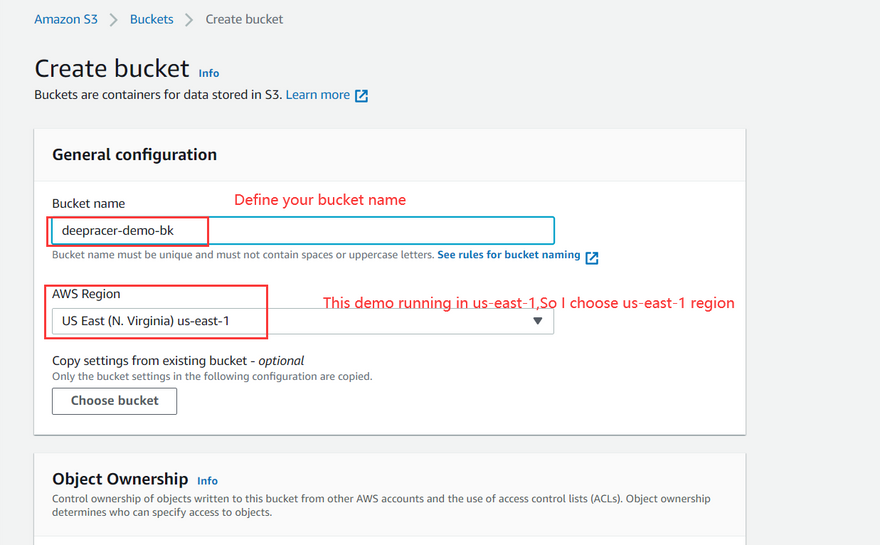
2.Creating a Storage Bucket
Here, you only need to set the bucket name and area, and other settings can remain the default
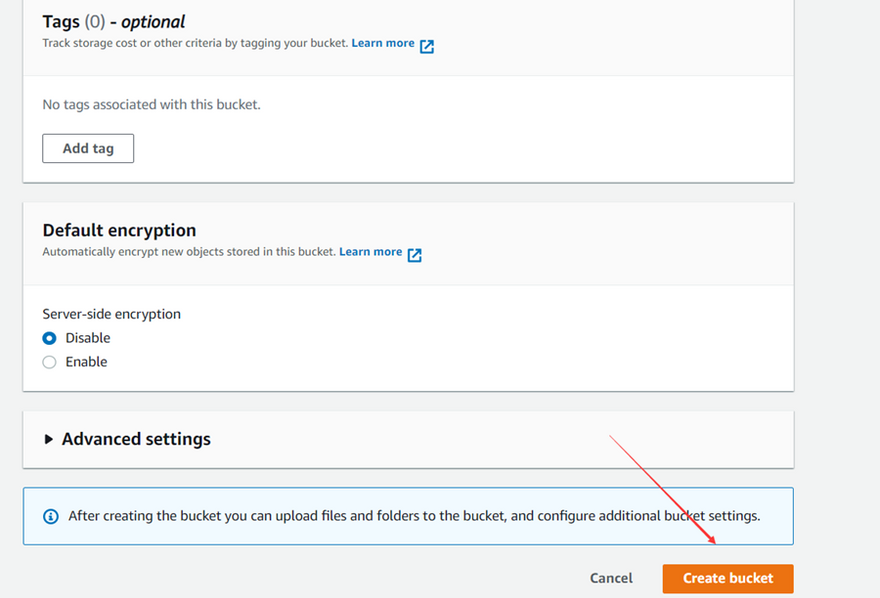
Slide to the bottom and click Create bucket
3.View the created storage bucket

Three、Creating a Lanuch Template
EC2启动模板控制面板:https://us-east-1.console.aws.amazon.com/ec2/v2/home?region=us-east-1#LaunchTemplates
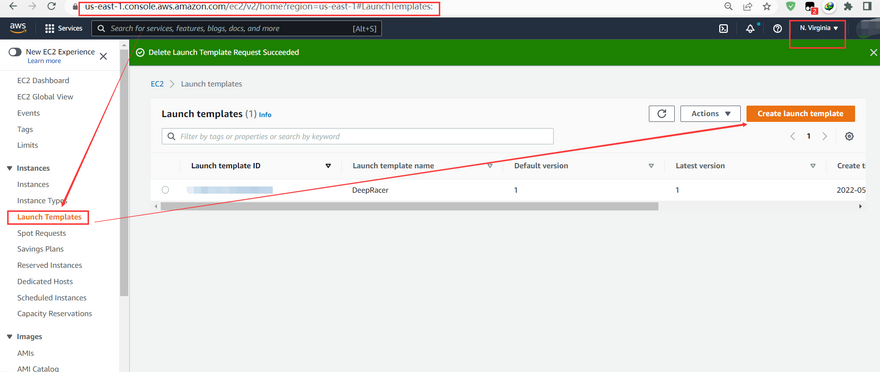
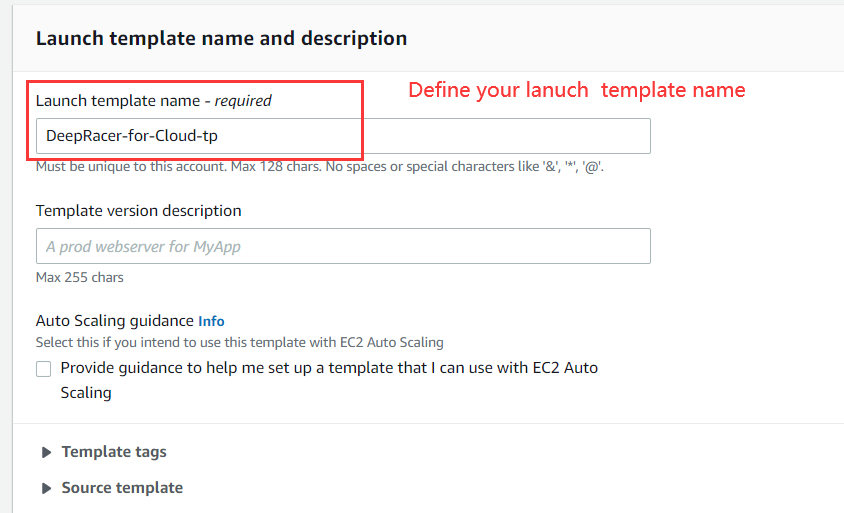
1.Defining template names
2.First you need to select the mirror
Please select Deep Learning AMI(Ubuntu 18.04) image
3.Set the instance type and key pair
Although the official tip is not to include these two parameters in the template, this experiment is to save time for multiple deployments later, so it is defined in the template in advance

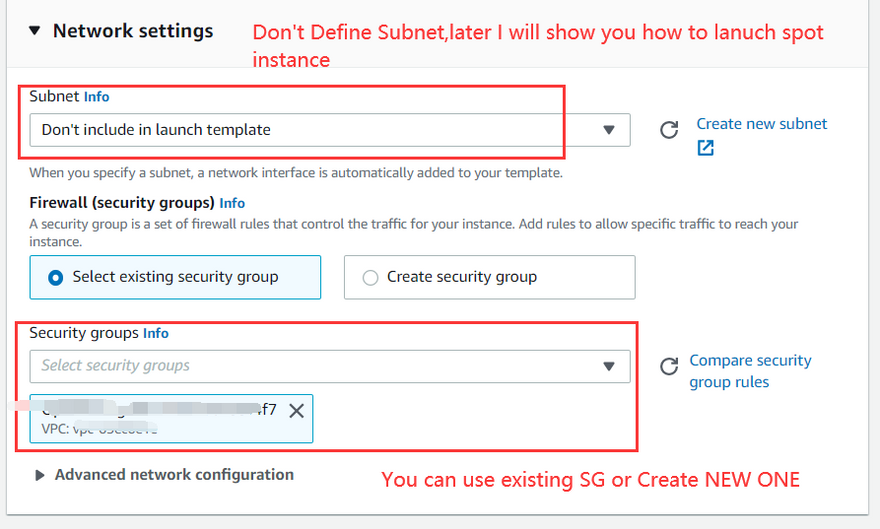
4.Define subnets and security groups
Since I need to use spot requests this time, I will not set the subnet. Later spot will make requests in any area of US-EAST-1
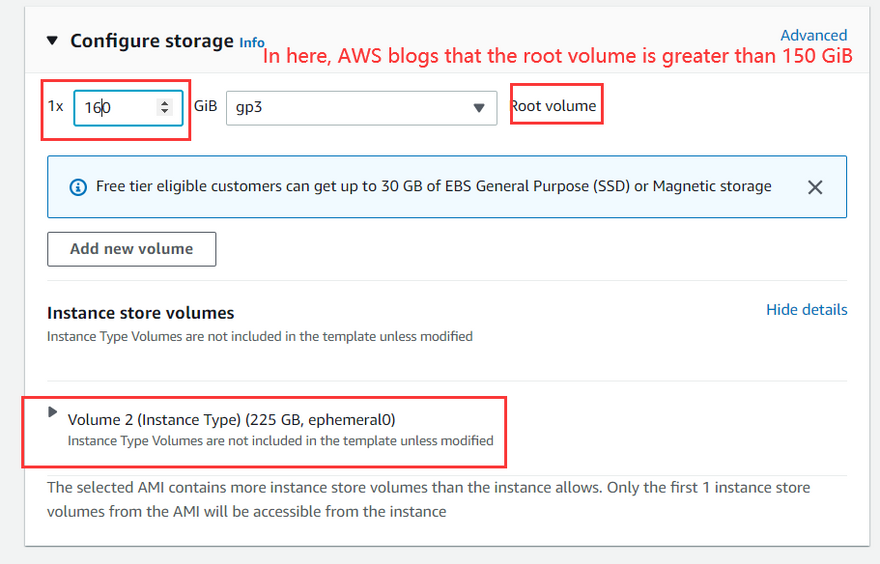
5.Configure storage
The configuration instructions given by the official blog are: the root volume must be at least higher than 150gib. Here, it is set to 160gib. We can also see that AMI has a storage volume with 225gb
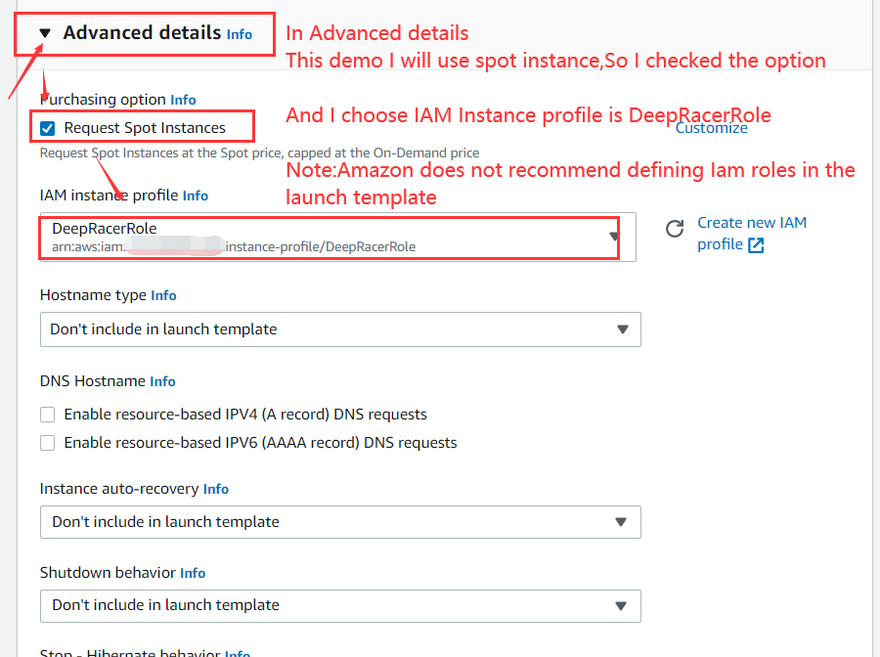
6.Advanced details
Here I checked the request spot instance. In order to reduce the cost, you can check it according to the user's own situation
Then, in the Iam role, we need to select the role we created in advance for EC2
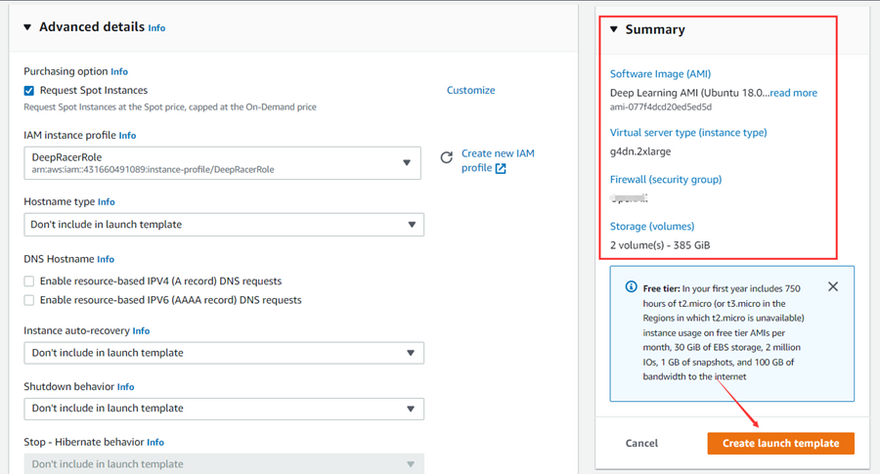
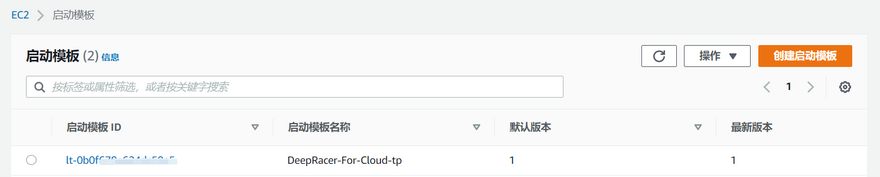
7.View summary and create template
Check the created template and click create if there is no error
Four、Create Instance
EC2 instance console:https://us-east-1.console.aws.amazon.com/ec2/v2/home?region=us-east-1#Instances
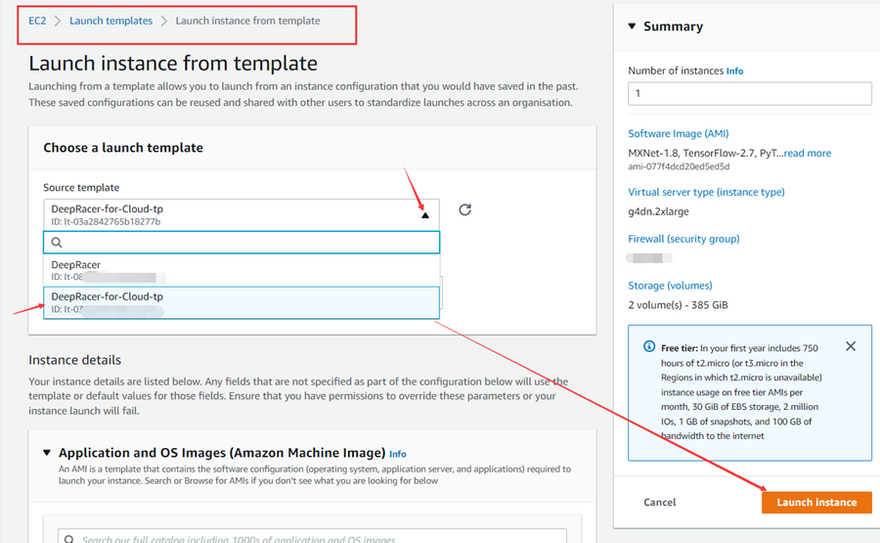
1.Select Lanuch instance from template
Here, select the template you created earlier
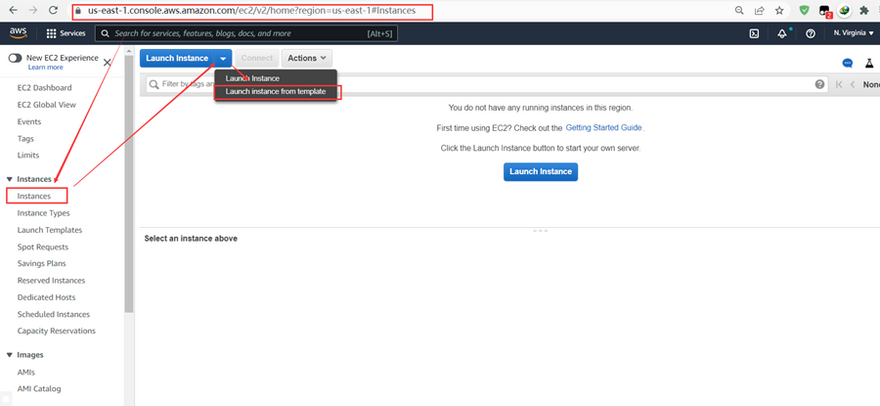
After confirmation, start the instance
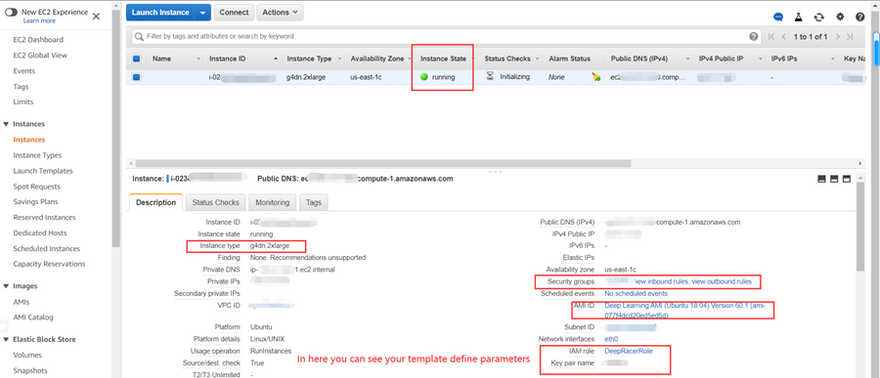
View successfully created instances
If you check the spot request instance, and an error is reported when starting the instance, indicating that there is no spot quota, and you are ensuring that your account has sufficient limit, there may be no spot instances available for you in this period of time in this area. Please use the on-demand instance to create
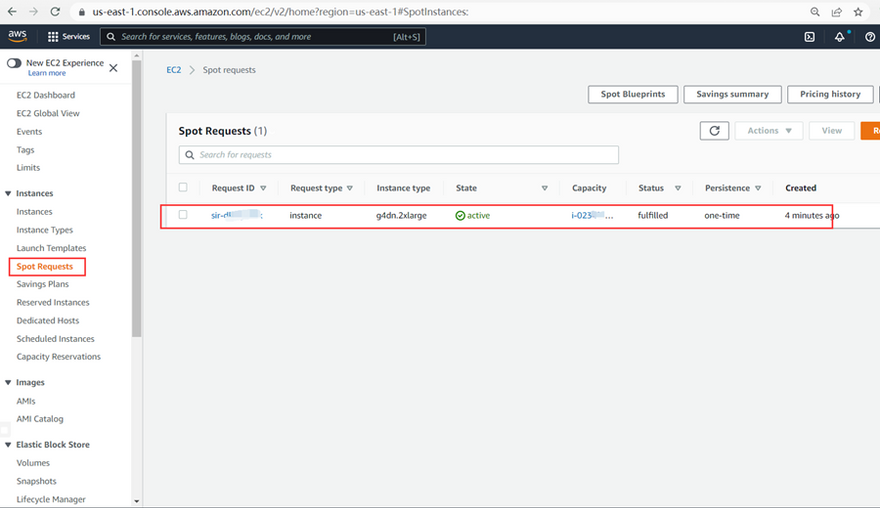
2.View spot requests
If you checked the spot request instance in the instance template and started it successfully, you can see your instance in the spot request control panel
Five、Connect instances and build the underlying environment
Here is the installation procedure given in the official AWS blog
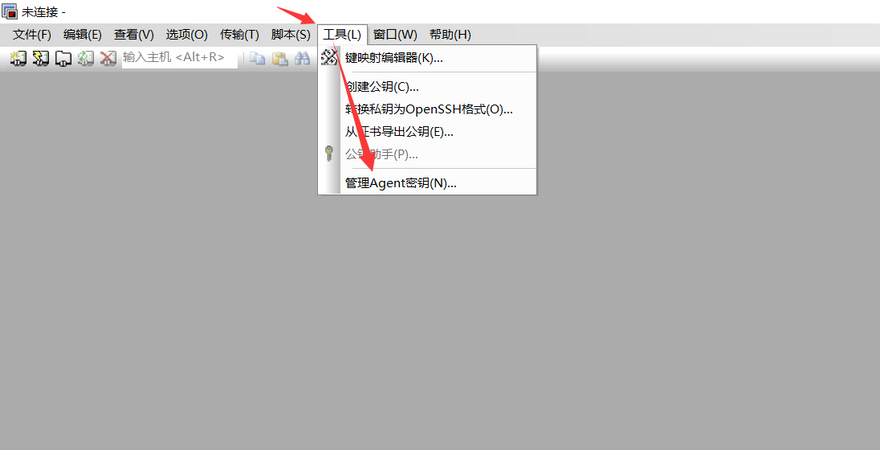
I'd like to show you how to connect EC2. I use the SecureCRT connection tool here
Basic. Connect your instance
Here only supports the use of PEM type key (shared with openssh), if you are For PPK type, please use putty to connect
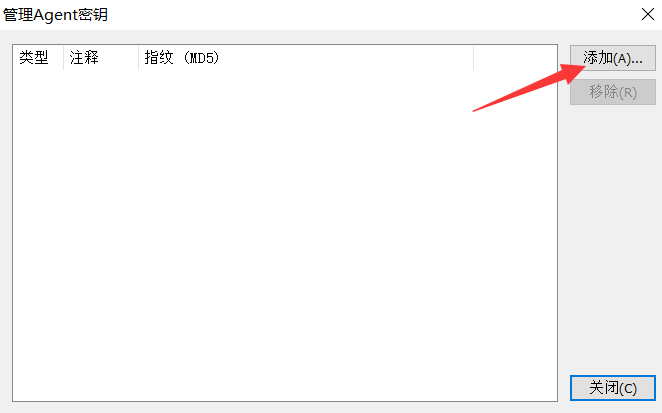
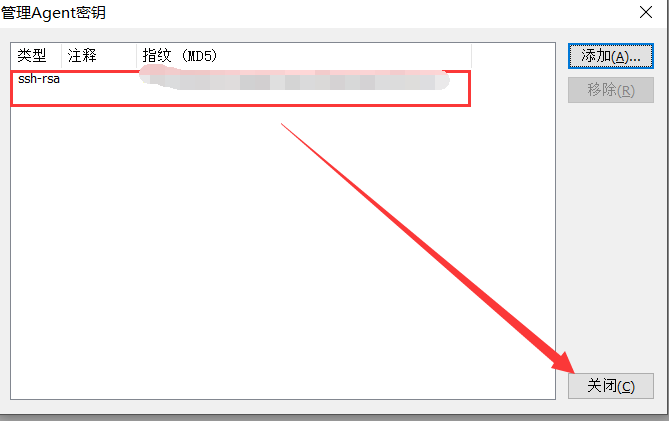
①.SecureCRT import key
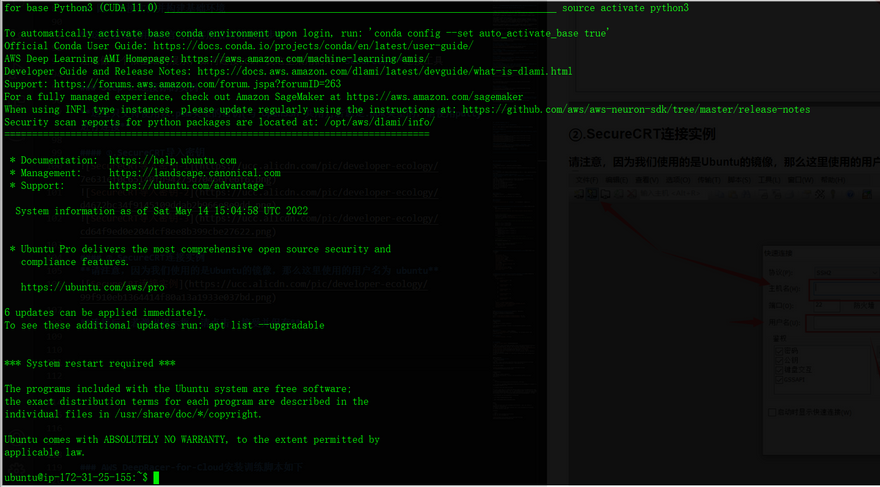
②.SecureCRT connection instance
Please note that since we are using the image of Ubuntu, the user name used here is Ubuntu
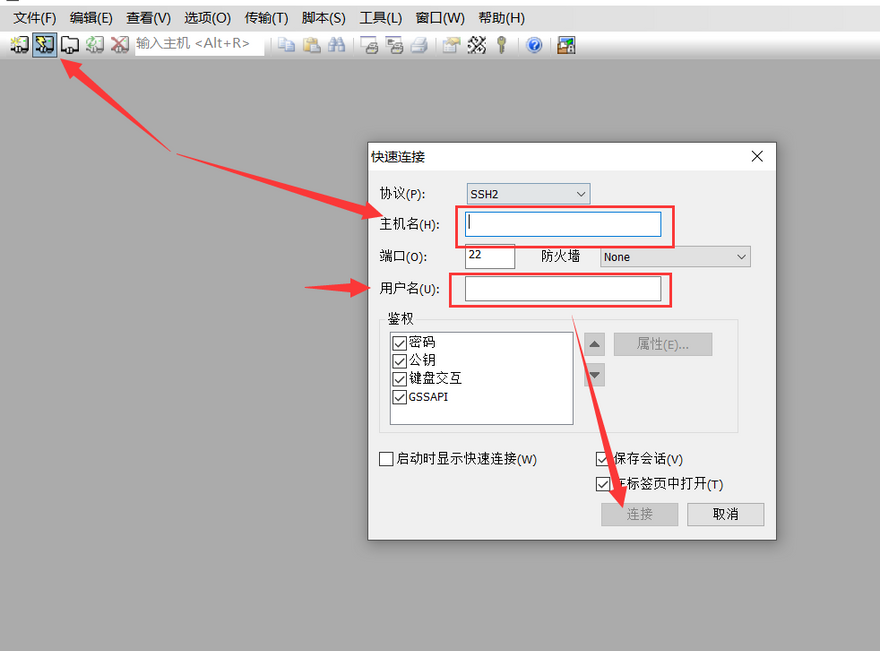
After connecting, if a prompt box pops up, please click accept and save
Next, enter the construction of the basic environment
The installation and training script of AWS deep racer for cloud is as follows
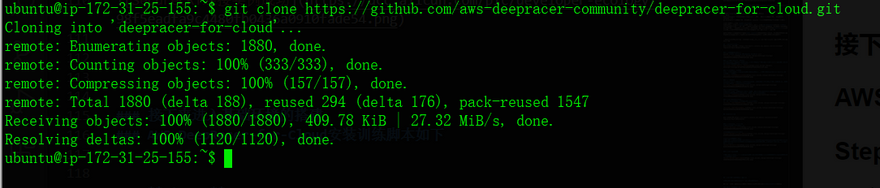
Step-1. Pull code
Enter the created EC2 instance and execute the following command to pull the code from GitHub:
git clone https://github.com/aws-deepracer-community/deepracer-for-cloud.git
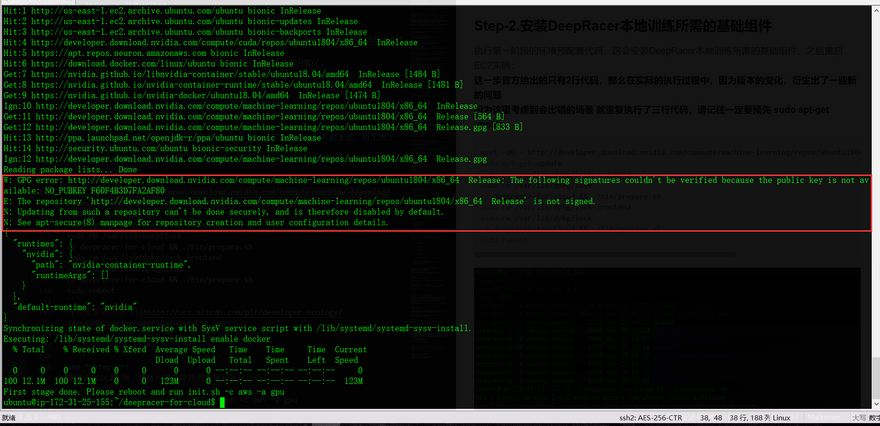
Step-2. Install the basic components required for deep Racer local training
Execute the environment pre configuration code in the first stage, which will install the basic components required for deeperacer local training, and then restart the EC2 instance:
There are only 2 lines of code officially given in this step, so in the actual implementation process, some new problems are derived due to the change of version
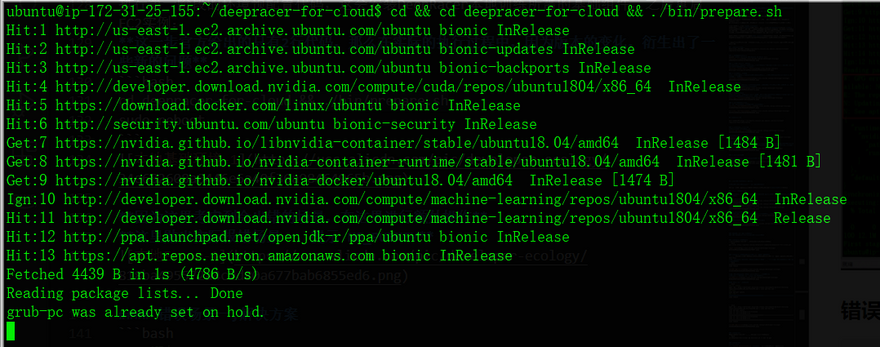
cd deepracer-for-cloud && ./bin/prepare.sh
sudo reboot

Because the scenario that will make mistakes is considered here, additional operations are carried out here
The actual error reporting scenario 1 is posted here to prompt No_ PUBKEY
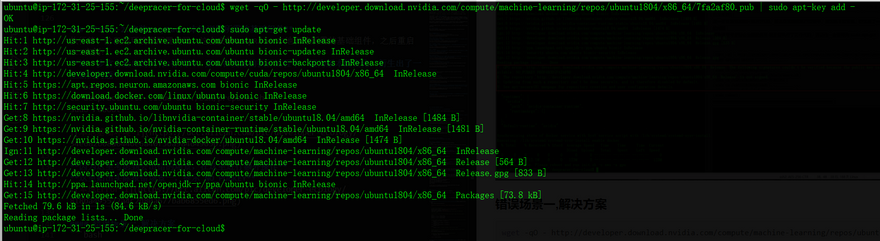
Error scenario 1, solution
### Add pubkey
wget -qO - http://developer.download.nvidia.com/compute/machine-learning/repos/ubuntu1804/x86_64/7fa2af80.pub | sudo apt-key add -
### update
sudo apt-get update
### Re execute. Please make sure you are not in the deep for cloud directory. Please go back to the home directory of Ubuntu
cd deepracer-for-cloud && ./bin/prepare.sh
### reboot
sudo reboot
If the following progress bar appears, it indicates that the error has been fixed and the basic environment is being installed
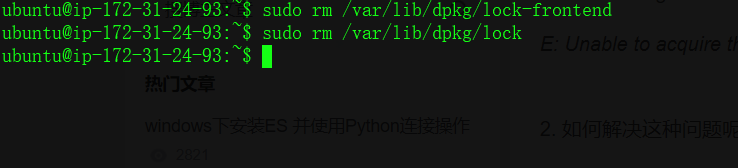
Error scenario 2, solution
If the progress bar does not appear and the following errors appear, it may appear many times
E: Could not get lock /var/lib/dpkg/lock-frontend - open (11: Resource temporarily unavailable)
E: Unable to acquire the dpkg frontend lock (/var/lib/dpkg/lock-frontend), is another process using it?
Please run the code solution and re execute the basic environment installation command
sudo rm /var/lib/dpkg/lock-frontend
sudo rm /var/lib/dpkg/lock
### Re execute. Please make sure you are not in the deep for cloud directory. Please go back to the home directory of Ubuntu
cd deepracer-for-cloud && ./bin/prepare.sh
### Reboot
sudo reboot
Step-3. Reconnect the EC2 instance and execute the environment initialization code in the second stage
### Please make sure you are in the home directory of Ubuntu at this time
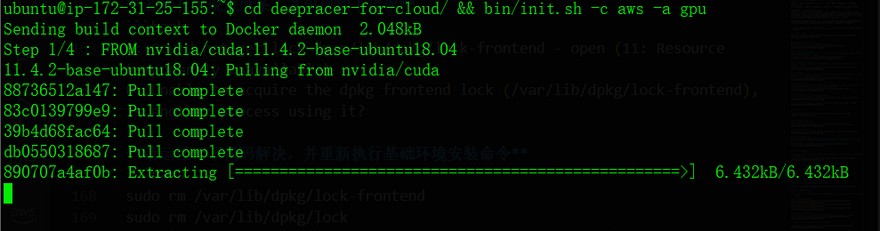
cd deepracer-for-cloud/ && bin/init.sh -c aws -a gpu
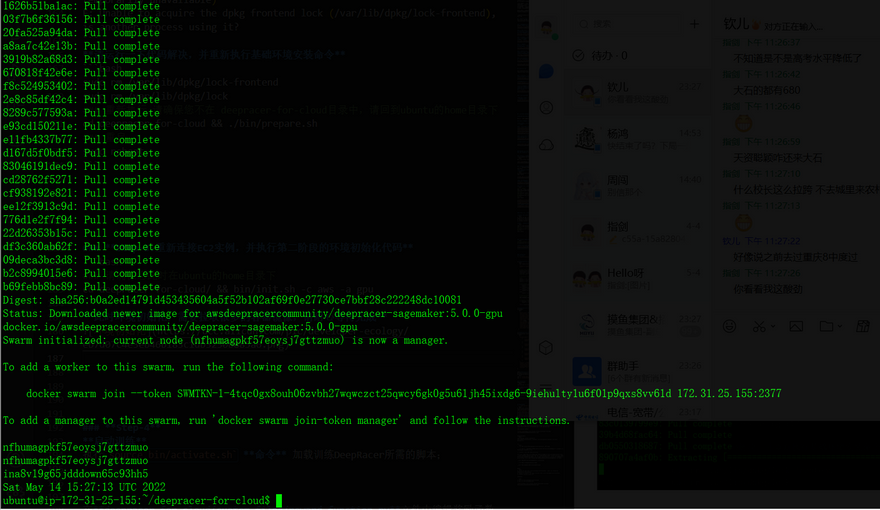
At this time, the environment initialization needs to pull many container images. Please wait patiently for completion
The environment initialization is completed as follows
Step-4. Load scripts required for training deepracer
source bin/activate.sh
Step-5. Edit reward function, training information and car information
There is a custom in the deep for cloud directory_ The files directory contains three files:
reward_function.py #Reward function file
hyperparameters.json #Training information file
model_metadata.json #Car information file
Edit reward function in dealer-for-cloud/custom_files/reward_function.py file
    def reward_function(params):
    '''
    Example of penalize steering, which helps mitigate zig-zag behaviors
    '''

    # Read input parameters
    distance_from_center = params['distance_from_center']
    track_width = params['track_width']
    steering = abs(params['steering_angle']) # Only need the absolute steering angle

    # Calculate 3 marks that are farther and father away from the center line
    marker_1 = 0.1 * track_width
    marker_2 = 0.25 * track_width
    marker_3 = 0.5 * track_width

    # Give higher reward if the car is closer to center line and vice versa
    if distance_from_center <= marker_1:
        reward = 1
    elif distance_from_center <= marker_2:
        reward = 0.5
    elif distance_from_center <= marker_3:
        reward = 0.1
    else:
        reward = 1e-3  # likely crashed/ close to off track

    # Steering penality threshold, change the number based on your action space setting
    ABS_STEERING_THRESHOLD = 15

    # Penalize reward if the car is steering too much
    if steering > ABS_STEERING_THRESHOLD:
        reward *= 0.8

    return float(reward)
In deepracer-for-cloud/custom_files/hyperparameters.json file edit training information, such as:
    {
    "batch_size": 64,
    "beta_entropy": 0.01,
    "discount_factor": 0.995,
    "e_greedy_value": 0.05,
    "epsilon_steps": 10000,
    "exploration_type": "categorical",
    "loss_type": "huber",
    "lr": 0.0003,
    "num_episodes_between_training": 20,
    "num_epochs": 10,
    "stack_size": 1,
    "term_cond_avg_score": 350.0,
    "term_cond_max_episodes": 1000,
    "sac_alpha": 0.2
  }
Edit vehicle information in deepracer-for-cloud/custom_files/model_metadata.json file, including action space, sensor and neural network type, for example:
    {
    "action_space": [
        {
            "steering_angle": -30,
            "speed": 0.6
        },
        {
            "steering_angle": -15,
            "speed": 0.6
        },
        {
            "steering_angle": 0,
            "speed": 0.6
        },
        {
            "steering_angle": 15,
            "speed": 0.6
        },
        {
            "steering_angle": 30,
            "speed": 0.6
        }
    ],
    "sensor": ["FRONT_FACING_CAMERA"],
    "neural_network": "DEEP_CONVOLUTIONAL_NETWORK_SHALLOW",
    "training_algorithm": "clipped_ppo",
    "action_space_type": "discrete",
    "version": "3"
}
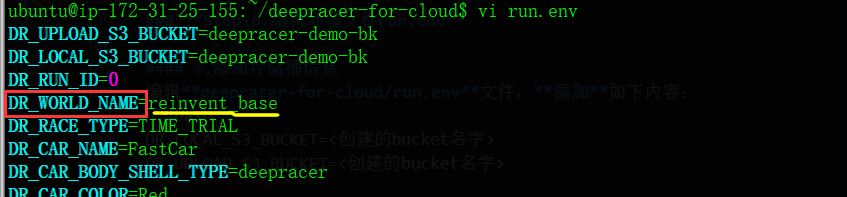
Step-6. Edit the environment file run env
①. Add bucket information
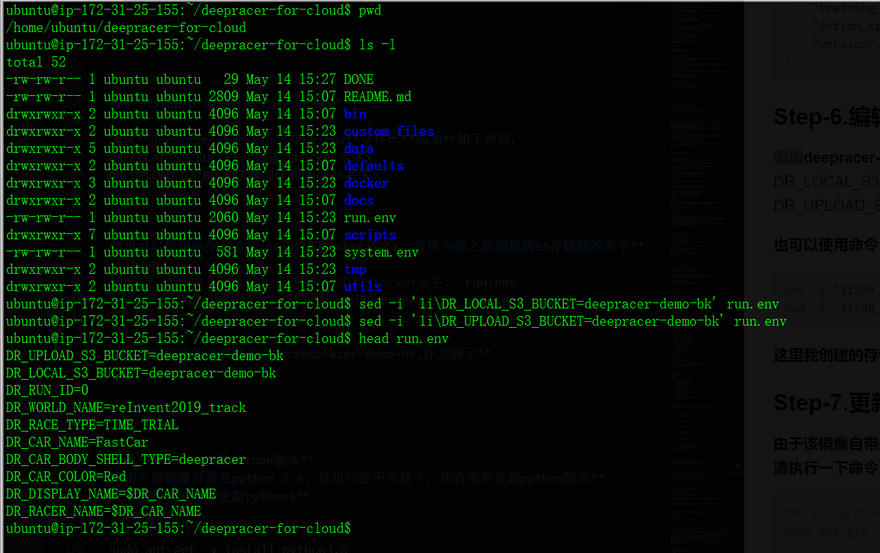
Edit deepracer-for-cloud/run.env file, add as follows:
DR_LOCAL_S3_BUCKET=<YOU_CREATED_BUCKET_NAME>
DR_UPLOAD_S3_BUCKET=<YOU_CREATED_BUCKET_NAME>
You can also use the command, please put <YOU_CREATED_BUCKET_NAME> replace with the name of the S3 bucket you created earlier
sed -i '1i\DR_LOCAL_S3_BUCKET=<YOU_CREATED_BUCKET_NAME>' run.env
sed -i '1i\DR_UPLOAD_S3_BUCKET=<YOU_CREATED_BUCKET_NAME>' run.env
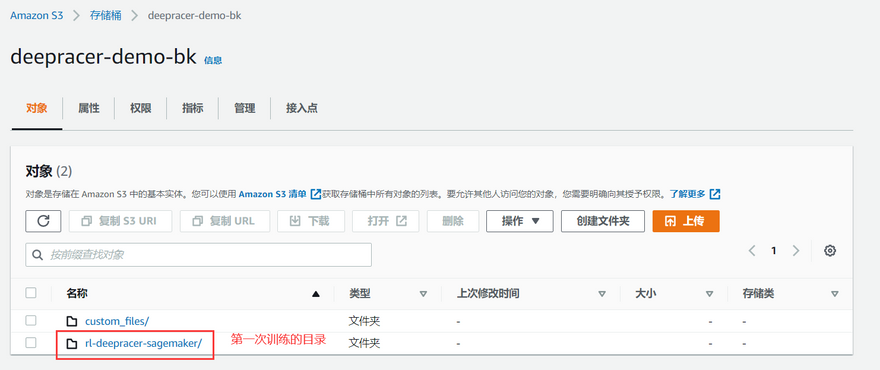
The bucket name I created here is: deepracer-demo-bk, as a demonstration
②.Edit track information
I use re: invent 2018 track here, and its DR_WORLD_NAME is reinvent_ base
Please in run.env file found DR_WORLD_NAME modify its value
Step-7. Update Python version
Since the image comes with Python 3.6, it is no longer supported here, so you need to update the python version
Please execute the python 3 command
### install python 3.8
sudo apt-get -y install python3.8

sudo update-alternatives --install /usr/bin/python3 python3 /usr/bin/python3.8 2

Step-8. Update configuration
### Execute the following code to make the configuration here effective
dr-update

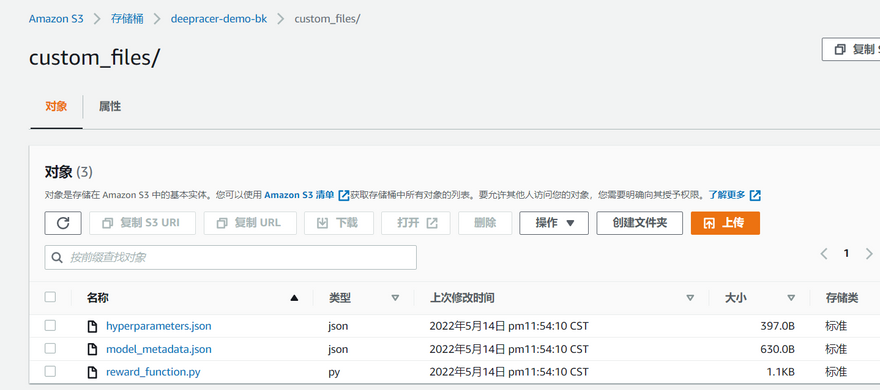
Step-9. Upload dr-upload-custom-files to S3 bucket
dr-upload-custom-files
At this time, the custom files in the S3 bucket should contain the following files

Step-10. Start training
Execute the following command to start training
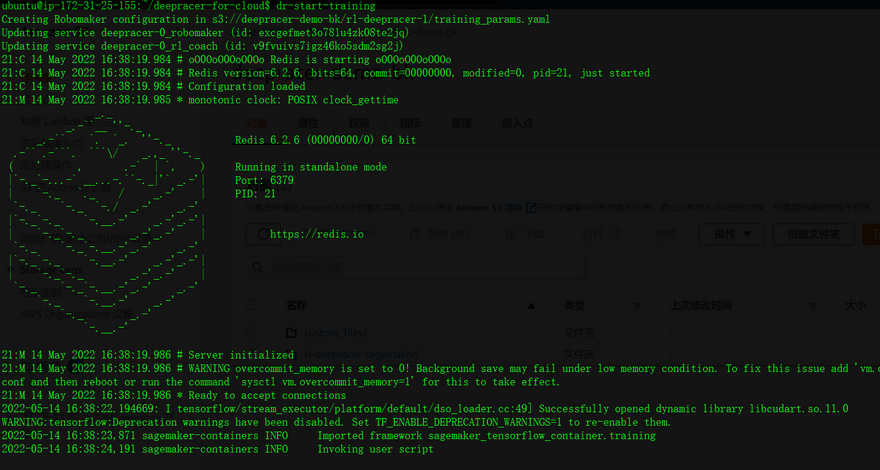
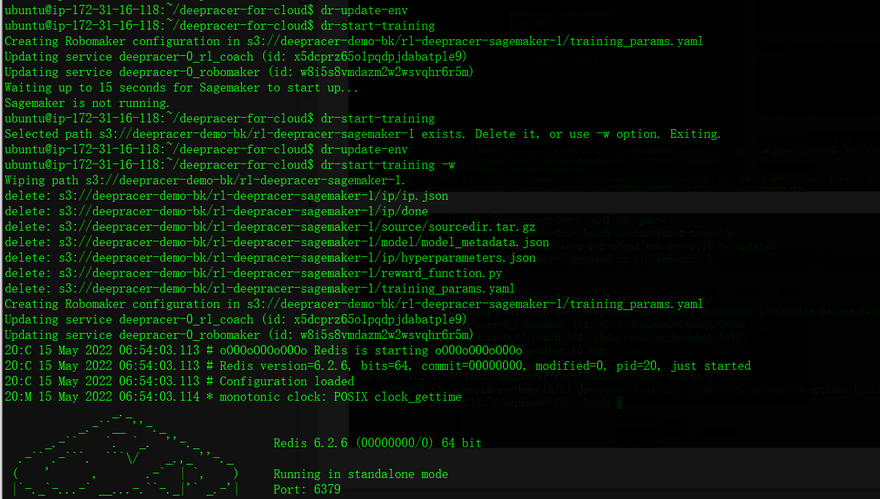
dr-start-training
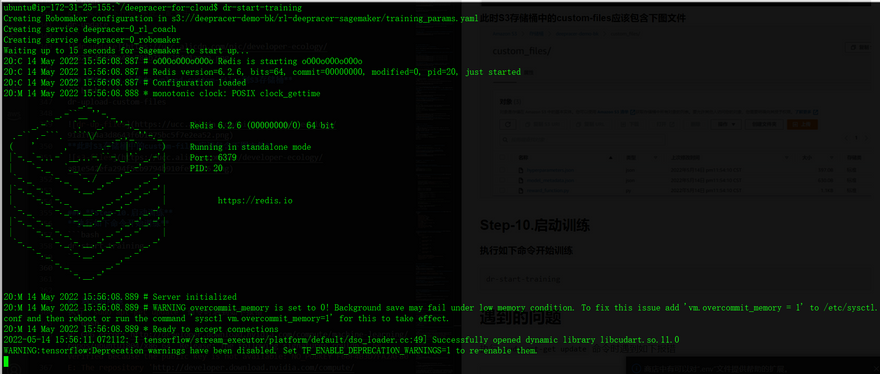
Normal training is shown in the figure
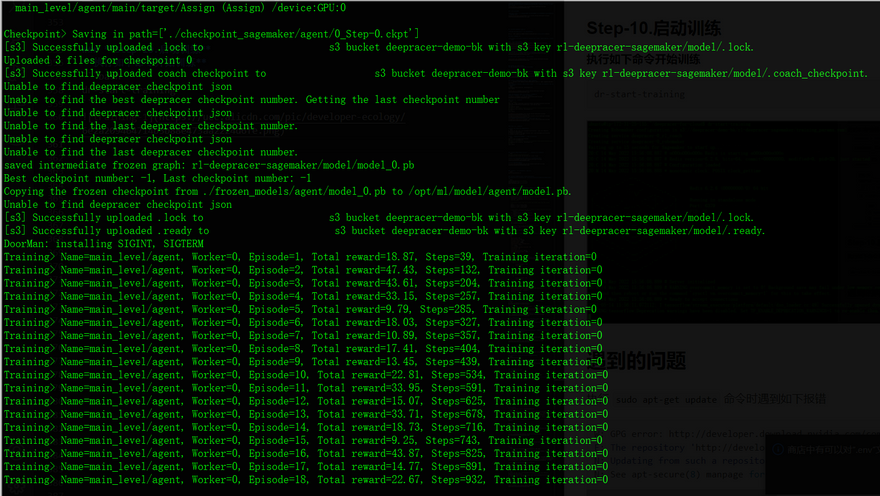
At this point, your model has started training on EC2
Six、Follow-up Operations (retraining)
1.If the instance terminates, pull the instance again, and then the last training
Please do the following
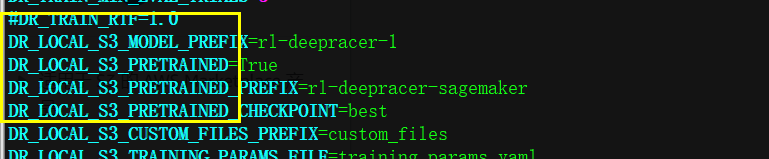
①.Edit run.env file
Modify the following parameters
### This is the last training storage folder. Please check the folder name in S3 bucket
DR_LOCAL_S3_MODEL_PREFIX=<Directory of S3 storage bucket for this training>
### Determine whether the training or assessment should be based on the model created in the previous session
DR_LOCAL_S3_PRETRAINED=True
### Set the directory of this training
DR_LOCAL_S3_PRETRAINED_PREFIX=<Directory of S3 bucket stored in the last training>
### This training defaults to last from the checkpoint setting of the previous training
DR_LOCAL_S3_PRETRAINED_CHECKPOINT=best
This is before the modification

This is a modified version
Take a look at the files in the S3 bucket
②.Update to make this configuration effective
dr-update-env
③.If you modify custom_files, please execute the following command to upload custom_files again
dr-upload-custom-files
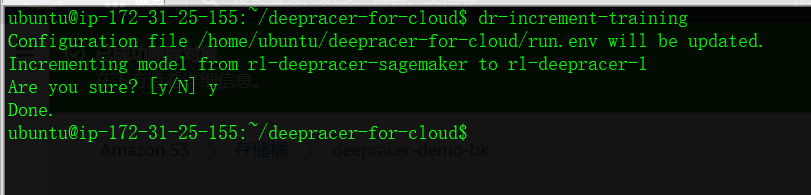
④.Start training
dr-start-training
If sagemaker is not running is prompted, execute dr-start-training -w
dr-start-training -w
Seven、run.evn configuration file parameter setting, dr command interpretation
Refer to for specific parameters
Deepracer-for-Cloud GitHub
Eight、Problems encountered
1.NO_PUBKEY
W: GPG error: http://developer.download.nvidia.com/compute/machine-learning/repos/ubuntu1804/x86_64  Release: The following signatures couldn't be verified because the public key is not available: NO_PUBKEY F60F4B3D7FA2AF80
E: The repository 'http://developer.download.nvidia.com/compute/machine-learning/repos/ubuntu1804/x86_64  Release' is not signed.
N: Updating from such a repository can't be done securely, and is therefore disabled by default.
N: See apt-secure(8) manpage for repository creation and user configuration details.
Treatment scheme
Due to the use of Ubuntu 18.04
So use the following solution
wget -qO - http://developer.download.nvidia.com/compute/machine-learning/repos/ubuntu1804/x86_64/7fa2af80.pub | sudo apt-key add -

sudo apt-get update

2.Python3. 6. Report an error and update the python version
sudo apt-get install python3.8
sudo update-alternatives --install /usr/bin/python3 python3 /usr/bin/python3.8 2
Note:
The first parameter --install indicates that the service name is registered with update-alternatives.


The second parameter is to register the final address. After success, the command will be used as the soft chain of real commands at this fixed destination address. Later management is to manage this soft chain;

( --install link name path priority)

Where link is the public link directory of software with the same function in the system, such as /usr/bin/java (absolute directory is required); Name is the name of the command linker. For example, Java path is the directory where you want to use the new command and new software. Priority is the priority. When the command link already exists, it needs to be higher than the current value, because when alternative is in automatic mode, the system enables the link with high priority by default# Integer the priority set according to the version number (the changed priority needs to be greater than the current one)

The third parameter: service name, which will be used as the association basis for future management.

The fourth parameter is the absolute path of the managed command.

The fifth parameter is priority. The higher the number, the higher the priority.
3.Unable to obtain lock
E: Could not get lock /var/lib/dpkg/lock-frontend - open (11: Resource temporarily unavailable)
E: Unable to acquire the dpkg frontend lock (/var/lib/dpkg/lock-frontend), is another process using it?
resolvent:
$ sudo rm /var/lib/dpkg/lock-frontend
$ sudo rm /var/lib/dpkg/lock
4.If sagemaker is not running is prompted, execute dr-start-training -w
dr-start-training -w

Top comments (0)