With so many software choices out there and different versions, it can be confusing trying to set up your local development environment to suit every project's needs. And sometimes project needs can clash and make it even tricker to set up your local environment.
This is where GitHub Codespaces can help. Essentially GitHub Codespaces are environments you can set up for each repository you have stored on GitHub which can be customised to suit that repository's needs.
Making it easier for you to have the correct working environment for that project.
In this blog post I’ll dive into the concept of what a GitHub Codespace is and how you can build a dedicated environment to work on Terraform for Azure.
What is a development container?
GitHub Codespaces are built on top of development containers, or dev containers.
These containers are Docker containers that offer a development environment you can customise to provide a consistent experience for yourself or your team.
The dev containers are configured using three files:
- Devcontainer.json
- Dockerfile
- Docker-compose.yml
You’ll find for some small dev container configurations only the devcontainer.json file will be needed.
Steps for building a development container for Terraform
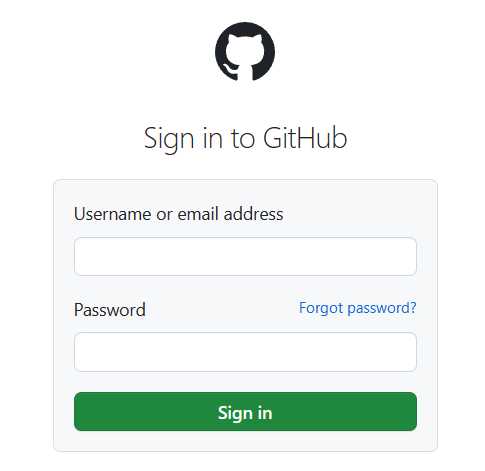
Open a browser and go to: https://github.com/login and login to your account
Login to GitHub
Browse to the repository where your code is stored and you’d like to create the Codespaces in.
Create a new GitHub Codespace
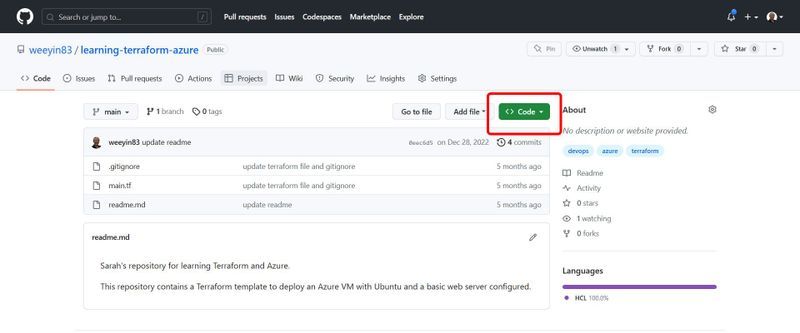
On the right hand side of your screen, click on Code
Select the Codespaces tab
Create a new GitHub Codespace
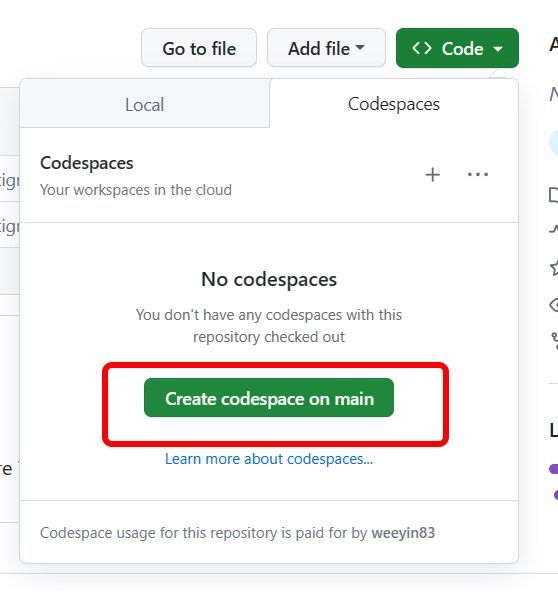
Now select Create Codespace on Main. This will create a Codespace based on your main branch, don’t worry you can switch branches once the Codespace is active.
Within a few seconds your GitHub Codespaces will launch.
We need to access the command palette. You can do that by:
- Pressing this keyboard shortcut combination Shift+Command+P (Mac) OR Ctrl+Shift+P (Windows/Linux)
- From the Application Menu, click View > Command Palette
- Pressing F1
Once in the command palette choose the option Add dev container configuration files
GitHub Codespaces command palette

You will be presented with two options, select Create a new configuration
GitHub Codespaces command palette

A list of predefined dev containers will be presented to you.
We are going to be working with Azure and Terraform so we are going to start our dev container build using a community template called Azure CLI
GitHub Codespaces command palette

The next configuration step is around additional software, it suggests ZSH!, leave this option selected and click OK.
GitHub Codespaces command palette

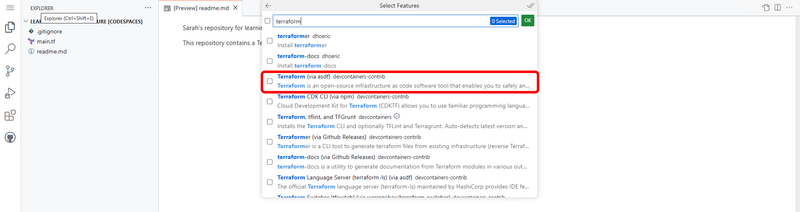
The last step is to select any additional software you might want, there are a lot of options available to you at this point. We need to add Terraform and I like to add aztfexport, then click on OK.
GitHub Codespaces command palette
GitHub Codespaces command palette

Then selecting Keep Defaults on the next screen. The configuration is complete.
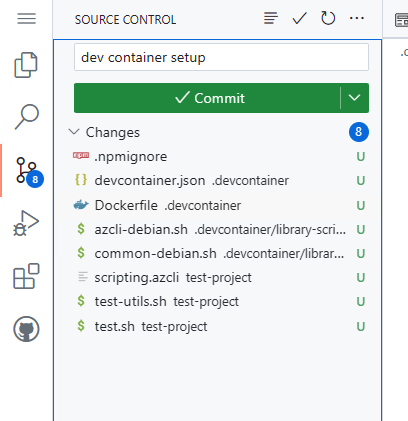
In the right hand corner a dialog box will pop up, highlighting the fact that your dev container configuration has changed and it’s time to rebuild your container to apply them. Before you do that we need to commit our configuration to our GitHub repository.
Head over to the left hand navigation bar, and select the Source Control icon.
A bunch of files will have been created due to the answers you gave in the dev container configuration wizard. Write an appropriate commit message and then select Commit and then Sync Changes.
GitHub Codespaces source control sync
We now need to rebuild our dev container. The pop up box might still be there and you can select Rebuild Now.
If not we need to access the command palette. You can do that by:
- Pressing this keyboard shortcut combination Shift+Command+P (Mac) OR Ctrl+Shift+P (Windows/Linux)
- From the Application Menu, click View > Command Palette
- Pressing F1
Search for Codespaces: Full Rebuild Container
GitHub Codespaces command palette

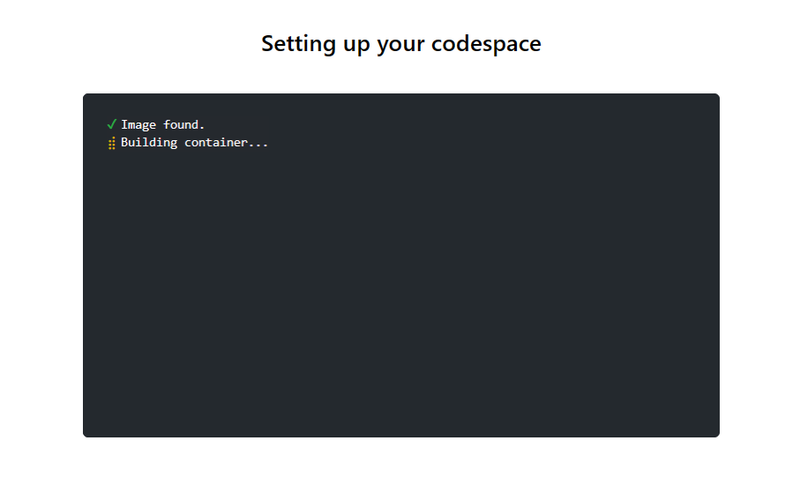
It may take a few minutes for your container rebuild to happen. Once it has been rebuilt you will have a development environment that has the Azure CLI, Terraform and Azure Export for Terraform tool installed.
GitHub Codespaces environment building
Conclusion
GitHub Codespaces are an incredibly powerful tool that you can customise to suit your needs. Be sure to explore the possibilities and understand how utilising them can help make your working environment more efficient.

Top comments (0)