Introduction
MindsDB enables in-database machine learning capabilities. It enables the user to query the future from inside the existing database using AI tables.
Generally, MindsDB helps to build accurate predictive models by processing the existing data and feeding it into training models using standard SQL queries. It also enables to visualize the predictions using the BI tools.
So, today in this tutorial we are gonna learn how to deploy a self-hosted version of MindsDB using Oracle Cloud Compute Instance.
Deploying an Oracle Cloud Compute Instance
Oracle Cloud Infrastructure is widely used across the IT industries and provides a set of highly available and scalable cloud services that enable to build and serve a wide range of applications.
So, let's go ahead and create a Compute Instance on Oracle Cloud using the steps below.
Step 1: Log in to your Oracle Cloud Infrastructure account or signup for one if don't have one already. Oracle provides 300$ worth of credits for 30 days to try their services.

Note: It may take a while to provision your account and you will receive an email once it is ready. Your account needs to be fully provisioned and ready so that you can use the different services on the platform.
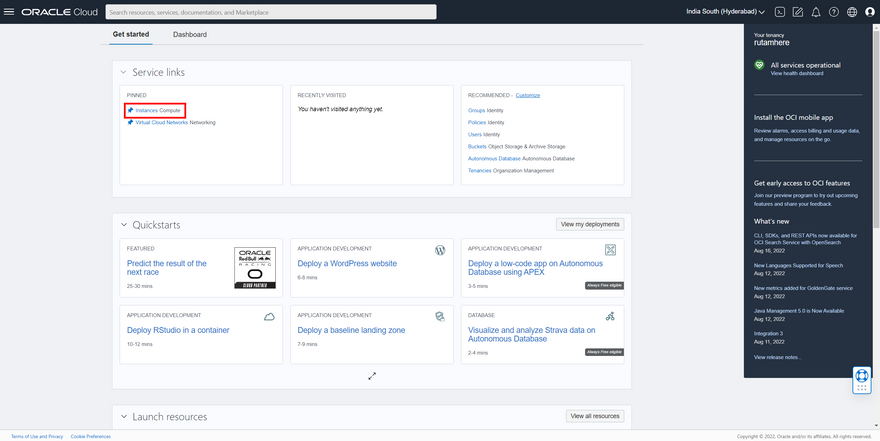
Step 2: Once your account is ready and you're signed in, you will land on a Get Started page as shown below. Simply click on the Instances from the top Pinned tab.
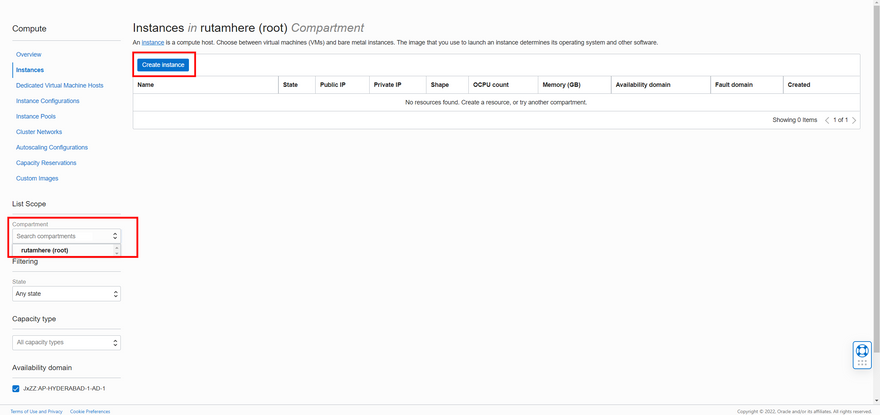
Step 3: On the next screen that appears, select your username from the Compartment section under List scope in the left panel and then hit the Create instance button.
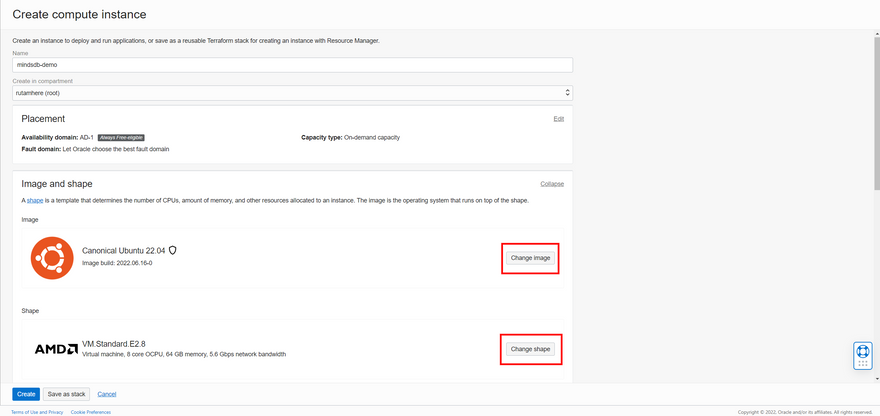
Step 4: In the Create compute insatnce page, we need to fill in the configurations for the virtual machine as per our needs. But for the sake of this tutorial, we can go with the following configuration.
-
Name: Put a name as per your choice (I chose
mindsdb-demofor now.) -
Create in compartment: It will be your
username(root). - Placement: Leave this section as it is at its default values.
-
Image and shape: Click on
Editand choose the following.- Click on
Change image.- Image Source: Platform Images
- Compartment: your_username(root)
- Image Name: Canonical Ubuntu
- OS Version: 22.04
- Image Build: 2022.08.10-0 (Latest when this is written)
- Now click on
Select imageto save these changes. - Now click on
Change shape.- Instance type: Virtual Machine
- Shape Series: Speciality and previous generation
- Shape name: VM.Standard.E2.8
- Click on
Select shapeto save these changes.
- Click on
- Networking: Leave the values as it is at its default.
- Add SSH keys: Select
Generate a key pair for me. Don't forget to download and save both the Private and Public keys as we will require them later to interact with the VM. - Boot Volume: Just tick the
Use in-transit encryptionand leave others unchecked.
Now we are all set with the specific configuration we require to run this VM. Let's click on the Create button now to provision this VM.
Step 5: After we hit the Create button, it takes us to the Work requests page for the instance. Please wait a while here, until the I image box at the left top turns green and you see the Running status below it.
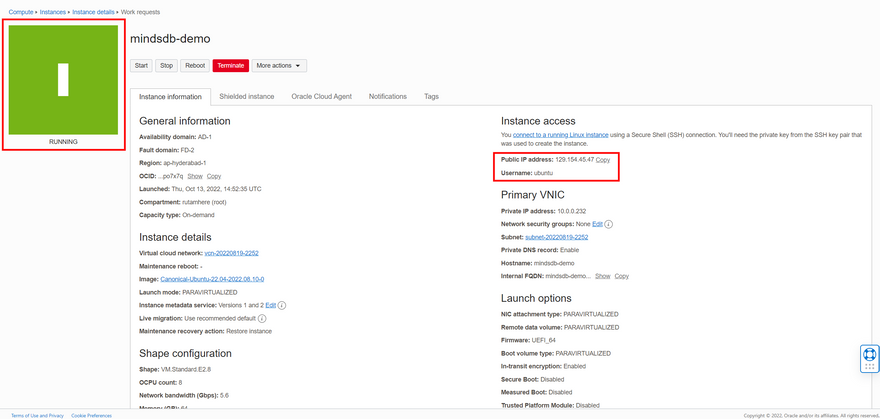
Step 6: We can simply SSH into our VM now using the Private key we downloaded earlier using the CMD with the following command.
ssh -i location_of_the_private_key username_for_the_instance@public_ip_of_the_instance
If I replace the placeholders in the above command, then the command would look something like this. Type yes and hit Enter when prompted in the CMD to access the VM from your command line.
ssh -i ssh-key-2022-10-13.key ubuntu@129.154.45.47
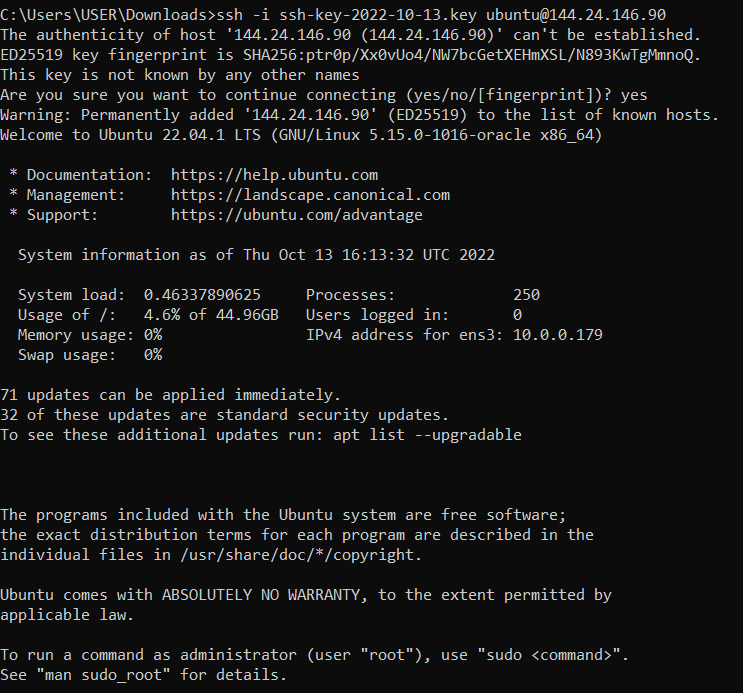
We are now ready to proceed with the next steps to install the MindsDB instance in our VM.
Deploying MindsDB on the Cloud Instance
In this section we will deploy the MindsDB instance on the VM and then try to use its GUI using the public IP of the VM on the respective port. The following will let us do easily.
Step 1: Once we SSH into the instance, we need to update the package indexes present in it so that we can get the latest package versions when we install something. We can do that with the command below.
sudo apt-get update

Step 2: We will use Docker to install MindsDB in the later steps. So, let's install Docker first in the VM with the command below. Type Y and hit Enter when prompted to proceed with the installation.
sudo apt-get install docker.io

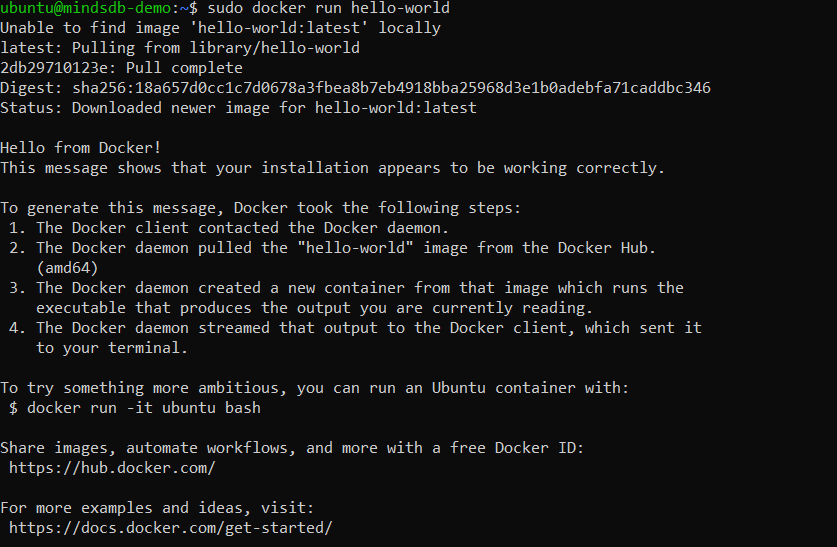
Once this command executes successfully, simply run the command below to check whether Docker is running fine or not. This should return a Hello from Docker! meesage.
sudo docker run hello-world
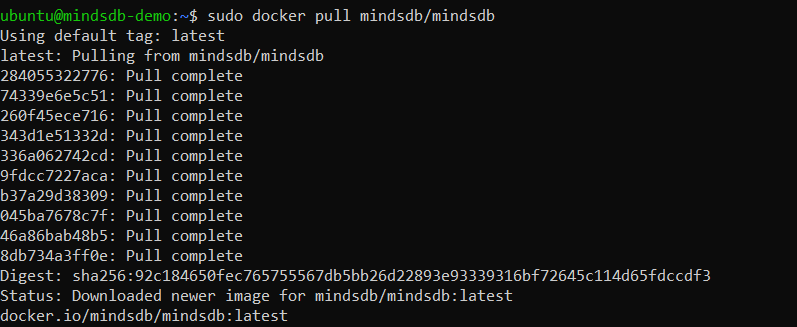
Step 3: We will now pull the latest stable release of MindsDB into our instance with the following command.
sudo docker pull mindsdb/mindsdb
You can also try working with the latest beta releases of MindsDB using the command below.
sudo docker pull mindsdb/mindsdb_beta
Step 4: We can now run the MindsDB instance and expose the specific ports that are required to access the MindsDB GUI and have successful data transactions through the MySQL APIs. The command will be as follows.
sudo docker run -p 47334:47334 -p 47335:47335 mindsdb/mindsdb
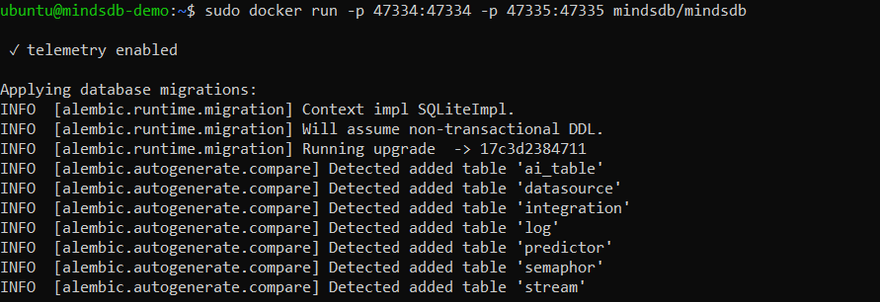
Note: Port 47334 will be used by the GUI.
Port 47335 will be used by the MySQL API.
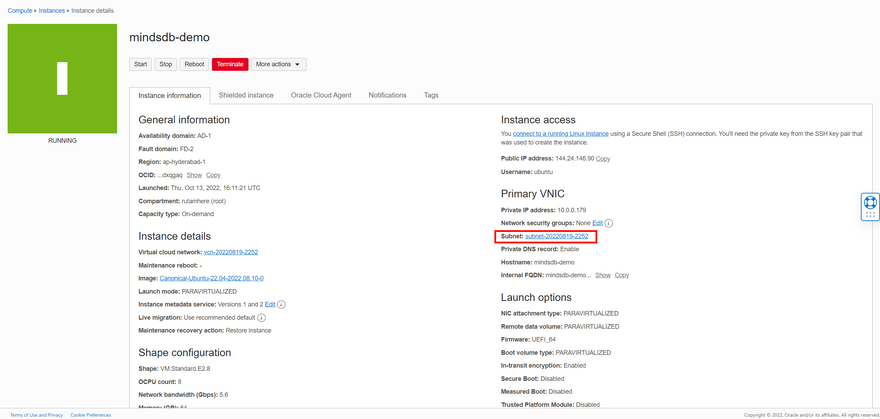
Step 5: Now if we try accessing the GUI with the public IP of the instance on port 47334, it will simply error out. This is because the Oracle Cloud Infrastructure blocks the incoming traffic by default for the instance. So, we need to define an ingress rule for the instance now to be able to access the GUI.
- Go back to the
Instance detailsdashboard and click on the subnet name. This should take you to theSubnet Detailspage.
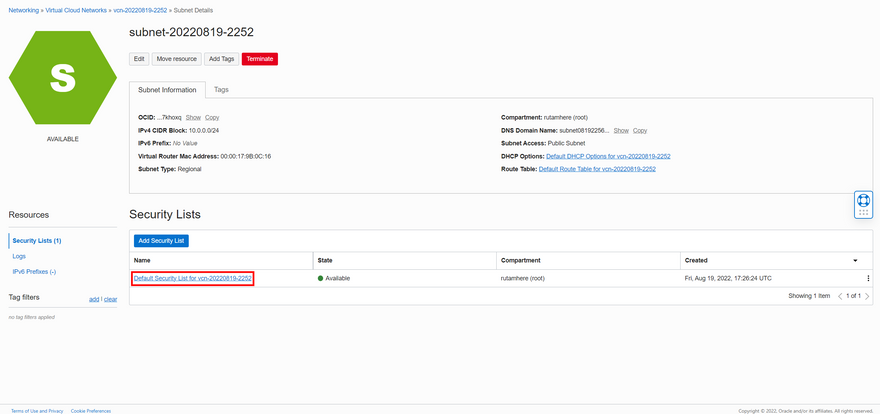
- In the
Security Liststable, click on the only available record ofDefault Security List. This will take you further to theSecurity List Detailspage.
- Now click on the
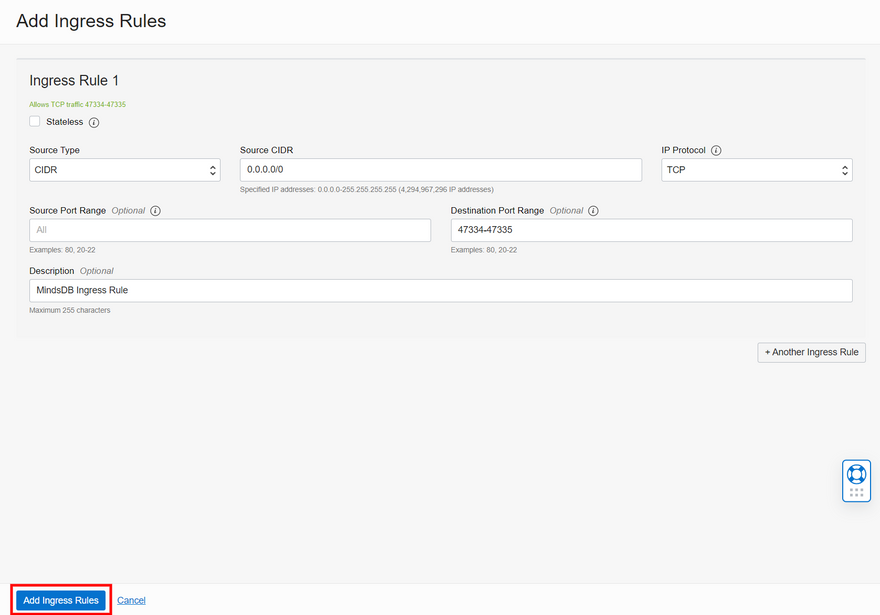
Add Ingress Rulesbutton underIngress Rulestab. This will open a dialog box where we can define the ingress rule, we want to use for the instance.
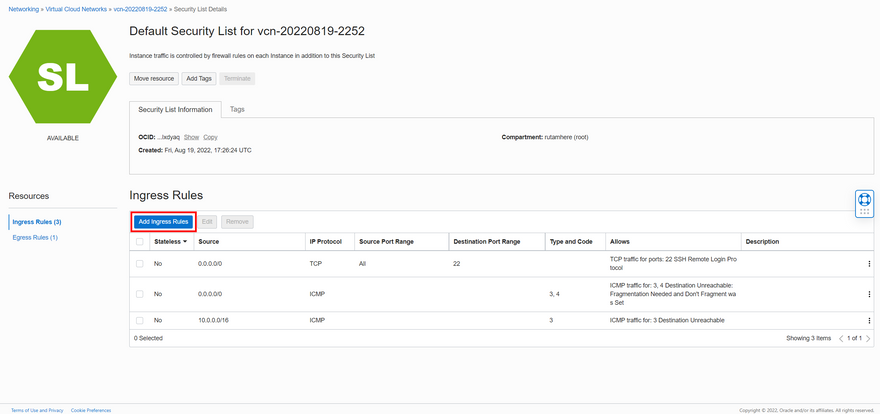
- Now use the following details to define the ingress rule.
- Stateless: Leave it unchecked as it is.
- Source Type: CIDR
- Source CIDR: 0.0.0.0/0
- IP Protocol: TCP
- Source Port Range: Leave it blank. (Default is Allow All)
- Destination Port Range: 47334-47335
- Description: MindsDB Ingress Rule
Now click on Add Ingress Rule button to add this rule to the Default Security List.
Step 6: We can try to access the MindsDB GUI with the public IP and the respective port and should be successfully able to access it.
http://publicIP:47334/
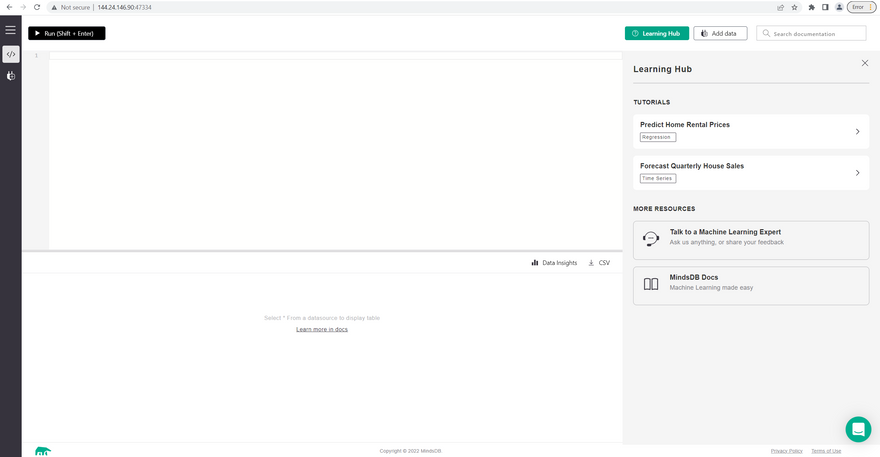
MindsDB GUI has 3 major parts i.e., a Query Editor at the top, a Result Viewer at the bottom and the Learning Hub resources at the right side to make it more accessible to new users.
Note: With
rootuser access to the instance, we will never need to usesudobefore each and every command.
Exploring the Default MindsDB Tables
By this time, we already have our MindsDB deployment hosted on the public IP of the instance. So, it's time now to find out what default tables exist in MindsDB when we launch it for the first time.
Let's run the following SQL command to get the list of available Tables.
Show tables;
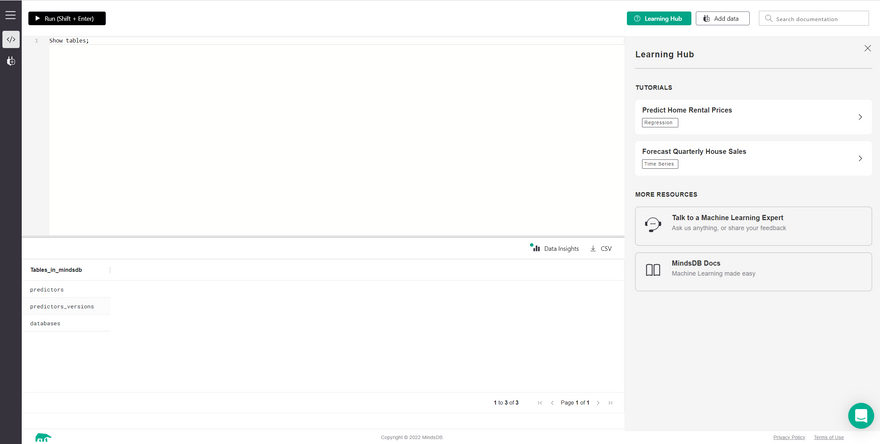
We can find three tables listed above, namely:
Predictors: This table stores each of the trained Predictor Models along with their specific details as a separate record.
Predictors_Versions: This table stores the versioning information of a particular Predictor Model as to how many times the model has been tweaked and newly trained by the user.
Databases: This table stores the list of all the databases connected to our MindsDB instance.
Conclusion
We have pretty much reached to the end of this tutorial now. So, before we leave, let's summarize all the things that we just did above. Initially, we started with creating our Oracle Cloud account, provisioned a compute instance, installed MindsDB using Docker inside it, created an ingress rule for the incoming traffic and finally explored the MindsDB GUI along with the default tables present.
Now, as all of you know how to get started with MindsDB on Oracle Cloud Infrastructure, it's time for all of you to deploy your own MindsDB instances and start training some interesting Predictor models with it and share about it with the community.
Lastly, I would love to know your feedback and would really appreciate it if you drop a LIKE and share this article in your circles where you believe it will add some value.
Note: All the dashboard images are respective properties of Oracle Cloud Infrastructure and MindsDB and are used here only for illustrative purposes.


Latest comments (0)