Introduction
MindsDB embeds ML capabilities into traditional databases. With the help of MindsDB, we can make our databases smarter and design several Predictor models to predict useful insights from our available datasets.
In this tutorial, we are gonna learn how we can deploy MindsDB using a Civo Compute instance easily.
Deploying a Civo Compute Instance
Civo provides powerful and reliable compute instances for a fairly decent price. These compute instances are actually high-performance virtual machines that can be launched in just 60 seconds and are powered by Kubernetes under the hood.
Now lets get started by creating a Civo Compute instance. Follow the steps as listed below.
Step 1: Login to your Civo Account or create one if you don't have one yet. You can sign up for an account here and can avail 250$ worth of free credits for a month to try different Civo products.
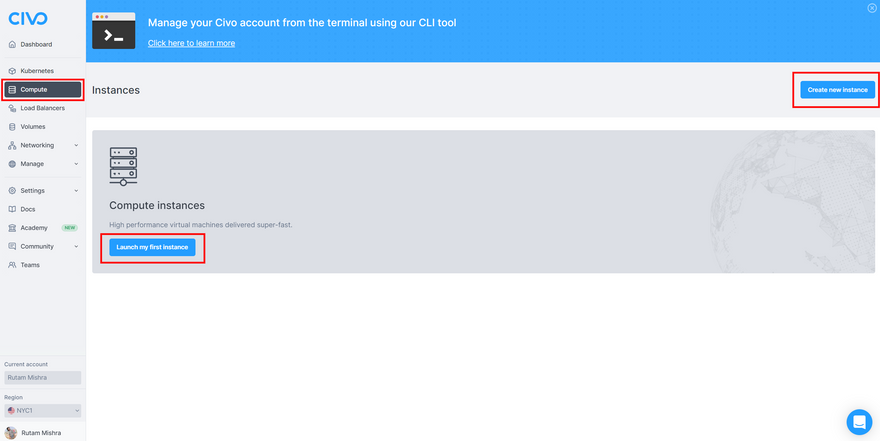
Step 2: Once you're logged in, click on Compute from the left navigation pane and then either hit the Launch my first instance or Create New Instance button to start configuring the compute instance.
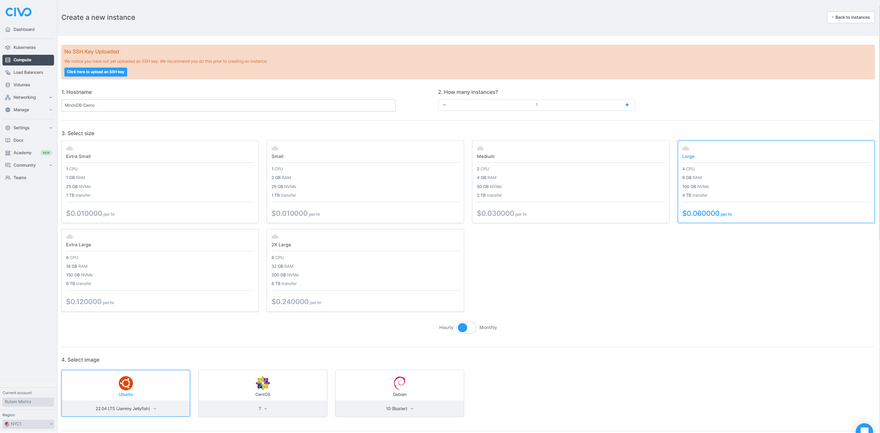
Step 3: On the Create a new Instance page, we need to choose the specs we want our compute instance to boot up with. You can always select the specs as per your needs, but we will be using the specs as defined below for this tutorial.
- Hostname: Give a name as you want.
- How many Instances?: Leave it at 1.
- Select Size: Select Large($40/month).
- Select Image: Select Ubuntu 22.04 LTS(Jammy Jellyfish)
- Initial User: Select root as we want to have use as Admin
- Network: Leave it at Default
- Public IP Address: Select Create.
- Firewall: Select Default.
- SSH Key: Select Random Password.
- Initialisation Script: Leave it blank.
- Tags: Leave it blank.
Now simply click on the Create button to boot up the compute instance.
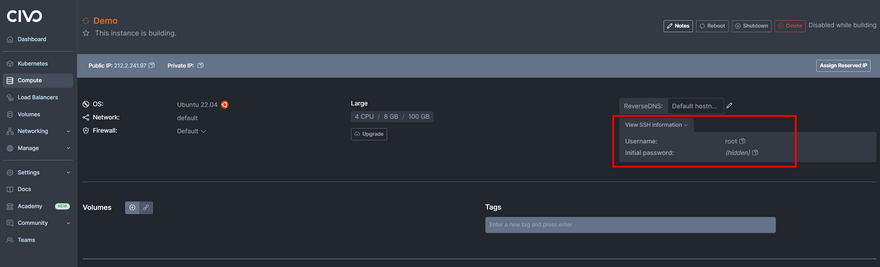
Step 4: Once you click on Create, the instance starts building and should be up and running in a while. As soon as the instance has started, we can simply SSH into the instance using its Public IP and the SSH information to install MindsDB and proceed with the next steps.
Installing MindsDB on the Instance
Our compute machine is booted up already and now it's time to install MindsDB on it using Docker. Let's get started with the steps below to achieve the same.
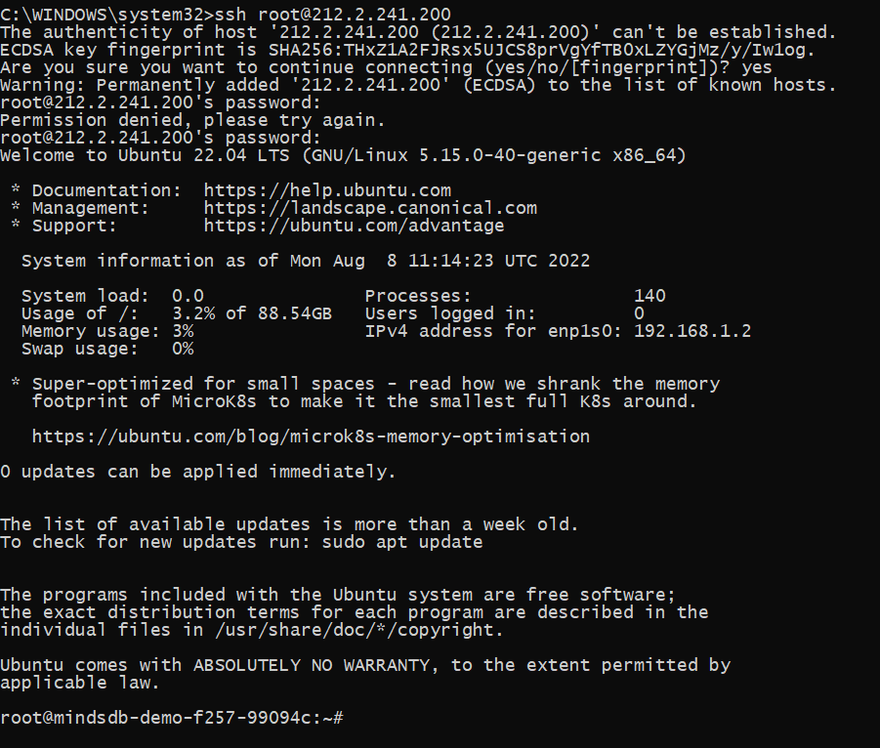
Step 1: SSH into your compute instance using the terminal of your system. Open your terminal and type the command below to get access into your instance. Type Y or Yes when prompted and hit Enter to proceed.
ssh root@PUBLIC_IP_OF_THE_INSTANCE
Copy the password from the instance dashboard under SSH Information tab and use it when prompted in the terminal to do a successful login into the system.
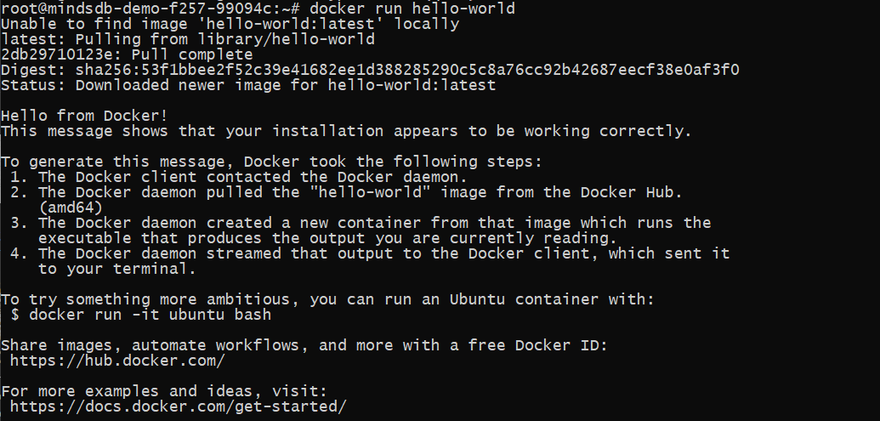
Step 2: Now it's time to check whether Docker is installed correctly or not. Use the command below to find this out.
docker run hello-world
This should run successfully, and you should see a message Hello from Docker.
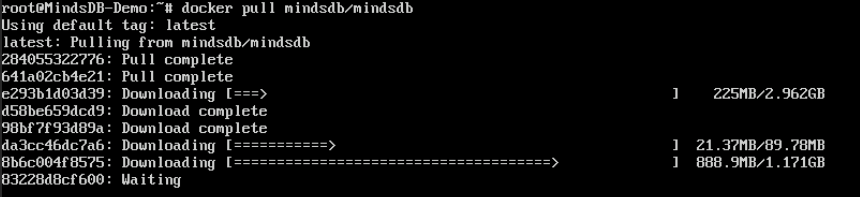
Step 3: Let's run the following command now to pull the latest stable release of MindsDB into our instance.
docker pull mindsdb/mindsdb
We can also work with the latest Beta version images of MindDB using the command below.
docker pull mindsdb/mindsdb_beta
Note: Follow the MindsDB Getting Started documentation to find more such ways to install MindsDB other than Docker.
Step 4: We will now run a command to run MindsDB on our instance and expose specific ports so that we can access its GUI and MySQL APIs, etc. Use the command below to do it.
docker run -p 47334:47334 -p 47335:47335 mindsdb/mindsdb
-
Port 47334 - The MindDB GUI runs on this port. You can always use the
ComputeInstancePublicIP:47334to access it in the browser. - Port 47335 - The MySQL API runs on this port and enables to carry out database transactions over TCP/IP.

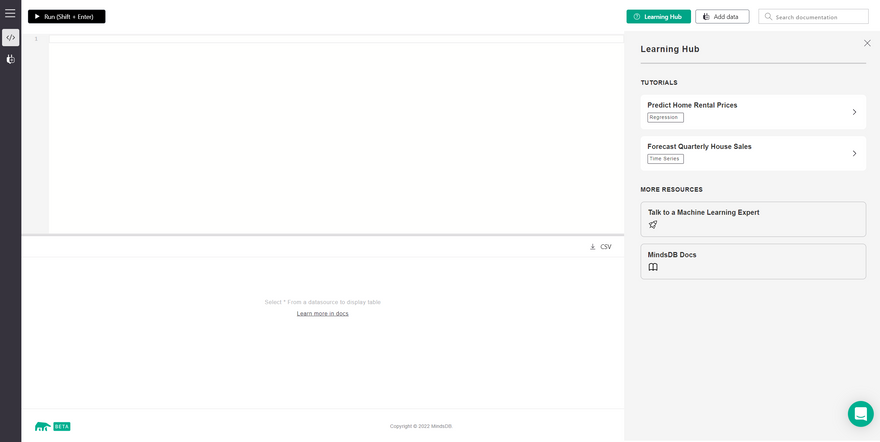
Step 5: We can now simply try to access the MindsDB GUI using the Public IP of the instance over the exposed port of 47334. If we give a closer look at the interface, we can find a query writer at the top, the result viewer at the bottom and the learning hub resources towards the right.
Exploring Tables inside MindsDB
As we have already hosted our MindsDB version on the instance, we are now ready to train the predictor models and start predicting results as we require. But let us first explore the tables that are present by default. We can simply do that with the following command.
Show tables;
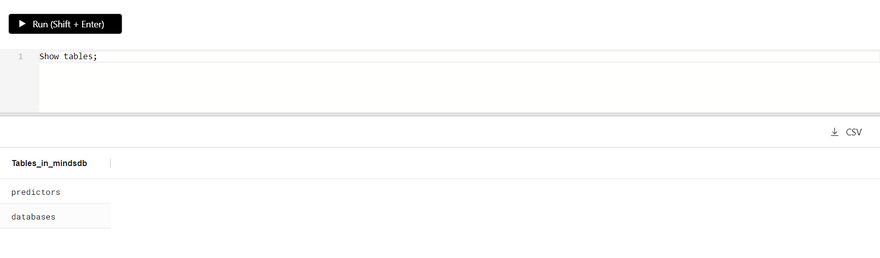
As we can see, we get two tables by default i.e., Predictors and Databases.
The Predictors table stores the Predictor models that we train, and each model is stored as a record in this table as an individual row and each of its columns contain specific information about the model.
The Databases table contains the list of databases connected with the MindsDB instance.
Conclusion
Well, now we have reached the end of this tutorial and it's time to do a short recap of what we did here. So, we started with creating a Civo Compute instance, then we installed MindsDB on top of it using docker, exposed the required ports to access the MindsDB GUI and finally explored the tables that are present there by default.
Apart from the self-hosted version, MindsDB also provides a MindsDB Cloud version which you can use for free. So, do give it a try and play around with your own Predictor models.
Lastly, before you leave this page, feel free to drop a like if you liked this tutorial and don't forget to key in your feedback as well.
Note: All the Dashboard images are sole properties of Civo and MindsDB respectively and are used here for illustrative purposes.


Top comments (1)
Recently I found this platform through a recommendation on a tech blog and gave it a go. I had been losing consistently for a while and was ready to stop. However, after I joined spin mama and started exploring, my luck finally turned. I won a significant sum on the slots online that made up for all my previous failures. The poker section is also very well-structured and easy to use. I have recovered my funds and made a profit.