Introduction
MindsDB is an AI layer that works on top of the existing databases to train, develop and deploy the finest machine learning models seamlessly. MindsDB performs the pre-processing of data from within the database and feeds it to the machine learning model using standard SQL to do precise and accurate predictions as required.
In this tutorial, we are going to deploy MindsDB on a GCP Compute Engine instance, go through its GUI and check through the default tables that are present after deployment.
Deploying a GCP Compute Engine
Google Cloud Platform is known to all and used by many in current times. So, it's time to go ahead and create a Virtual Machine on GCP to get started. You can simply follow the steps below to get it done.
Step 1: Login to your GCP account or sign up for one here. GCP provides 300$ worth of credits for 90 days to try the platform.
Step 2: Once you're signed in, click on the Go to console button. This should open up the cloud console for your account in a new tab.
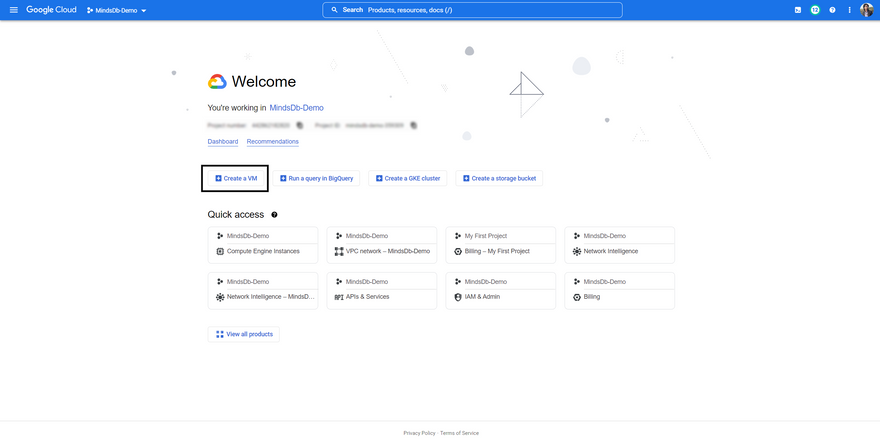
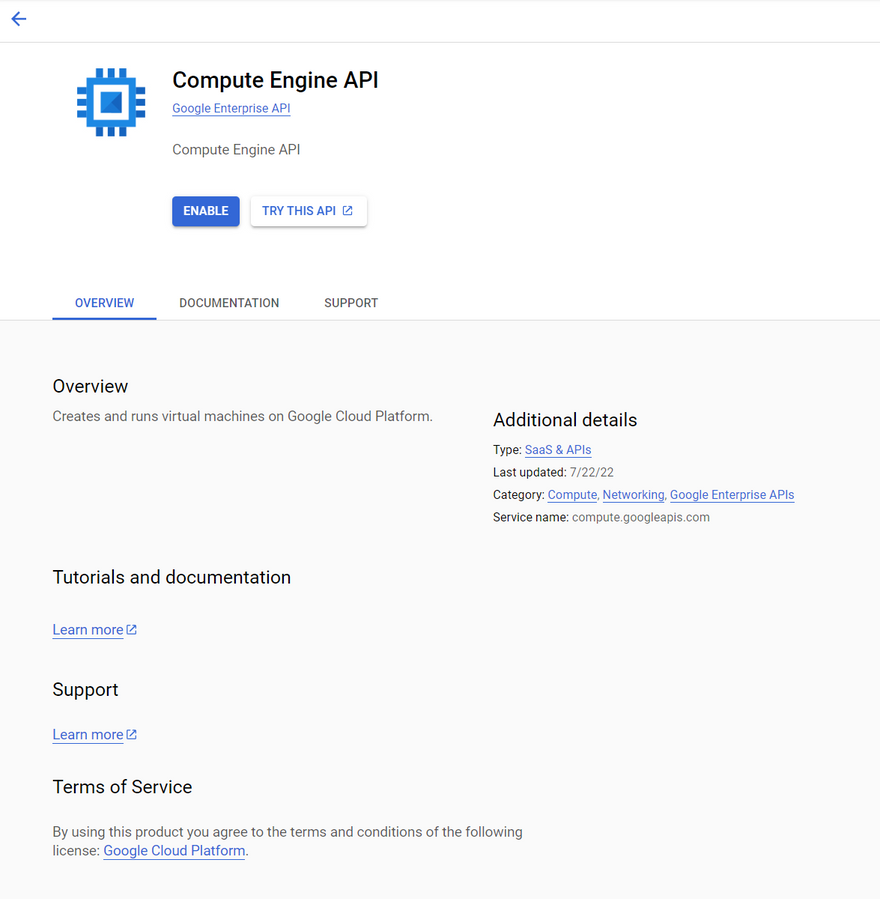
Step 3: On the cloud console screen, simply hit the Create a VM button. If it is your first time using the platform, then it would ask you to enable the Compute Engine API first and then take you to the Create an instance page.
Step 4: We need to specify the specs for the compute instance on the Create an instance page. You can always specify these as per your needs, but we will be using the specs mentioned below for this tutorial.
- Name: Provide a name for your instance
- Labels: Leave it as it is.
- Region: Select the one near to you for lower latency
- Zone: Choose any zone out of the available ones
- Machine Family: General Purpose
- Series: E2
- Machine type: e2-medium (2 vCPU, 4Gb Memory)
- Display device: Leave it as it is.
- Confidential VM Service: Leave it as it is.
- Container: Leave it as it is.
-
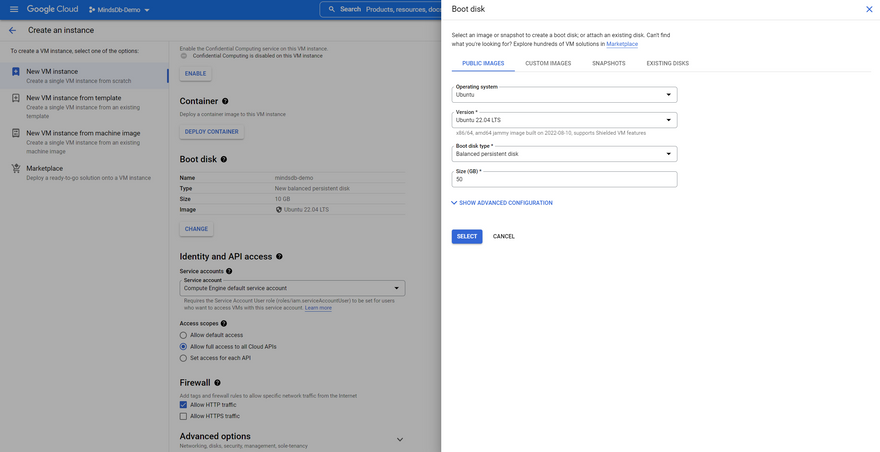
Boot Disk: Click on
Change, use the following and click onSelect.- Operating System: Ubuntu
- Version: Ubuntu 22.04 LTS x86/64
- Boot disk type: Balanced Persistent Disk
- Size: 50
- Service account: Compute Engine default service account
-
Access Scopes: Select
Allow full access to all Cloud APIs -
Firewall: Select
Allow HTTP traffic - Advanced Options: Leave it as it is.
Now you can click on Create to instantiate the launch of the VM.
Step 5: Once you hit the Create button, it will take you the VM Instances dashboard where you can find the instance you just created listed. Wait a bit until the Status turns to a green tick mark and the internal and external IP addresses are visible. This confirms that the instance is ready to use now.
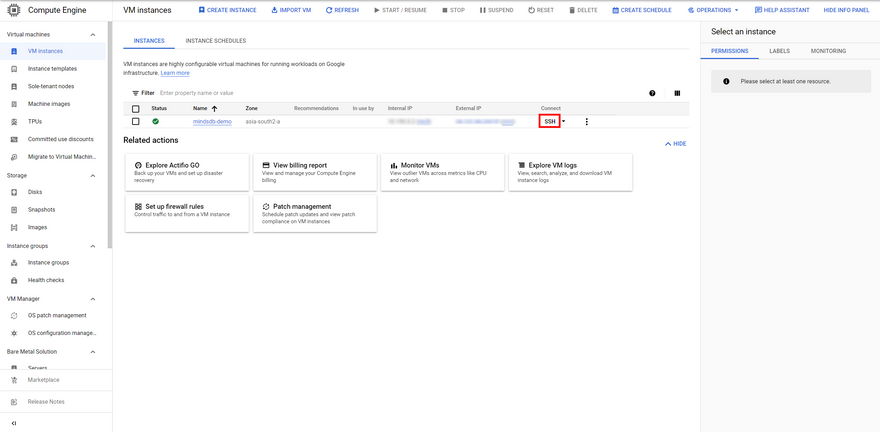
You can now simply hit the SSH button to access the instance and proceed with the next steps.

Deploying MindsDB on the Compute Instance
As we are ready with our instance now, we will simply try to install and run MindsDB inside our instance and access its GUI. Make sure to follow the instructions below to proceed further.
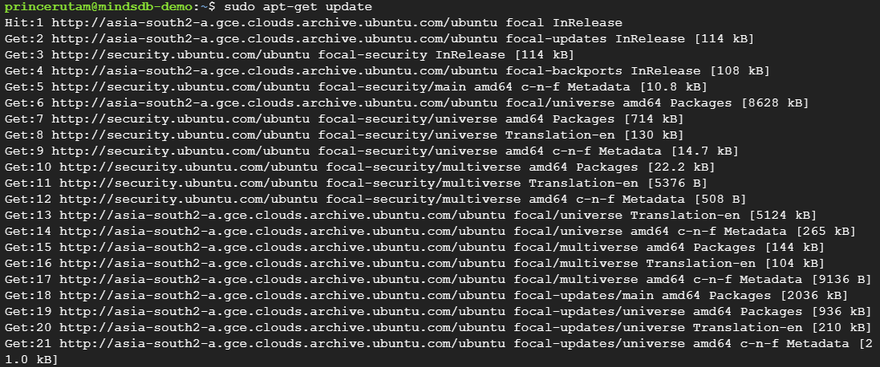
Step 1: As soon as you SSH into your instance, run a apt-update command to refresh the package indexes present in the system.
sudo apt-get update
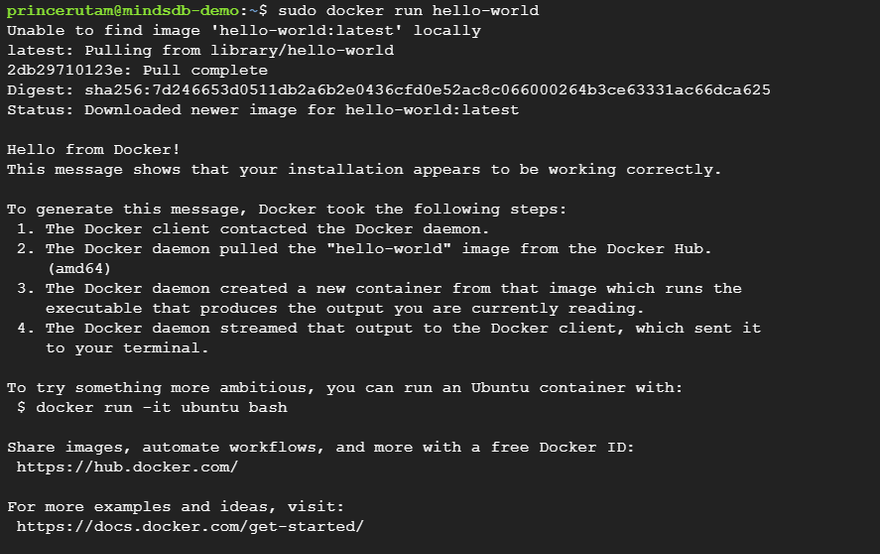
Step 2: Now it's time to check whether Docker is installed or not as we are going to use this to install MindsDB. We can do that by the following command.
sudo docker run hello-world
This should return a Hello from Docker message which confirms that Docker is present in the machine.
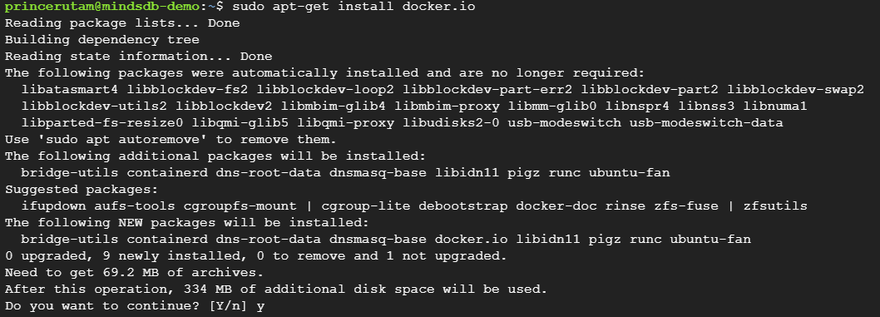
In case, it throws an error, you can simply install Docker using the following command. Hit Y when asked to proceed with the installation.
sudo apt-get install docker.io
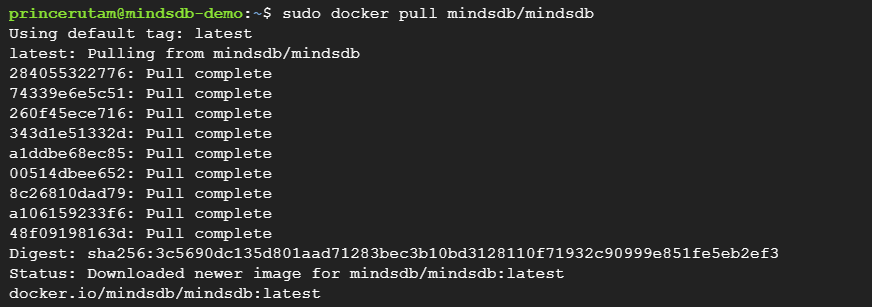
Step 3: We will now need to pull the latest stable build of MindsDB into our instance. We can do that with the command below.
sudo docker pull mindsdb/mindsdb
The stable build may or may not be the latest available build. If you wish to work with the latest release, then you can always pull the Beta version with the command below.
sudo docker pull mindsdb/mindsdb_beta
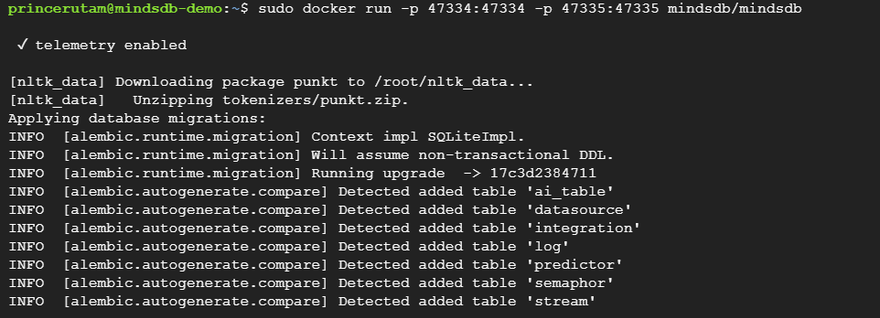
Step 4: Now it's time to run MindsDB on our instance and open the specific ports so that we can access its GUI and the MySQL APIs for data transactions.
sudo docker run -p 47334:47334 -p 47335:47335 mindsdb/mindsdb
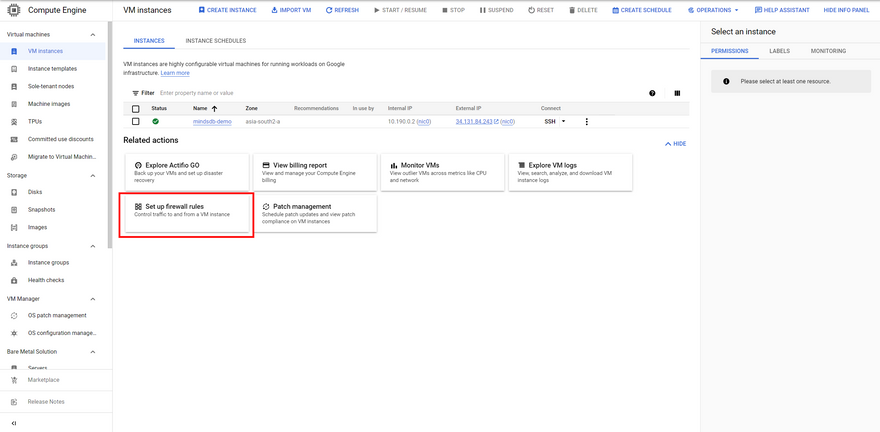
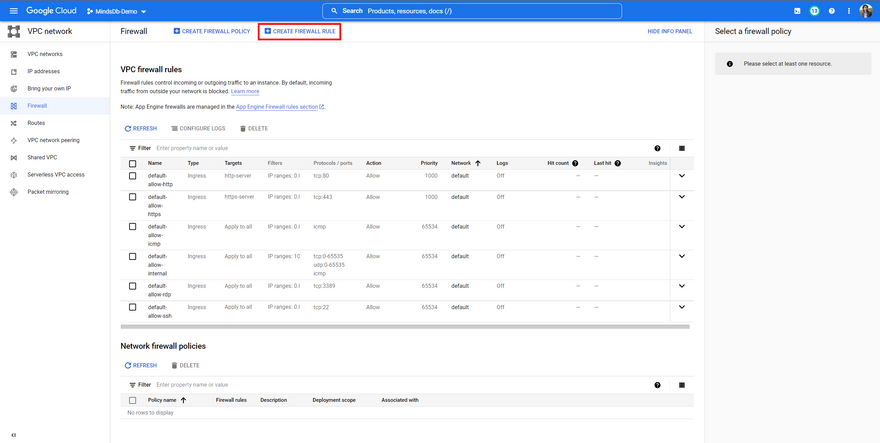
Step 5: Although we have exposed the ports above, Compute Engine blocks the traffic by default. So, we need to explicitly define a firewall rule to allow incoming traffic through these two ports. So, let's go back to the VM Instances dashboard and click on Setup firewall rules.
Once you're on the Firewall dashboard, simply hit the Create Firewall Rule at the top to add a rule for these ports.
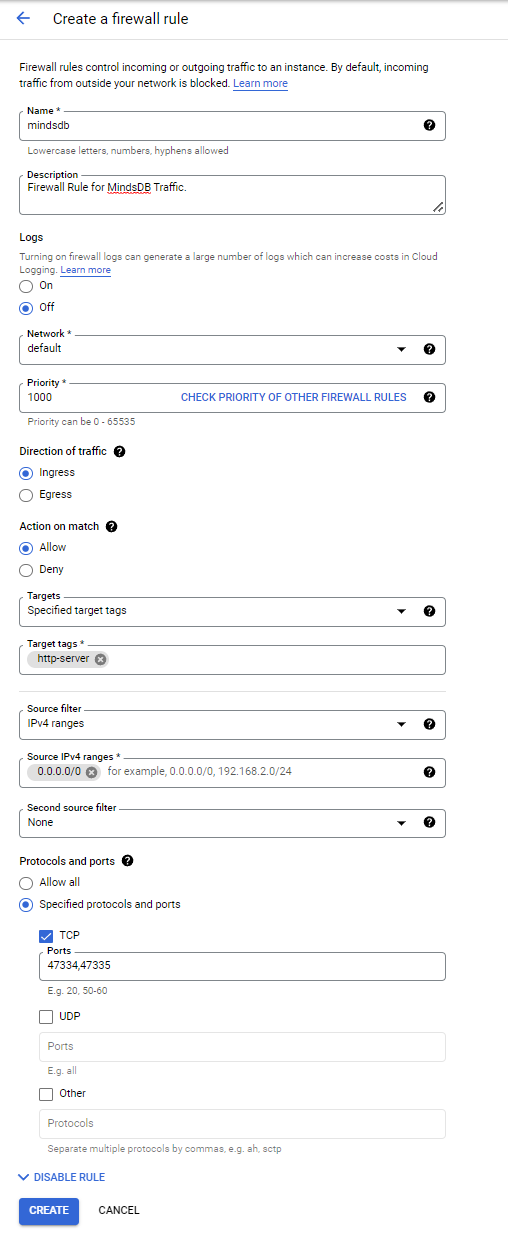
Now use the following values to set up and create the rule.
- Name: Provide a name as you wish.
- Description: Provide a description if you want to.
-
Logs: Select
Off. -
Network: Select
Default. - Priority: 1000
- Direction of traffic: Ingress
- Action on match: Allow
-
Targets: Select
Specified Target Tags. -
Target-tags: Type
http-server. -
Source filter: Select
IPv4 ranges. - Source IPv4 ranges: 0.0.0.0/0
- Second source filter: None
-
Protocols and ports: Select
Specified protocols and ports- Check on
TCP. - Ports: 47334,47335
- Check on
We can now click on Create to use this firewall rule on our instance.
Step 6: It's time to now try and access the MindsDB GUI. We can do that by hitting the external IP of the instance on the port 47334. This should open up the MindsDB GUI for us.
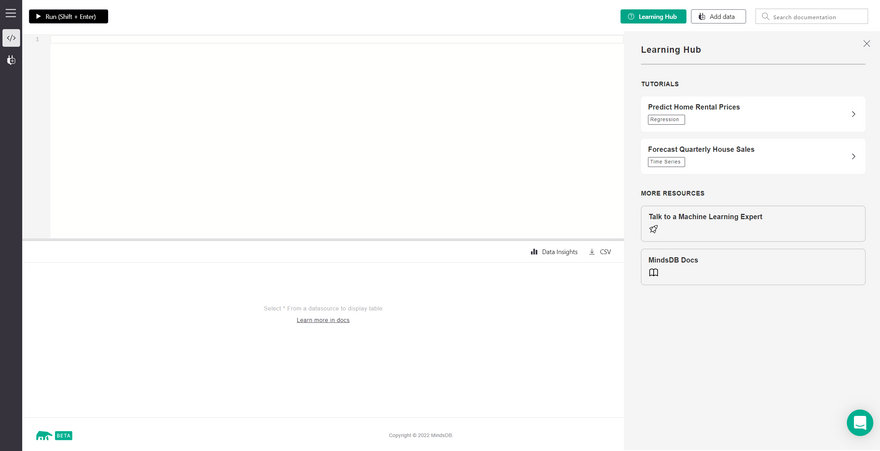
As we can see, the MindsDB GUI has a SQL Editor at the top, a result viewer at the bottom and a bunch of learning hub resources on the right of the screen.
Note: We don't need to use
sudobefore each command if we are logged in to the instance as therootuser.
Exploring the Tables in MindsDB
As we are already done deploying our MindsDB instance on the compute engine, now let us try to explore the tables that are present by default when we install MindsDB.
We can simply run this command in the GUI SQL Editor to list the available tables.
Show tables;
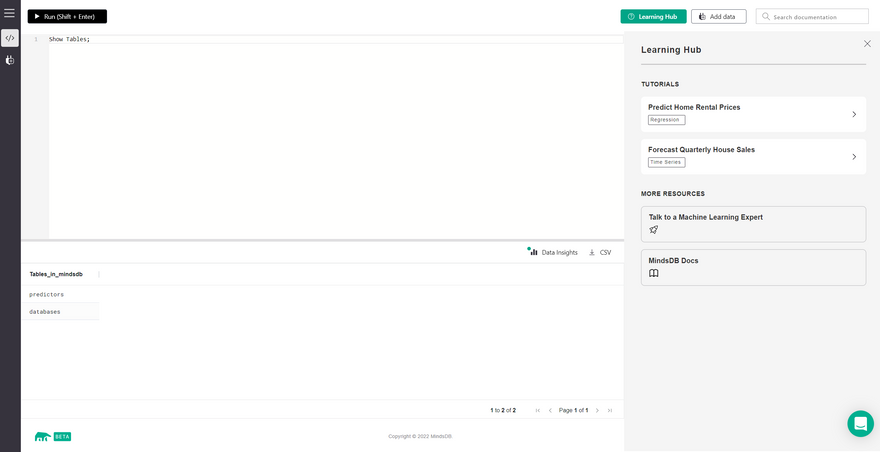
We can see that there are two tables namely, Predictors and Databases.
The Predictors table stores the predictor models that we train as an individual record. Each of its column contains specific details about the respective predictor model.
The Databases table contains the list of databases that are connected to the MindsDB instance.
Conclusion
We have now reached the end of this tutorial. So, it's time to recollect what we just did above sequentially. We initially created a compute engine instance, deployed MindsDB on top it, created a firewall rule to allow the incoming traffic for MindsDB and finally explored the MindsDB Web UI and tables that are present by default.
Now it's time for you to play around with your own MindsDB instance on a Compute Engine and come up with interesting Predictor models to try and test the robustness of MindsDB. MindsDB also provides its own cloud version which you can use here.
Lastly, before you leave, please drop a like if you found this tutorial helpful and don't forget to key in your feedback as well.
Note: All the dashboard images are sole properties of Google Cloud Platform and MindsDB respectively and are used here only for illustrative purposes.


Top comments (0)