It’s Holiday Card season! But my hand hurts just thinking about addressing all those envelopes, and I can’t remember the last time I bought stamps…let’s be real, ain’t nobody got time for that.
Fortunately, I happen to work for a company that sends direct mail programmatically. Many developers integrate with Lob using one of our SDKs in their preferred programming language, but we recently launched our low-code Campaigns and I thought I’d give it a whirl.
The following is a step-by-step tutorial so you too can create your own full-color 6”x9” holiday postcard (to be printed and mailed by Lob) for under a dollar each.
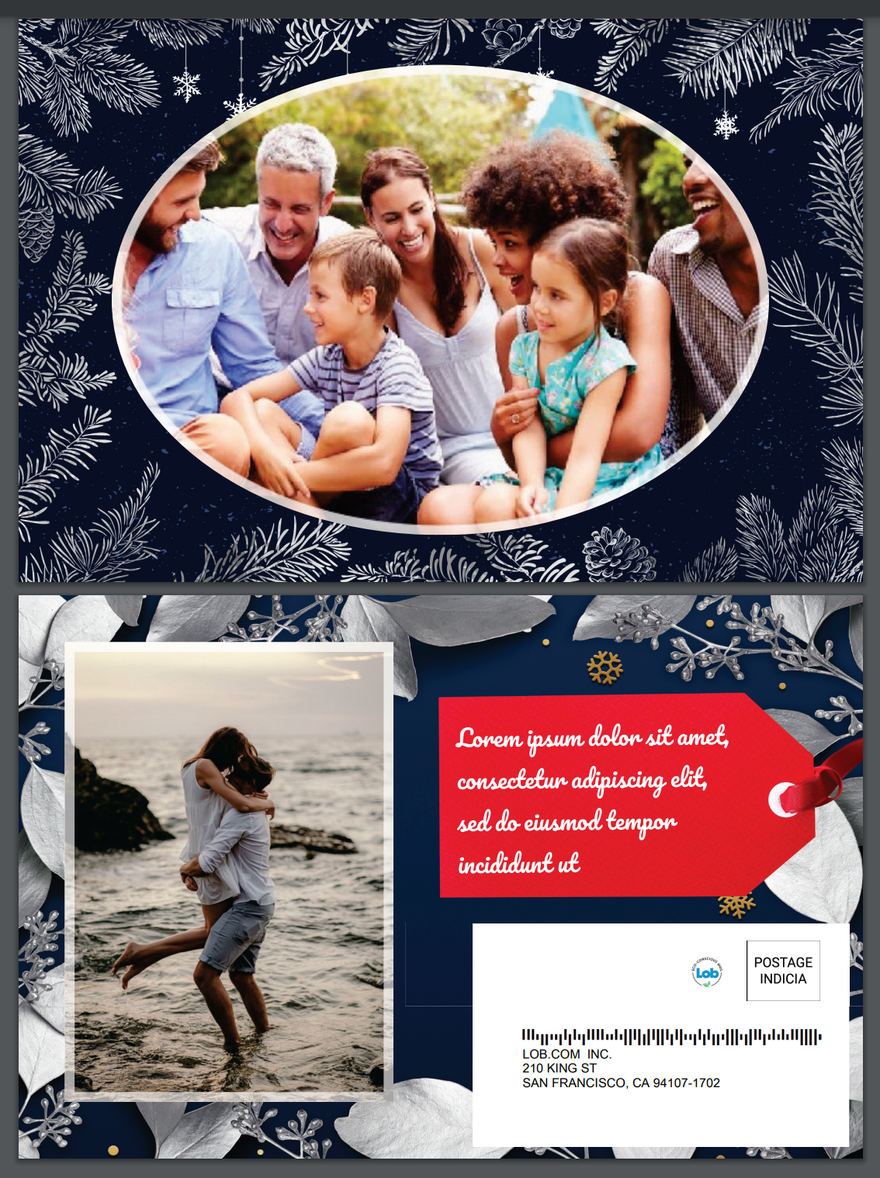
Here is a sample of the postcard we will create.
Select and prep your photos
Choose two of your favorite photos: one landscape (for the front), one portrait (for the back). Use your photo editing tool of choice to format each correctly; I used Preview on my Mac. To ensure that they scale proportionally and print at the highest quality they should be 5x7 inches (2100 pixels x 1500 pixels in landscape or 1500 pixels x 2100 pixels in portrait) and at a resolution of 300 pixels per inch. (If you need more support on this part, and/or are snagging photos from your iPhone, see the Appendix.)
You will then need to host your images somewhere; I used a free account at imgbb.com.
Prep your data
You will then need to bring up the HTML for the front and back of the postcard. Click each link and view the HTML; we’ll use it in a later step).
Next, you will prep your address data. Make a copy of this spreadsheet and input your data:
Do not modify or add any column headers!
Add the full name in the
namecolumnAdd the address data (make sure that leading zeroes aren’t being dropped and that the state code is used)
Replace the “Lorem ipsum” in the
messagecolumn with your own personalized message. Make sure that the message fits within the space by being shorter than the placeholder examples (about 65 characters) You can test your holiday card messaging HEREAdd the links to your front and back images to every row in the
image_frontandimage_backcolumns (should look something like this: https://i.ibb.co/fpJ84Js/front.png)Download and save your address file as a .csv.
Create your HTML templates
Now you are ready to create your postcard templates in the Lob dashboard.
First you will need to sign up for a free Lob account.
Once you have registered you will be taken to the dashboard. In the Developer tier there is no cost to test out the Print & Mail APIs, but if you want to send live requests—and have a postcard printed and mailed—it will run you $0.896 a pop.
Payment information can be entered here: Your name (top right) -> Settings -> Payment
Create & save HTML templates for the Front and Back of your postcard
On the left menu bar, Navigate to HTML Templates.
Make sure Live is highlighted!
Click on ‘Create’
Name this ‘Front Template’ and paste in the HTML code for the front. Click ‘Create’ to save.
On left menu, click HTML Templates to go back to main template screen. (You should see your new Front template there under Live templates.)
Once again, ensuring Live is highlighted, click ‘Create’ again. Name this ‘Back Template’ and paste in the HTML code for the back. Click 'Create' to save.
Click HTML templates to go back to main template screen; you should see your new Back template there under Live templates.
** Make sure you see both templates are listed when Live is highlighted before proceeding.
Create and send your postcards
On the left menu bar, navigate to Campaigns; click on “Create Campaign”
Step 1: Configure Campaign
- Enter a Name and Description
- Campaign Type: Marketing
- Mail Type: Postcard; Size: 6x9
- Postage references: Return address is not required; Select postage: Up to you, note the listed expected delivery times
- Cancellation Window: This is set at 5 minutes; you will not have the option to edit on a Developer plan
- Campaign-Level Metadata: Optional
Step 2: Add Audience
Upload your CSV file (created during prep stages), or drag and drop it into the dashboard
Map required address variable: These are mapped automatically.
Step 3: Choose Creative
Under ‘Postcard Front’, select the HTML Template you created from the dropdown menu. (Note a preview will not show your images or messages as they are not mapped yet)
Under ‘Postcard Back’, select the HTML Template you created from the dropdown menu. (Note a preview will not show your images or messages as they are not mapped yet)
Connect your creative to your audience:
Merge variable strictness: Ignore;
Connect/map your merge Variables from HTML to the appropriate column in the CSV: {img_front} to img_front, { img_back} to img_back, {message} to message
Step 4: Review Campaign
If something is not correct, click ‘Previous Step’ to edit. The free Developer tier does not allow you to edit cancellation windows. That said, once you place your order, after 5 minutes, the live request will be sent to Lob. Your postcards will be created and mailed, and you will be charged.
If all looks correct, click ‘Place Order’ and your holiday cards will be on their way! You can view your cards under Campaigns in the Lob dashboard.
Wrap up
Lob was started by two developers who needed to solve a problem, and direct mail APIs were the answer; the goal was to make sending mail just as easy as sending an email. This is a fun personal use case, but Lob is meant to automate direct mail—postcards, letters, checks, self-mailers, and more—at scale. Just like email, each mailpiece can be highly personalized, and for advanced tiers, Mail Analytics is available for each mailpiece to track each postcard along its journey to delivery (and if you included a QR code, you could even track open rate). Check out Lob.com if you want to learn more.
Appendix: How to prep a photo
Email/Download a photo from your iPhone onto your computer. The following steps are shown in the Preview app (Mac) but are a good guideline for any editing program.
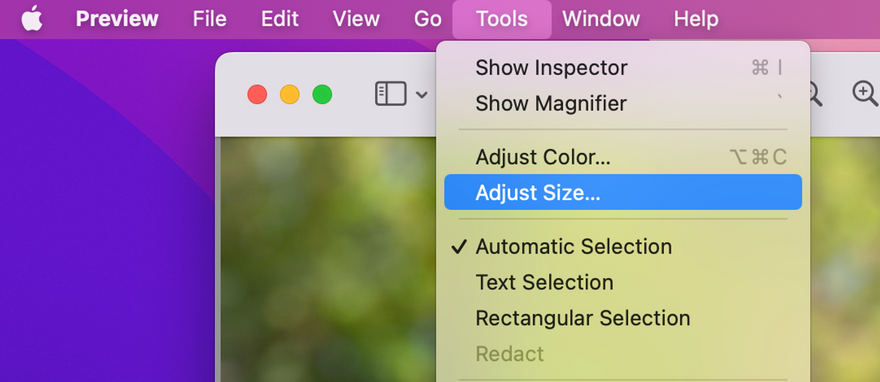
Select your back photo (portrait orientation). Under Tools, select Adjust Size.
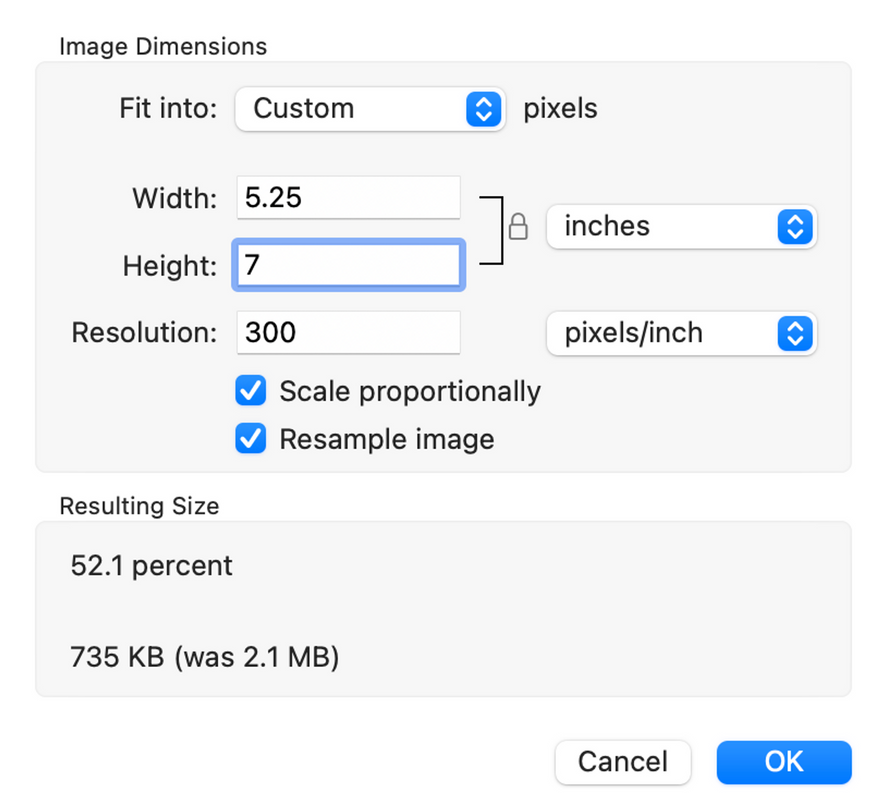
Change Resolution to 300 pixels/inch.
For this photo (portrait orientation): Change Width to 5 inches; and Height will automatically change. Alternatively, update the Height to 7 inches, and the Width will change. It’s highly likely you won’t end up with a perfect 5x7; that’s ok: Change the field that results in one of the measurements being slightly too big; you will crop in the next step).
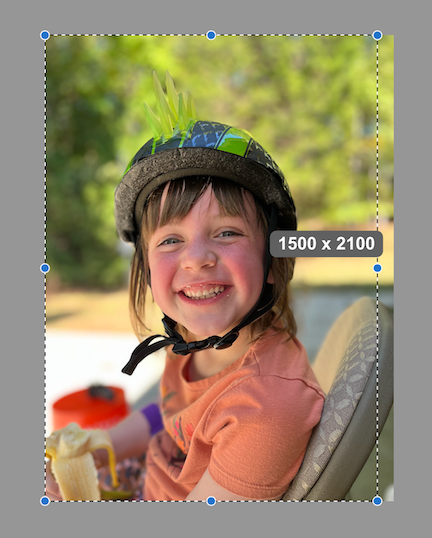
- Under Edit, Select All. Drag the dotted line to crop the image to the necessary 1500x2100 (as you move the line, the measurements will display; exaggerated below).
Under Tools, Assign Profile select Generic RGB. (Photos must be saved as RGB.)
Make sure your photo is named clearly as the BACK. Save!
Repeat these steps for **the FRONT photo, but in landscape orientation (7” wide x 5” high, 2100 pixels x 1500 pixels).


Top comments (0)