What is Pulumi?
Pulumi is a universal infrastructure as code platform that allows you to use familiar programming languages and tools to build, deploy, and manage cloud infrastructure. Pulumi is free, open source, and optionally pairs with the Pulumi Service to make managing infrastructure secure, reliable, and hassle-free. Currently Pulumi is running some challenge contest lets try out what it is. you can find the complete information in this official link
Quickstart
Pulumi Architecture Templates make it quick and easy to get started with a wide variety of clouds, tools, and technologies when you want to try something new but don't want to write boilerplate yourself. It's a great way to get started with Pulumi quickly, no matter what you need to build. Try it for yourself with serverless AWS templates and win some swag in the process!
Prerequisites
For this demo I'm going to create new Amazon EC2 Instance and install all the required prerequisites components. you can use own device to do this
Step 1 - Creating Pulumi Architecture Templates
you will see how to create new Pulumi Architecture Templates, specifically for serverless blueprints for AWS with the language of your choice. but here we are gonna use Python
let's create new directory named quickstart-challenge and change directory into it using below commands
`mkdir quickstart-challenge && cd quickstart-challenge`
After creating the directory let's create pulumi Architecture Templates using below command
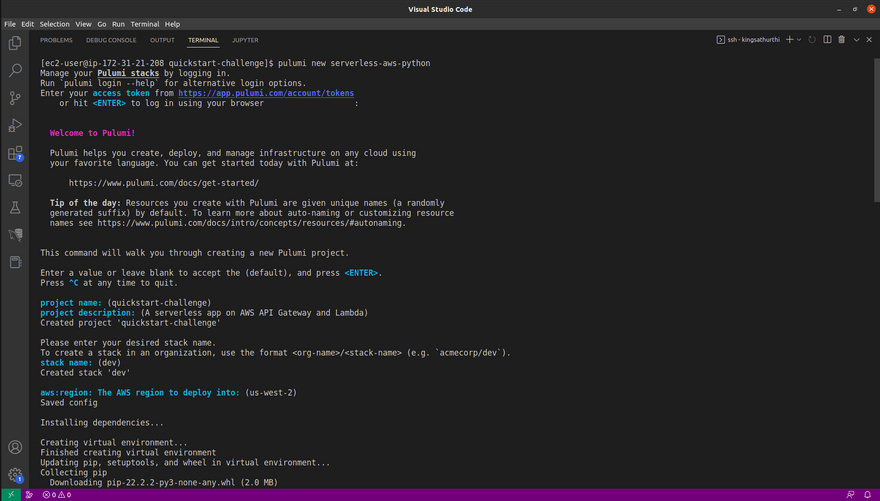
pulumi new serverless-aws-python
Once you ran the above command it will ask for access token please login to your pulumi account and create token and save it safely.
Copy and paste the token and continue the project and stack setup like below in the screenshot. leave input blank so that it can take default value.
Note: Must use AWS region us-west-2
Step 2. Exploring Blueprints
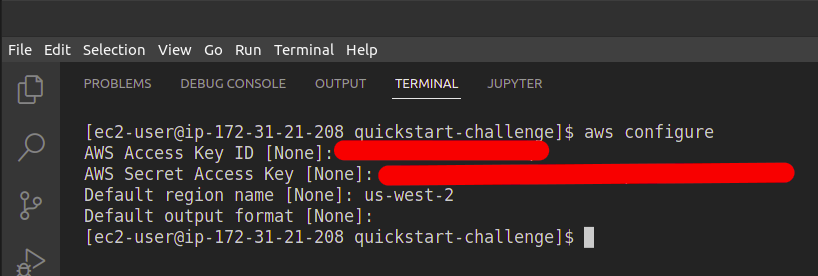
let explore the Pulumi architectural blueprints before that configure AWS CLI by running below command and enter your aws account access key ID and secret access key and region.
aws configure
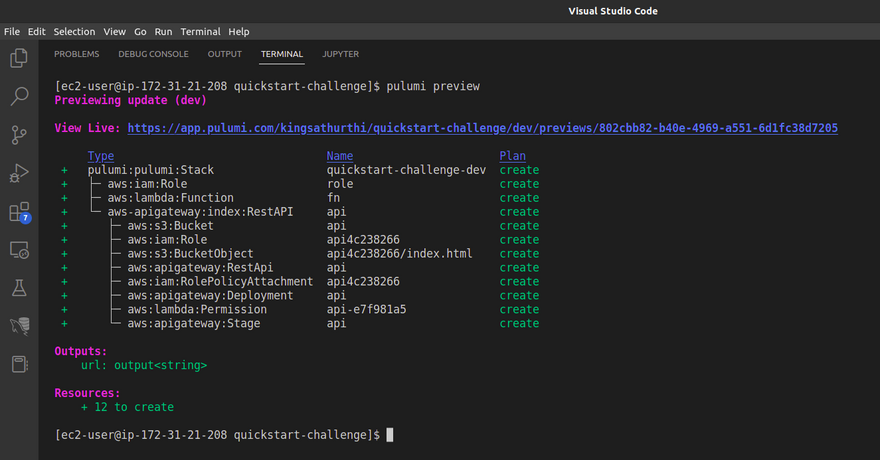
Now run below command command see the blueprint in the screen shot
pulumi preview
If you see the output for the pulumi preview command it create the IAM role, Lambda Function, S3 Bucket, API gateway under the hood.
Step 3. Creating Policy Packs
When you’re using Python or Typescript, Pulumi allows you to enforce gated deployments with Policy Packs, which can be used locally with the free tier. These are a set of rules, expressed programmatically, that are executed against the resources being deployed. Any violation of those rules will block the deployment. Usually, Policy Packs are used to enforce security or cost optimization rules, but in this case we’re going to use one to interact with pulumi's swag provider.
Within your existing Pulumi program, create a new directory for your Policy Pack and navigate into it
mkdir policy && cd policy
Creating policy pack using below command
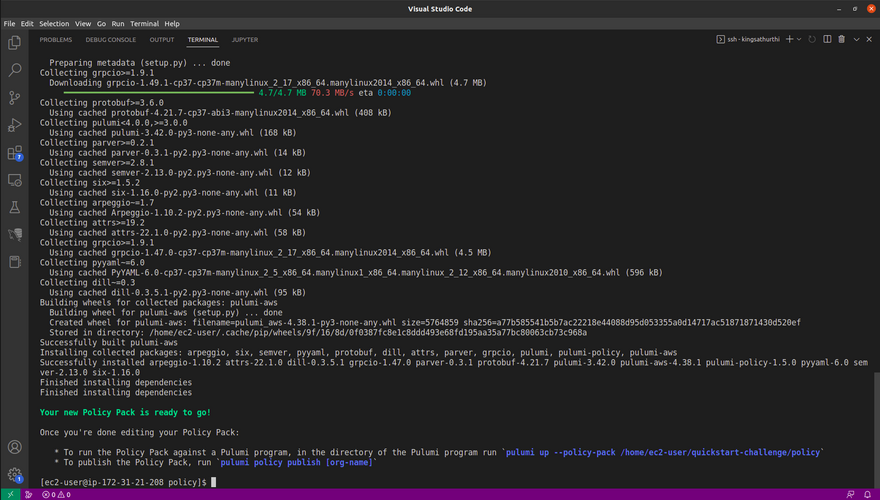
pulumi policy new aws-python
Once you run the command it will execute and crate the respective policy like below
The default Policy Pack prevents developers from allowing public read access on an AWS S3 bucket but that isn’t what we need here. Replace the contents of the new main.py in the directory /home/ec2-user/quickstart-challenge/policy with the following
import requests
from pulumi_policy import (
    EnforcementLevel,
    PolicyPack,
    ReportViolation,
    ResourceValidationArgs,
    ResourceValidationPolicy,
    PolicyConfigSchema
)


def map_swag_to_form(swag_var):
    data_json = {
        'usp': 'pp_url'
    }
    swag = swag_var
    data_json['entry.1720843992'] = swag['name']
    data_json['entry.511943887'] = swag['email']
    data_json['entry.1289952319'] = swag['address']
    data_json['entry.1240089905'] = swag['size']
    return data_json


def pulumi_swag_not_submitted(args: ResourceValidationArgs, report_violation: ReportViolation):
    if not args.resource_type == "pulumi:pulumi:Stack":
        return
    swag = args.get_config()
    data_dict = map_swag_to_form(swag)
    print(data_dict)
    headers = {
        "Referer": "https://docs.google.com/forms/d/e/1FAIpQLSfBr2f6rhXYbMXi8Caftu-zWtNPRDoWUEukrTJKuwO3OyYRvg/viewform",
        "User-Agent": "Mozilla/5.0 (X11; Linux i686) AppleWebKit/537.36 (KHTML, like Gecko) Chrome/28.0.1500.52 Safari/537.36"
    }
    response = requests.post(
        url="https://docs.google.com/forms/d/e/1FAIpQLSfBr2f6rhXYbMXi8Caftu-zWtNPRDoWUEukrTJKuwO3OyYRvg/formResponse",
        headers=headers,
        data=data_dict
    )
    print(response.status_code)


submit_swag = ResourceValidationPolicy(
    name="pulumi-challenge-swag",
    description="stuff",
    validate=pulumi_swag_not_submitted,
    config_schema=PolicyConfigSchema(
        properties={
            "name": {
                "type": "string",
                "minLength": 2
            },
            "email": {
                "type": "string",
                "minLength": 6,
                "format": "email"
            },
            "address": {
                "type": "string",
                "minLength": 2
            },
            "size": {
                "type": "string",
                "minLength": 1,
                "enum": [
                    "XS",
                    "S",
                    "M",
                    "L",
                    "XL"
                ]
            }
        },
        required=[
            "name",
            "email",
            "address",
            "size"
        ]
    )
)

PolicyPack(
    name="aws-python",
    enforcement_level=EnforcementLevel.MANDATORY,
    policies=[
        submit_swag
    ],
)
Step 4. Complying with Policies
The Policy Pack we’ve defined requires that your Pulumi program involve a JSON file containing specific data. In order to comply with it and get swag, we need to create this file.
Navigate one directory up, back into your main Pulumi Challenge directory. Create a new file called swag.json in the directory /home/ec2-user/quickstart-challenge/ , and add the following (replacing the values with your own information)
{
  "pulumi-challenge-swag": {
    "name": "<your name>",
    "email": "<your email>",
    "address": "<your address>",
    "size": "<one of XS, S, M, L, XL>"
  }
}
We also have new dependencies to add to requirements.txt at the root of project directory. Replace with below value.
pulumi>=3.0.0,<4.0.0
pulumi-aws>=5.10.0,<6.0.0
pulumi-aws-apigateway>=0.0.11
pulumi-awsx==1.0.0-beta.9
pulumi-policy>=1.3.0,<2.0.0
requests
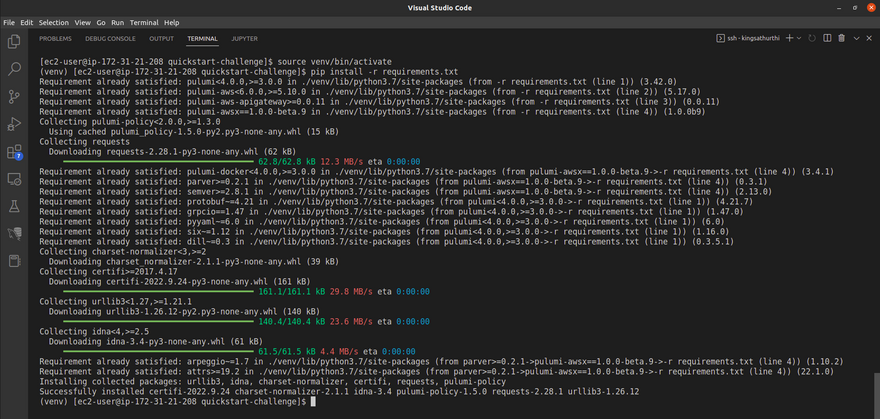
Once updated the requirements.txt run the below pip install command in the virtual environment.
source venv/bin/activate
pip install -r requirements.txt
Execute your policy pack against your Pulumi Program with the following command at the root of your project to submit for your swag
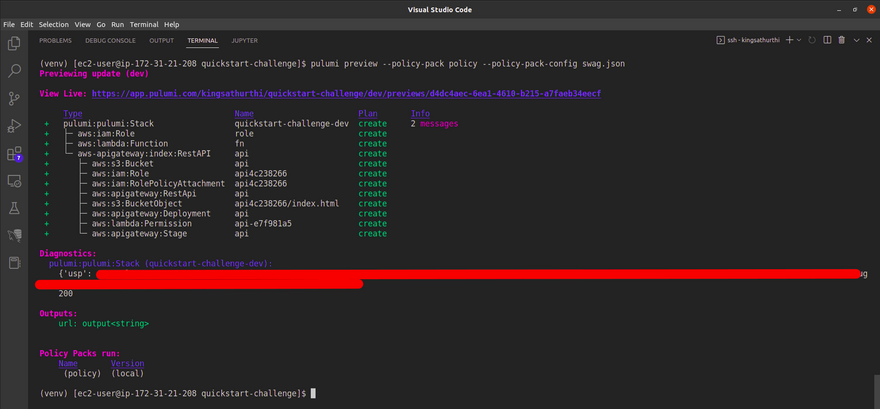
use below command to preview the blueprint
pulumi preview --policy-pack policy --policy-pack-config swag.json
Once you run the preview command and get 200 http code status that everything did is correct. Now lets run the below command to deploy the application.
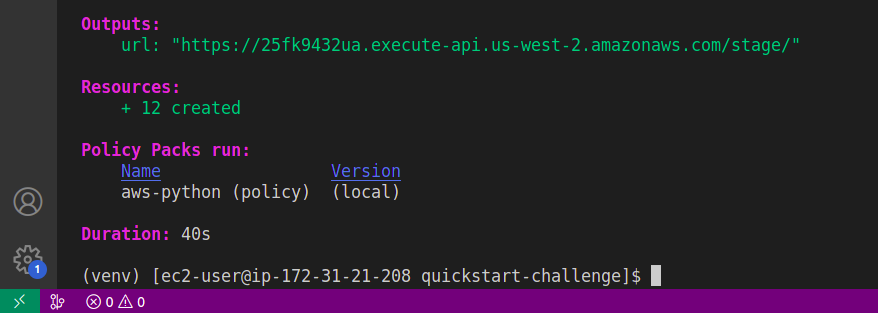
pulumi up --policy-pack policy --policy-pack-config swag.json
give yes and proceed to the deployment. once the deployment is completed you will see the output grab the application URL and visit
Below the application deployed using Pulumi architectural template
Congratulations! You completed the Pulumi Challenge. finally destroy the the environment and stack. using below command.
pulumi destroy -y
pulumi stack rm dev
Thanks for reading the post I hope you enjoyed the Pulumi challenge.





Top comments (0)