Introduction
At my day job, we first started using public cloud back in 2015, and at the time we were really just starting to crawl with cloud financials. Our finance department was not a fan of chargeback and as a result we ended up partnering with a third party reseller to help us with our cloud billing. We built a complicated system where we leveraged the reseller for consolidated billing, and each business team would issue a separate PO to the reseller for their AWS usage. The reseller was using a commercial tool called CloudHealth to slice and dice our bill and generate 70+ invoices each month back to us for each team.
Fast forward to the second half of 2021, and at this point our increased maturity around managing public cloud meant that it was time to start walking on our own and bring the cloud billing in-house. In April 2022 I wrapped up a six month project that had three main objectives:
- Develop and implement new internal tools to replace the capabilities of CloudHealth
- Design and implement a new cost allocation scheme for our AWS and GCP bills
- Negotiate a new EDP with AWS and migrate away from the third party reseller.
The result? A lot less paperwork in the form of purchase orders, invoices, and payments, more transparency on AWS costs for our account holders, and stronger FinOps muscles for our team.
Part of my solution was to implement the CUDOS Cost Intelligence Dashboards to replace the reporting capabilities of CloudHealth. You can also read about how I implemented CUDOS for my enterprise by reading these earlier blog posts:
Implementing CUDOS for the Enterprise – Part 1
Implementing CUDOS for the Enterprise – Part 2
In this post, I’m going to talk about our solution for creating a chargeback report for allocating our AWS spend back to business groups. I will provide a deep dive into the AWS Cost Categories tool, which we are using for cost allocation. I’ll talk about how it works, how we are using it at my company, and some of the lessons learned along the way.
AWS Cost Categories
AWS Cost Categories is a feature within AWS’ Cost Management suite that allows you to group cost and usage information into meaningful categories based on your needs.
You can map AWS charges in whatever way makes the most sense for your business, for example business units, environments, product lines, etc. In our case, we were primarily looking to catagorize charges based on internal cost centers defined by our Finance group.
After you create these cost categories, they become part of the Cost and Usage Report and are thus available for use in other parts of the Cost Management suite like Cost Explorer, AWS Budgets and my personal favorite the CUDOS Cost Intelligence dashboards.
Implementation
So how to get started?
First, think about what categories might make the most sense for your organization. Your groupings should align with whatever dimensions you are looking to aggregate your spend data For my situation, our primary grouping was Cost Center.
Also be aware that you can build as many different cost categories as you like. Maybe you want cost center and business group and product line…no problem. There is a limit of 50 categories per payer account but there is no charge for this service
Creating your Cost Category
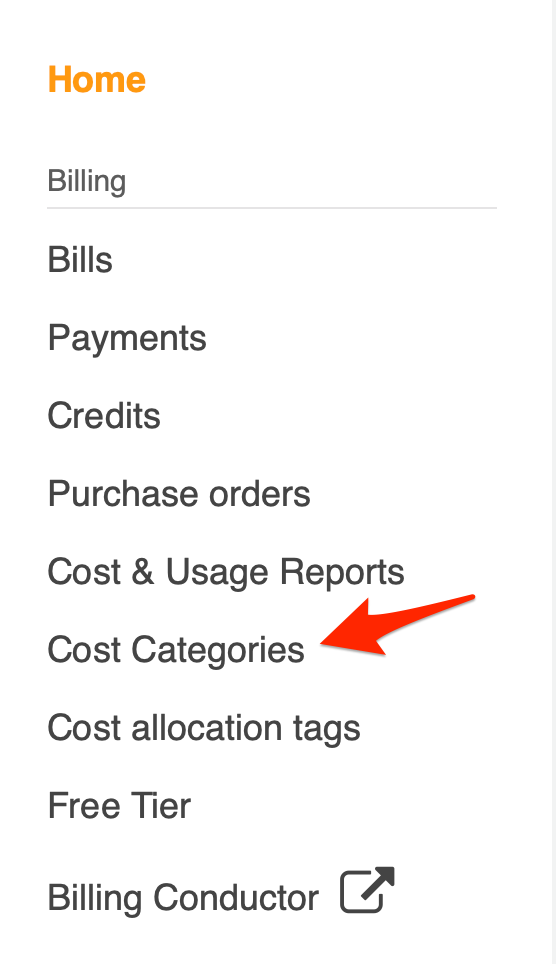
Start by logging into your payer account and navigating to the Billing Dashboard. From there choose Cost Categories from the menu on the left hand side:
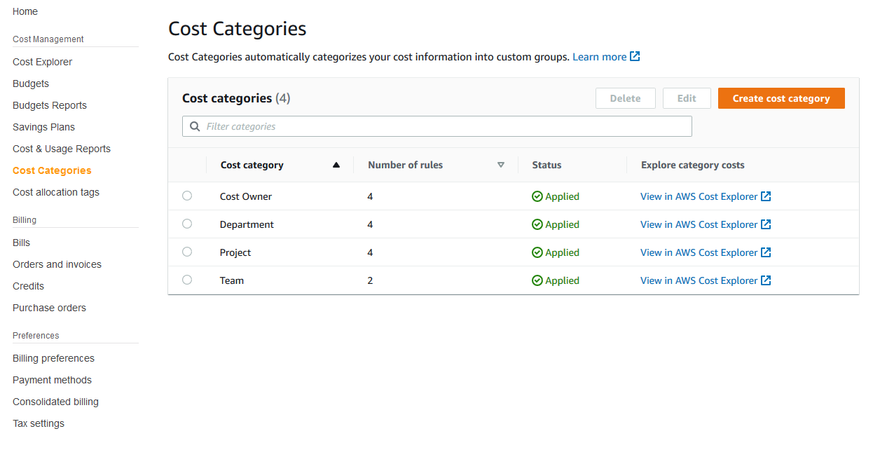
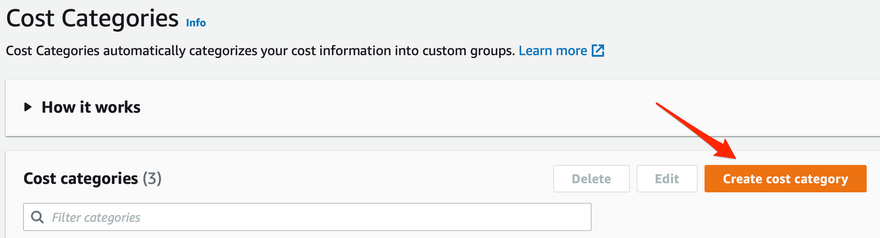
You will be taken to the Cost Categories home page. To create your new Cost Category, click the orange Create Cost Category button, which will launch the Cost Category creation “wizard”.
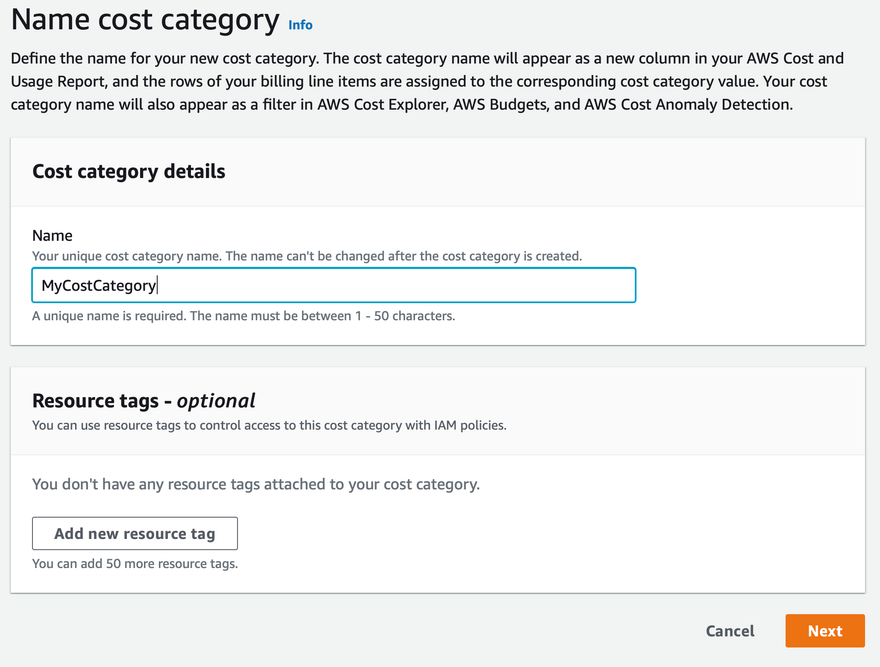
Step 1 – Name
Step 1 of this wizard is to give your Cost Category a meaningful name, e.g. Cost Center, and apply any desired tags to the Cost Category. Then click Next to proceed to the next step of the wizard.
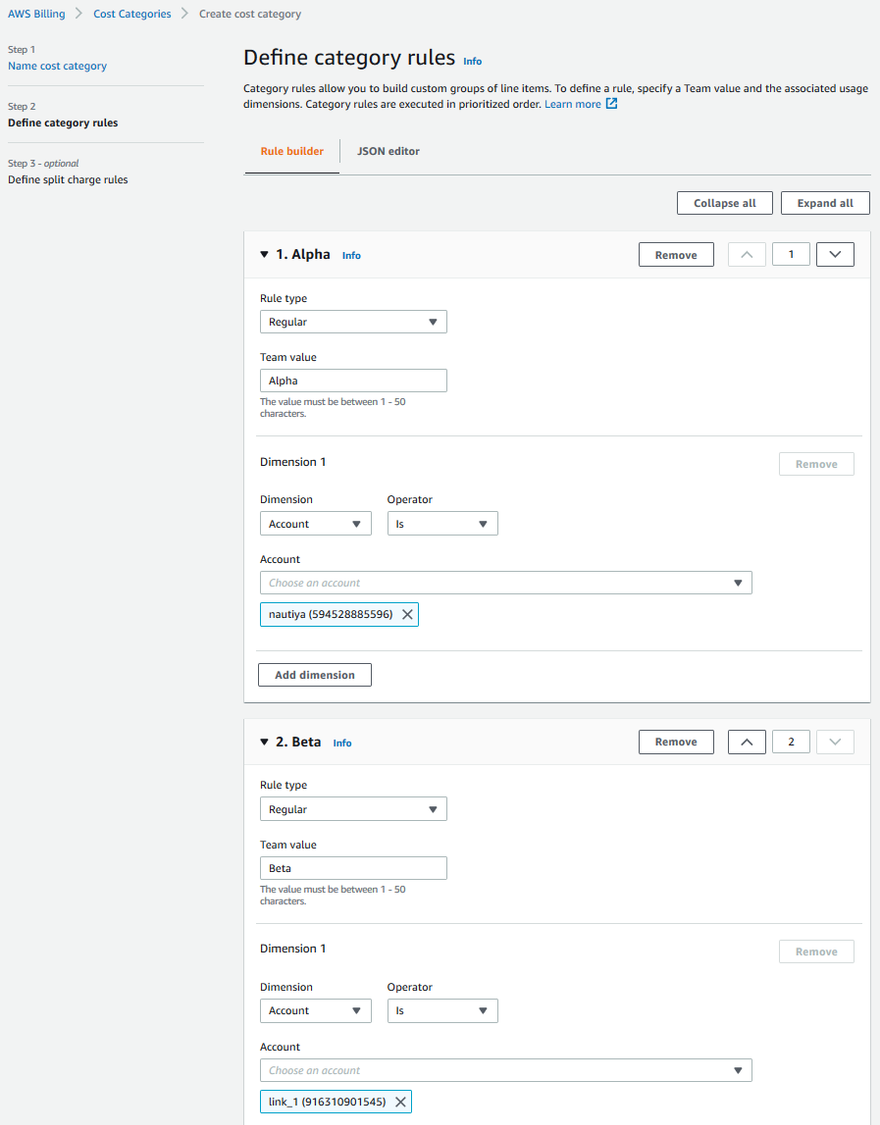
Step 2 – Define Rules
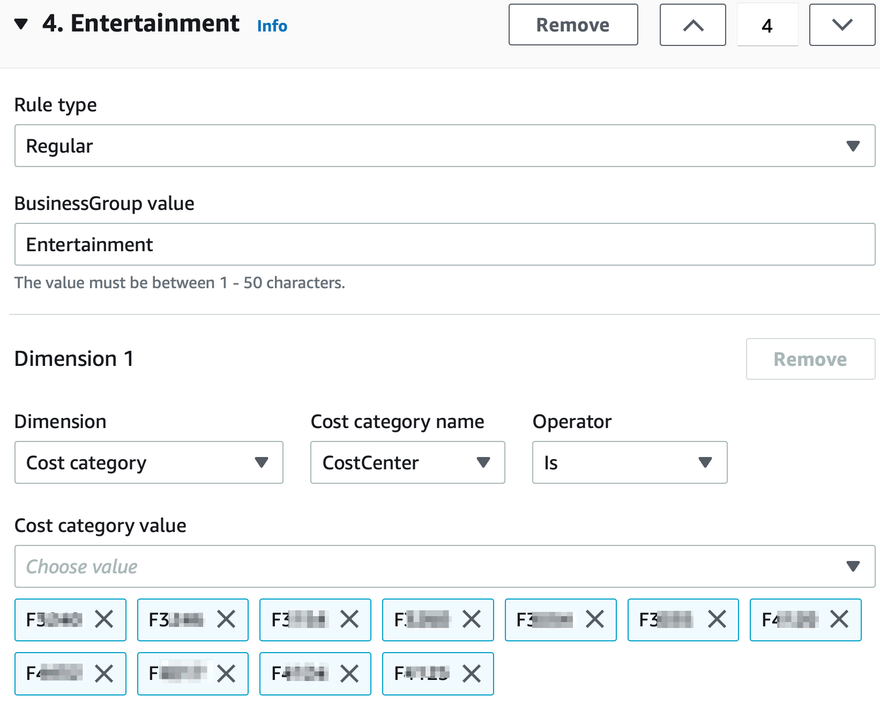
Once you’ve created your new category, you then need to define rules for how the tool will categorize your cost. The workflow is pretty simple: you create your category values, and then define rules for each value. Rules determines which charges will be assigned to that category.
These rules can be based on several different dimensions like AWS account, a specific AWS service or charge type, a tag, or even other cost categories.
Rules can also have multiple dimensions in them, for example “all charges from account X for AWS S3”. You can have up to 100 rules per cost category and they are executed in priority order from top to bottom. At the bottom of the ruleset you can also define a Default category to capture any charges that are not captured by your defined rules. I recommend you do this to avoid any uncategorized charges.
For my use case the requirements were pretty simple, I built my cost center category based on AWS account boundaries, each cost center value had one or more AWS accounts assigned to it.
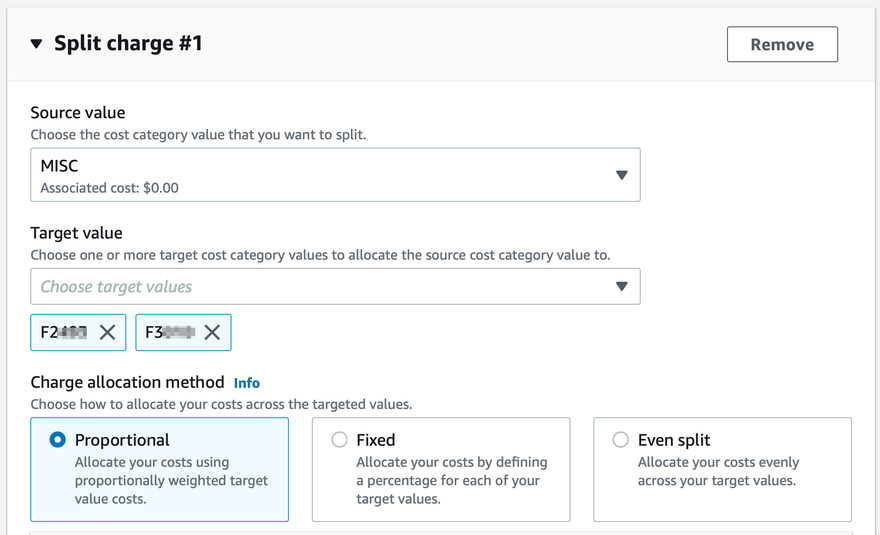
Step 3 – Define Split Charges
If you want to take a specific service charge and spread it across multiple categories, you can leverage the split charge feature. To achieve this you define a category rule to capture the charges that you want to split, and then use split charge rules to decide how you want the charges to be spread across all the remaining categories. You can read more about this particular feature in the AWS user guide on the topic.
Save and Finish
Once you have finished defining all your category rules and (optional) split charge rules, click the orange Save Changes button to finish creating your cost category. You will be returned to the Cost Categories home page and your new Cost Category will show a status of Processing while the service crunches through your CUR data. When finished, the status will change to Applied. The time it takes to show a status of Applied very much depends on how many accounts you have and where you are in the billing cycle for the month. In my environment I find it can take anywhere from 6-10 hours for a category to change from processing to applied.

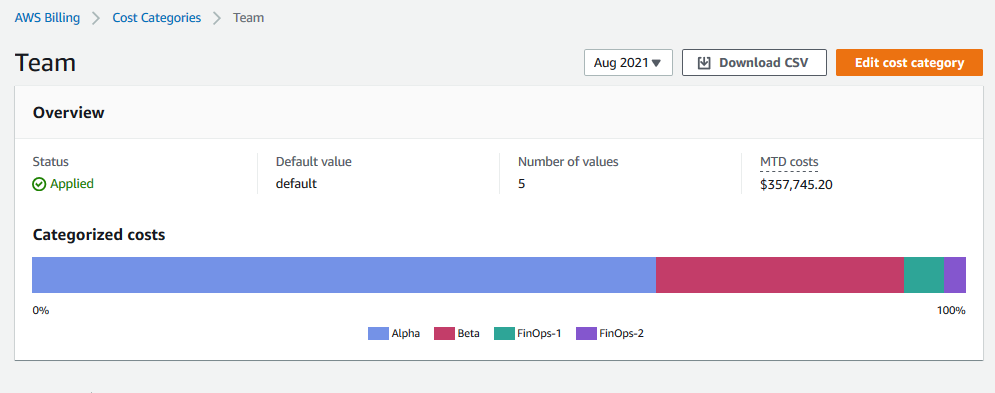
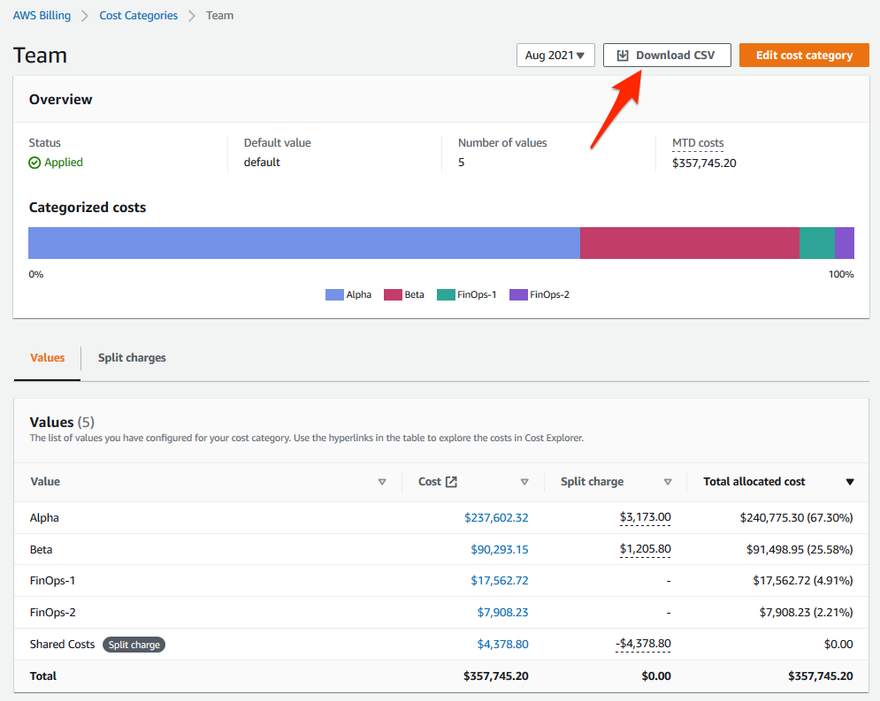
Viewing Cost Category Data
Once your cost category shows a status of applied, you can then view it in the cost categories console. Simply click on the cost category you wish to view. On the resulting page you are presented with a graphical overview of the category distribution, a table with absolute amounts and percentage breakdowns for every category as well as any uncategorized costs. Finally, you can download a CSV file for analysis with your spreadsheet tool of choice.
Caveat on Cost Categories reports
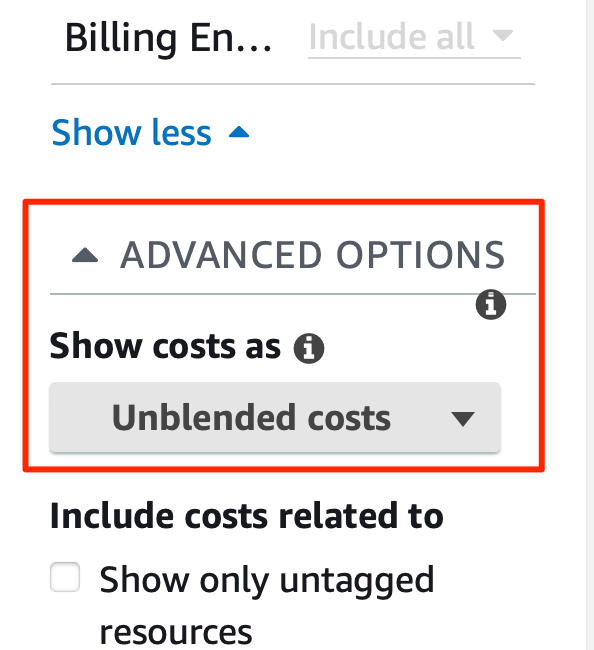
I want to call out one annoyance with the native Cost Categories reports that I discovered after I started using the tool. The reports that are shown in the cost categories console are all based on Amortized Charges rather than the Unblended costs that are on your AWS invoices. (Unclear on the difference? Check this blog post).
This caught me out when I first tried reconciling my cost categories report against my invoice. Most of my category values were off by a few hundred dollars from the invoice. I spent a week or so trying to figure this out before my AWS TAM let me know that Cost Categories is only capable of showing Amortized Charges. Sadly there is currently no way to change this inside the cost categories tool. You can bet I’ve got my name on a PFR to fix this though! I’ll talk about how I worked around this problem in the next section.
Tips & Tricks
Here are a few tips and tricks I’ve picked up over the past few months of working with Cost Categories that you might find useful.
Multi-level hierarchies
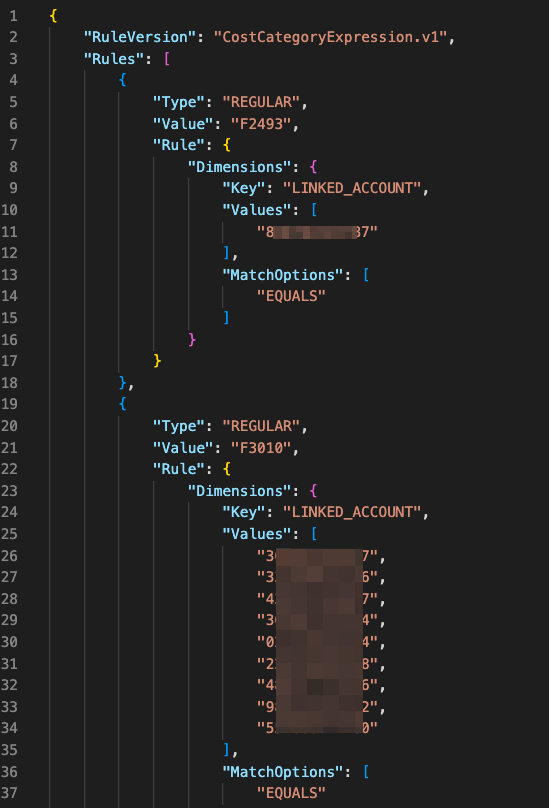
I mentioned before that one of the rule dimensions you can use in your category values is other cost categories. This allows you to leverage groupings you have already created to build hierarchical structures.. For example in my environment I built my initial “Cost Center” cost category based on AWS account values. From there, I built a new cost category called Business Group that grouped multiple Cost Centers together into each business group.
Cost Categories as Code
Once I had been working with cost categories for a while I started to find the graphical rule builder kind of tedious. I was happy to find that you also have the ability to edit your categories as a JSON file. This makes editing of your category rules a lot faster. Not to mention, it also gives you the option to place that JSON file in a version control system. From there, you can manage the ruleset like any other code in your environment. For you Terraform pros out there, cost categories is also supported natively in the Terraform AWS provider!
Cost Categories in Cost Explorer
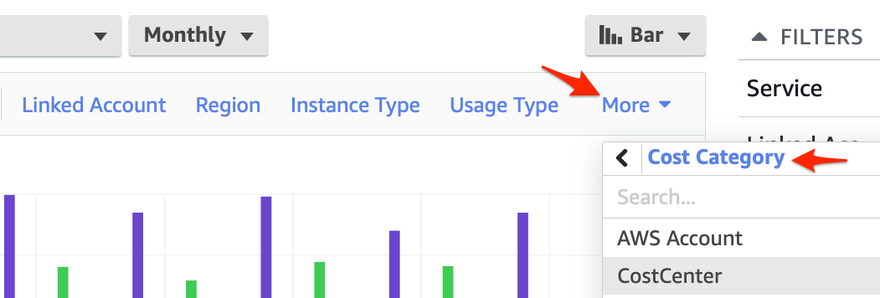
So as I mentioned before, once created Cost Categories become available for use inside of Cost Explorer. You can use it for filtering and grouping on spend data just like any other dimension available inside cost explorer.
I leveraged this capability to get around the amortized costs limitation of the native cost categories report. Cost Explorer allowed me to build a report that I could use for my monthly invoice reconciliation process. You can perform the following steps to get a downloadable file to use for cost allocation.
Use Cost Explorer to generate a monthly report grouped by my CostCenter cost category.
Make sure to go into advanced options and choose the setting to have cost explorer show costs as unblended costs.
Once you have the data the way you want it, use the Download CSV function to get a CSV file. From there, you can then use that file as input data for your cost allocation process.

Cost Categories and CUDOS
As I mentioned at the start of this article, once Cost Categories are created they become part of your CUR. As a result they become available for use in other AWS Cost Management tools. They can even be used by other third party tools that are leveraging the CUR. In my case this allowed me to bring my Cost Categories into the CUDOS Dashboard. As a result, I was able to use the CostCenter cost category I created to build new views into CUDOS. Below are some example screenshots where I’m leveraging Cost Categories to build new views of my CUR Data.
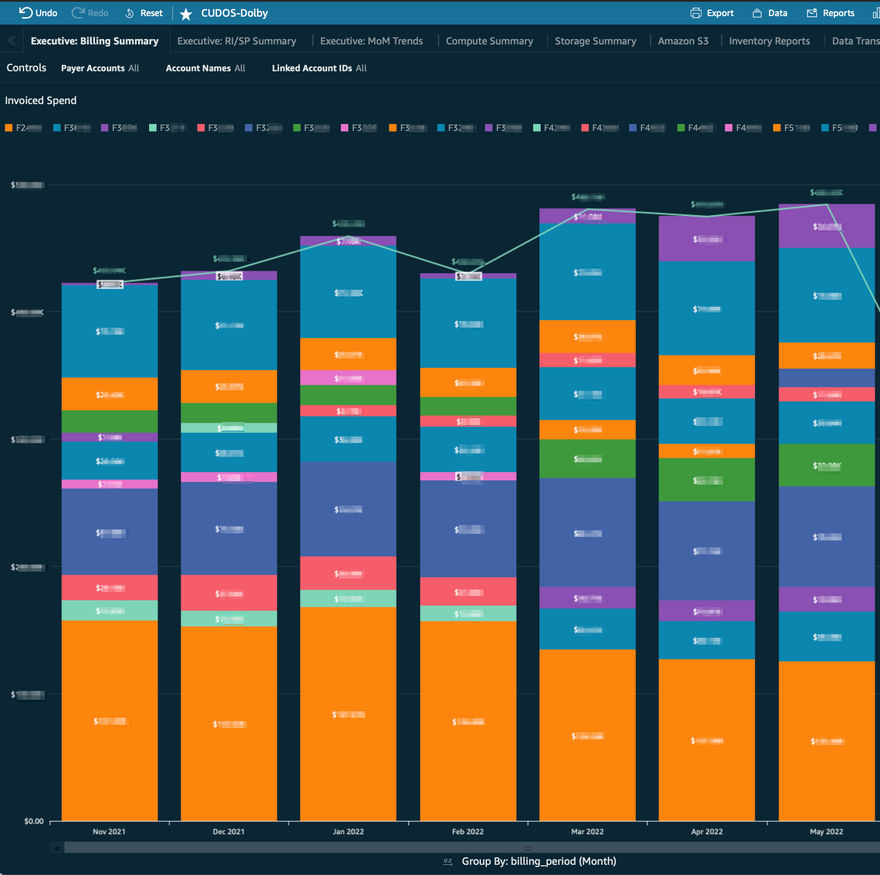
First is a view of monthly invoiced spend grouped by individual cost center. This allows you to see a month over month trend of how much each cost center is spending.
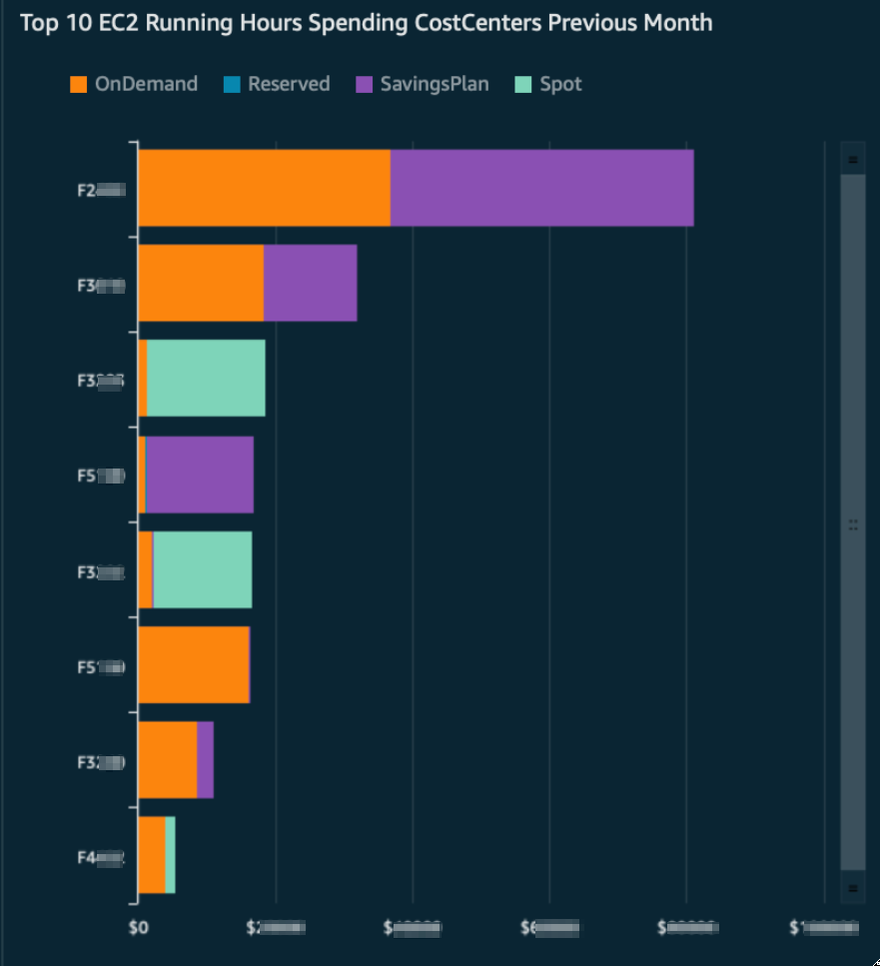
Here is a view showing EC2 running hours for the top 10 cost centers grouped by consumption type. In this way you can see how each cost center is performing with respect to targets for using savings instruments like reserved instances, savings plans, and spot instances.
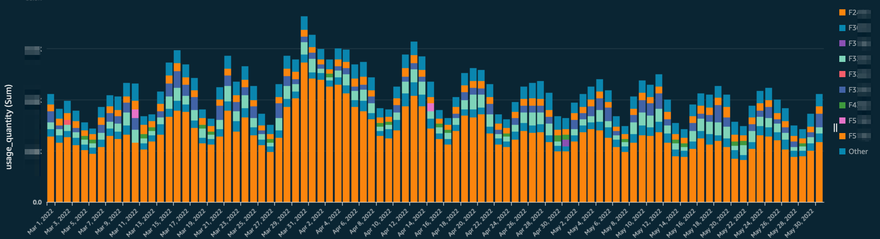
Finally, below you can see an analysis of daily data transfer out grouped by Cost center. This allows you to see which cost centers are responsible for the bulk of your data transfer out charges.
Conclusion
In this blog post, I’ve provided you with a dive into the AWS Cost Categories feature and how to set it up. I’ve also shared how we are using it in my company and some of the lessons learned along the way. You can leverage this feature to build your own chargeback reports based on whatever model makes the most sense for your organization. You can even use the split charges feature to take shared costs and spread them across different business units.
I hope you have found this post useful. Have you tried using Cost Categories in your environment? Please share your experiences or give me your feedback in the Comments section.
UPDATE - Cost Categories can now be Retroactive
An exciting update to the Cost Categories service was announced on September 27, 2022. Cost Categories now supports retroactive application of cost category rules. When creating a new cost category, you can apply cost category rules starting any month from the previous 12 months. Similarly, while editing a cost category, you can apply cost category rules starting any month from the previous 12 months. These changes will also be reflected in AWS Cost Explorer.
More details at this blog post.
References
AWS Cost Categories – Launch Blog Post
AWS Cost Categories User Guide
CloudyAdvice – Using AWS Cost Explorer for Forecasting
AWS Cloud Financial Management
CFM Talks Video – How to Design your AWS Cost Allocation Strategy

Top comments (1)
Using AWS Cost Categories makes it simple to see where your money goes in the cloud. You can group costs by projects or teams and make clear reports. This helps your team understand spending and manage budgets easily.