Over the last few years I have been interested by IaC (Infrastructure as Code), and started recently to use Terraform in my professional life. To keep practicing my Terraform skills I also started to use it for POCs and personal projects instead of using the portal.
Even if I had to push myself at the beginning, I now have a routine to initialize and manage my Azure resources that I will share in this post. It relies on Terraform Cloud that you can use for free !
What is Terraform and Terraform Cloud ?
This post is not a deep dive into Terraform, we will stick to the basics. But if you are very new to Terraform, I encourage you to browse the product website and follow a basic tutorial as it's the best way to know what the tool is about.
To better understand the differences between Terraform and Terraform Cloud, let's sum up the differences real quick:
- Terraform is the open-source CLI tool with the
plan,apply,destroycommands that can run anywhere (including on your machine or in Terraform Cloud) - Terraform Cloud is a SaaS offering to manage Terraform runs and states remotely
Is it free ?
Terraform CLI is open-source and free to use. Terraform Cloud is also free for teams up to 5 users, so it's perfect for pet projects.
Terraform Cloud has paid plans for larger organizations, and also a self-hosted version called Terraform Enterprise. That's not the topic of this post, but it's important to know how the company behind the tool makes money.
Create your Terraform Cloud workspace
Let's get finally to the point, shall we ? For this sample we will create an Azure Function App which will result in creating the following resources:
- A resource group
- An App Service Plan
- A storage account
- A Function App
- An Application Insights account (optional but always handy to monitor the app's telemetry)
Prerequisites
To do this we will need the following prerequisites:
- A Terraform Cloud account with an organization, to create one follow the guidelines from here
- An Azure subscription, a free one will be enough
- Azure CLI installed and connected to your subscription
Create your workspace
Once you have your organization (which represents your team) in Terraform Cloud, you will need a workspace (which represents your project).
Go to Terraform Cloud, select you organization, and click on the "New workspace" button.
On the next page you have to choose a workflow, choose CLI-driven workflow:
The CLI-driven workflow on the new workspace page
Using this workflow allows you to run Terraform commands from your machine, but they will run remotely in Terraform Cloud. It's the best of two worlds approach as you get the simplicity of running the commands from your terminal of choice, and you get the security of having the state stored remotely, and the runs are accessible in Terraform Cloud.

Give Terraform Cloud access to your Azure subscription
Next you need to connect your workspace with you Azure subscription. Start by creating a new service principal with this Azure CLI command:
$ az ad sp create-for-rbac -n '<SERVICE PRINCIPAL NAME>' --role Owner
Choosing a relevant name will be more helpful than the default azure-cli-datetime name. Specifying the Owner role is needed if you plan to assign a role to a resource, using a Managed Identity for instance.
The command will output a JSON object:
{
  "appId": "<A NEW GUID>",
  "displayName": "service-principal-name",
  "name": "http://service-principal-name",
  "password": "<A SUPER SECRET STRING>",
  "tenant": "<YOU TENANT ID>"
}
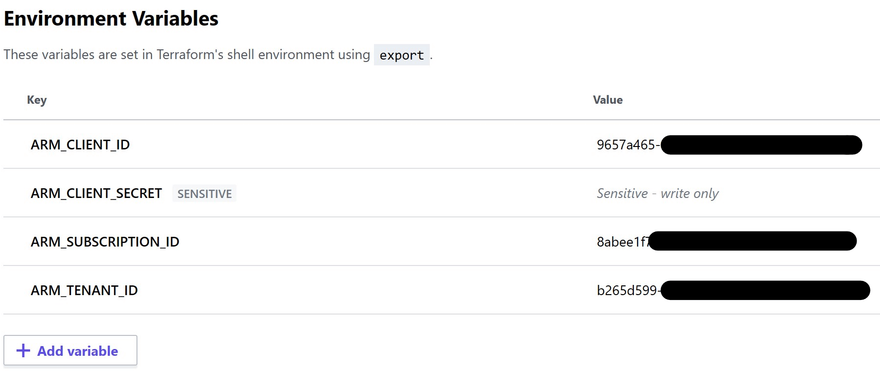
Then back in Terraform Cloud you need to create environment variables from the Variables tab of your workspace page:
-
ARM_CLIENT_ID: The Service Principal's id if from the previous command's output -
ARM_CLIENT_SECRET: The Service Principal's secret also from the command output (you should tick the Sensitive checkbox for this one) -
ARM_SUBSCRIPTION_ID: Your subscription id, you can get it with this command:az account show --query id -o tsv -
ARM_TENANT_ID: Your tenant id, also from the command output
You should get something like this:
Set a few variables for your project
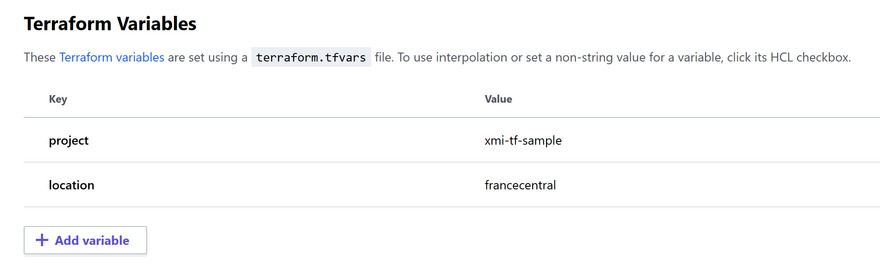
Still from the Variables tab of your workspace page, you need to create the following Terraform variables:
-
projectcontains a string used in the names of the Azure resources. It has to be something that will make the names unique globally -
locationcontains the name of the Azure region you want to use, in az cli style such aseastus,westus,westeurope, etc.
Note that these variables are not environment variables, they are not used in the shell but in the Terraform code.
Here is how I have set the variables in my workspace:
Get the code & get ready to deploy
I have made up a GitHub repo with the resources listed above, you can grab it here.
So you don't have to write the Terraform code for now but you can explore it and tweak it as you want.
Repository content
For simplicity I have put all the files at the root of the repository. In a "full" project I would have several folders dedicated to the Terraform files, the source, the tests, the doc, etc.
But there is only Terraform files here so it's pretty simple, we can just note that we have:
-
az-*.tffiles containing the creation of the Azure resources -
tf-*.ftfiles containing Terraform configuration such as the variables declaration and the required providers
Add the tf-backend.tf file
There is one file that you need to add to establish the link between the repo and your Terraform Cloud workspace. Just create the tf-backend.tf file with the following structure:
terraform {
  backend "remote" {
    organization = "<YOUR ORGANIZATION NAME>"

    workspaces {
      name = "<YOUR WORKSPACE NAME>"
    }
  }
}
This file is git-ignored as it contains the name of the Terraform Cloud organization and workspace. Even if those are not secrets, I consider as good practice not to commit environment-related values like this, especially in public repositories.
Let's deploy the resources !
We are finally getting to the point where we are going to deploy some stuff in Azure. Let's jump in your favorite terminal in the root of the repo if you are not already there, and fire a few commands.
First and just once run:
-
terraform loginto authenticate to your Terraform Cloud workspace using your browser -
terraform initto install the required providers
Then you are ready to use the most common Terraform CLI commands:
-
terraform planto create a plan to let Terraform determine the changes to make on your infrastructure -
terraform applyto apply the plan and finally make the changes (which will result in the creation of all resources when you run this for the first time)
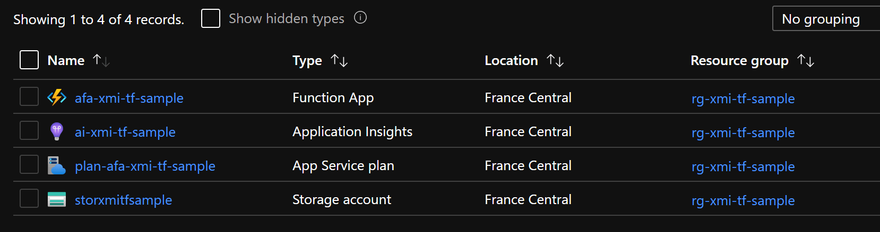
After that feel free to tweak the Terraform files, experiment, and run the plan and apply commands again. Use the Azure portal to see what you have deployed:
Once you are done, you can delete all the resources with the terraform destroy command.
What I like about this approach is that even if you can see the output of the commands in you terminal, everything is running in the cloud, and the state of the infrastructure is securely stored in the cloud as well.
Wrapping up & next steps
We have seen in this post how to deploy resources using the CLI approach of Terraform Cloud. While it might seem overkill to do this for personal projects or POCs, I think it's a good compromise as it combines the good practice to have the state securely stored in the cloud with the comfort of running the commands from my terminal (and not to have to push a change to trigger a CI/CD pipeline).
When I finish late my work on a project, I also like to run terraform destroy, approve the changes and close my laptop right away, as everything is running somewhere else... in the cloud !
This post describes a first step in my Terraform journey, and a big one as I needed quite some time to make up this post 😇
Then I might go further with the following next steps:
- Automate things: I could write a script to create the workspace, the service principal and configure everything in a single step
- Manage environments: while it's not necessary in the early stages of pet projects, being able to manage several environments (DEV, PROD, ...) could be interesting to do, and useful for my professional life
- Improve security: creating a service principal with the Owner role does not following the principle of least privilege... there must be a way to ensure that its access are scoped to the dedicated resource group
- Use Bicep: not related to Terraform at all but I know I will try this new way of deploying stuff in Azure some day 😅
That's it for this post, thanks for reading, don't hesitate to reach out, and happy terraforming 🤓

Latest comments (0)