Introduction
Dynamic volume provisioning allows storage volumes to be created on-demand. So rather than have cluster administrators manually make calls to their cloud or storage provider to create new storage volumes and then create Persistent Volume objects to represent them in Kubernetes, the dynamic provisioning feature eliminates the need for cluster administrators to pre-provision storage. Instead, it automatically provisions storage when it is requested by users.
In this article, we will be creating the following:
- An AKS cluster
- A PersistentVolumeClaim(PVC)
- A deployment in the cluster which have a running pod with the PersistentVolumeClaim(PVC) mounted on the pod, which will in turn dynamically create a Persistent Volume object.
Prerequisites
- Basic knowledge of Kubernetes
- Azure Account (You can create a free account)
- Install Azure CLI on local machine
- Azure Cloud Shell
There are a number of ways to create an AKS cluster in Azure. We can use the Azure portal, Azure CLI, Azure Cloud Shell or an IaC tool like Terraform. But in this tutorial, we will be using a the Azure Cloud Shell.
NOTE:
If you're using the Azure CLI installed on your local machine, you will need to run the first two commands below to login into your Azure account from the CLI and then install kubectl locally if you don't have it installed already.
Run the following command to login into Azure. This should prompt you to log in using your Azure credentials:
az login
Install the Kubernetes CLI
If you do not have kubectl installed already on your local machine, you can run the following command to install it:
az aks install-cli
-
Create a Resource Group
Open the Azure Cloud Shell in the Azure Portal and run the following command to create a resource group:
az group create --name aks-cluster-rg --location eastus
Create an AKS Cluster
Run the command below to create an AKS cluster newAKSCluster with 1 node. Specify the resource group that was created earlier.
az aks create --resource-group aks-cluster-rg --name newAKSCluster --node-count 3 --generate-ssh-keys
Connect to cluster using kubectl
Connect to the cluster using the newly install kubectl tool. The following command gets credentials for the AKS cluster named newAKSCluster in the aks-cluster-rg resource group:
az aks get-credentials --resource-group aks-cluster-rg --name newAKSCluster
You should get the following message that confirms that the newly created cluster is the current context.
Merged "newAKSCluster" as current context in /home/samuel/.kube/config
The following command to list the number of nodes in the cluster:
kubectl get nodes
The output below shows the number of nodes in the cluster and it status.
NAME                                STATUS   ROLES   AGE   VERSION
aks-nodepool1-36836238-vmss000000   Ready    agent   17m   v1.21.7
Create a Persistent Volume Claim(PVC)
Now, to create the Persistent Volume Claim(PVC) in the cluster, we use the declarative approach by writing a manifest file and run it against the cluster.
From the Azure CLI cloud shell, run the command below:
vi myPersistentVolumeClaim.yml
This will create a file called myPersistentVolumeClaim.yml. In there you can paste the following content into the file:
apiVersion: v1
kind: PersistentVolumeClaim
metadata:
  name: example-pvc
spec:
  accessModes:
  - ReadWriteOnce
  storageClassName: managed-premium
  resources:
    requests:
      storage: 5Gi
The manifest file above will create a Persistent Volume Claim(PVC), named example-pvc with a 5Gi storage and the storage class that will be used is the managed-premium Azure Disk provided by Azure.
Run the following commend to create the PVC:
kubectl apply -f myPersistentVolumeClaim.yml
You should get the following output:
persistentvolumeclaim/example-pvc created
To see the PVC that was created, open the Azure portal and navigate to the AKS cluster that was created earlier, click storage in the Kubernetes resources section, then click Persistent Volume Claim:
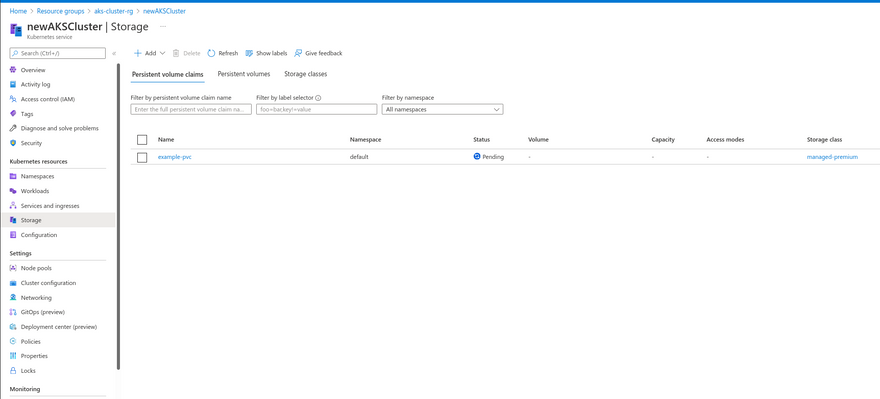
From the image above, you will notice that the PVC that has just been created is in a pending state. This is because the StorageClass that was used managed-premium has a volumeBindingMode set to WaitForFirstConsumer by default which will delay the binding and provisioning of a PersistentVolume until a Pod using the PersistentVolumeClaim is created.
Run the following command to describe the Storage Class:
kubectl describe StorageClass managed-premium
The output:
Name:                  managed-premium
IsDefaultClass:        No
Annotations:           <none>
Provisioner:           kubernetes.io/azure-disk
Parameters:            cachingmode=ReadOnly,kind=Managed,storageaccounttype=Premium_LRS
AllowVolumeExpansion:  True
MountOptions:          <none>
ReclaimPolicy:         Delete
VolumeBindingMode:     WaitForFirstConsumer
Events:                <none>
What we need to do now is, create a deployment that will have the PersistentVolumeClaim mounted on the pod, which will in turn automatically create a PersistentVolume(PV).
Run the commands below using the Azure Cloud Shell to create a manifest file called nginx-aks-deployment.yml
vi nginx-aks-deployment.yml
Then paste this content into the file:
apiVersion: apps/v1
kind: Deployment
metadata:
  name: nginx-deployment
  labels:
    app: nginx
spec:
  replicas: 3
  selector:
    matchLabels:
      app: nginx
  template:
    metadata:
      labels:
        app: nginx
    spec:
      containers:
      - name: nginx
        image: nginx
        ports:
        - containerPort: 80
        volumeMounts:
        - name: nginxpv
          mountPath: /var/www/html
      volumes:
      - name: nginxpv
        persistentVolumeClaim:
          claimName: example-pvc
The run the command below to create the deployment component in the cluster.
kubectl apply -f nginx-aks-deployment.yml
Output:
deployment.apps/nginx-deployment created
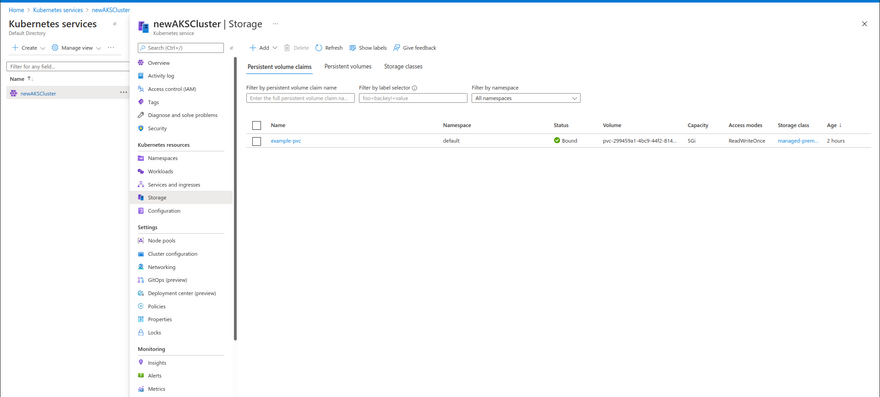
Now, let us head back to the Azure portal, in the storage section of the AKS cluster, from the screenshot below, you can see that the status of PersistentVolumeClaim has changed from pending to Bound:
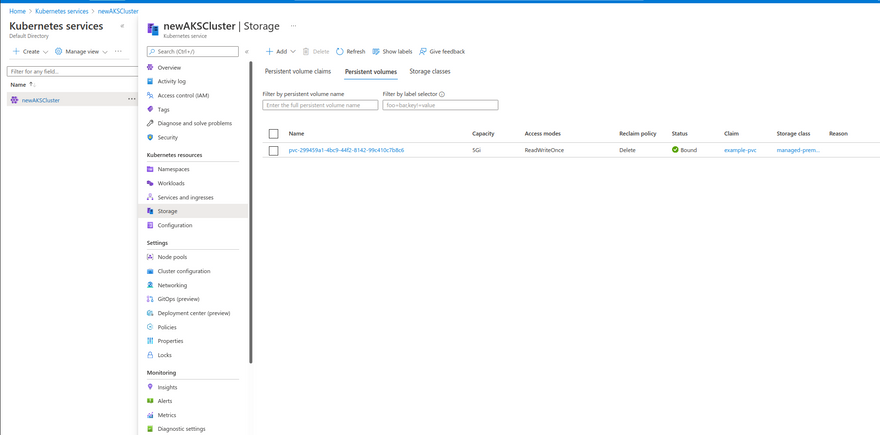
Also, the PersistentVolume got created dynamically:
Final Words
The intention of this article is cover how to create a Persistent Volume Claim or PVC which is later consumed by a pod. When creating a PVC, you specify which storage class to use which will in turn automatically create a PersistentVolume.
A lot of details where left out.
Feel free to comment with questions or suggestions.

Top comments (0)