Introduction
DigitalOcean has recently launched a new feature for its platform users and it's the most awaited Serverless Functions. With the availability of Functions, the resources are managed internally by DigitalOcean and they even take care of scaling them up or down based on demand automatically. Some of the other basic key features include the following.
More Focus on Code
This enables the developers to only work on their code and maintain its quality as DigitalOcean takes care of the provisioning and scaling of resources.Cost-Saving
With the use of functions, we no longer need to keep any idle server up and running all the time. We are simply charged only when the functions are triggered by an event.Autoscaling
DigitalOcean handles the infra as per the demand and one need not worry about its availability of it during its peak or idle hours.Faster Production-ready Deployments
With functions, we only need to choose the coding language and can then deploy them easily with a few clicks. This cuts the time which used to be wasted on infra-management and hence, makes deployments faster.
The DigitalOcean Functions Challenge
DigitalOcean is always community-driven and widely wants its community to try the new features and provide suggestions for the further scope of improvements. So, they have come up with a brand-new Functions challenge where one needs to call a Serverless Function to deploy Sammy, the official DigitalOcean mascot, in the shark tank created for this challenge.
Not only one can try the new Functions on the platform, but also the first 500 valid entries can win some DigitalOcean swags as well. You can find the detailed guidelines here.
Now, let's figure out some of the ways by which you can easily complete this challenge and win some swags as well. Remember that you can do this in several other ways as well and the use of Functions is not really limited to the following ways. You are always encouraged to try as many things as possible with the all-new DigitalOcean Functions.
Creating a Namespace to Deploy Functions
Before we begin, let's get the pre-requisites set up first.
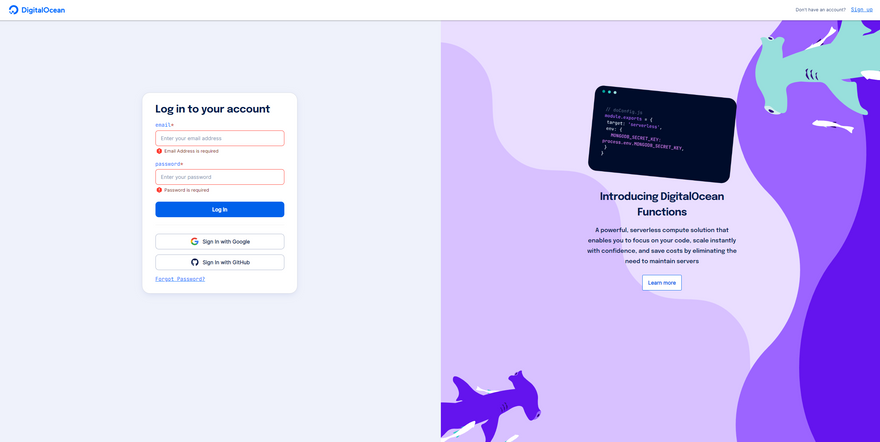
Step 1: Sign up for a new DigitalOcean account if you don't have one yet or else use your existing credentials to log in to the platform here.
Step 2: As soon as you log in, simply click on the Functions tab from the left navigation pane to open the Functions dashboard.
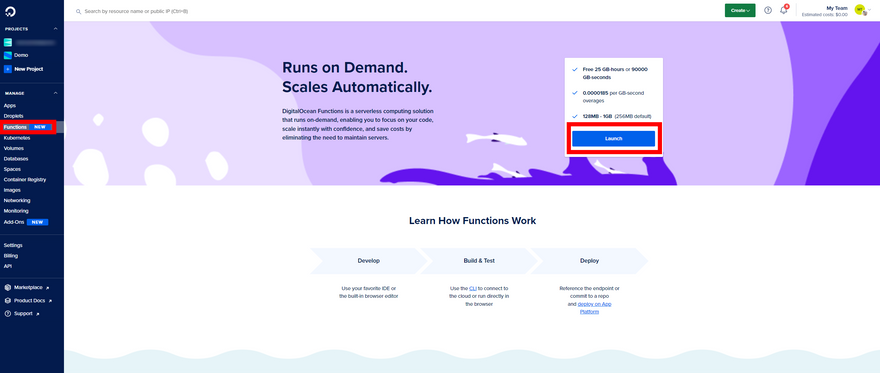
Now click on launch to create a namespace. This should be ready in a few seconds.
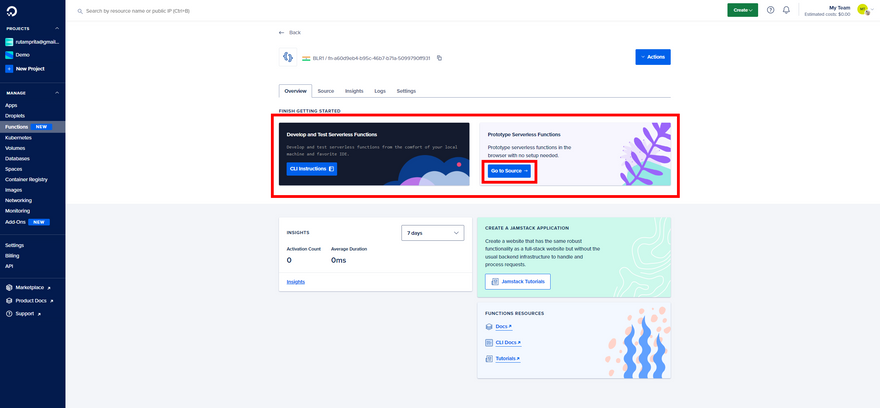
Step 3: Once you're inside the Namespace dashboard, you can clearly see that there are two ways by which we can deploy the functions; either using our local machine and code editor or directly from the browser.
We will use the second way of doing that directly through the browser for now. So, click on Go to Source button.
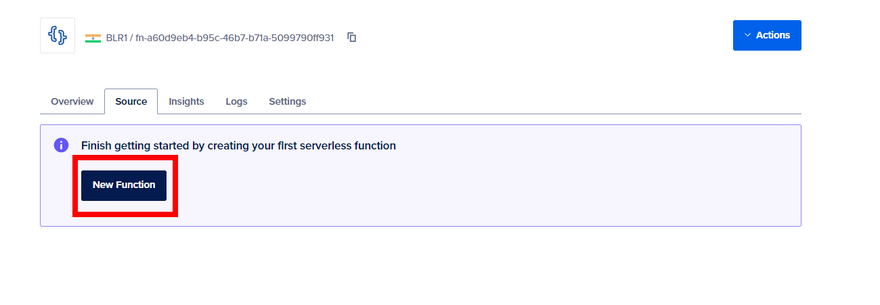
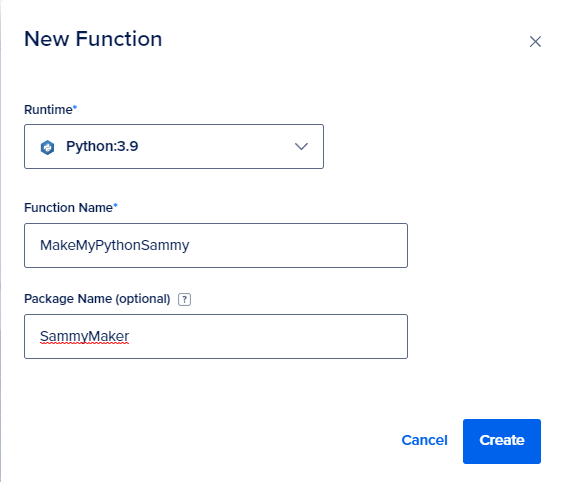
Step 4: Once you're in the Source tab, simply click on the New Function button.
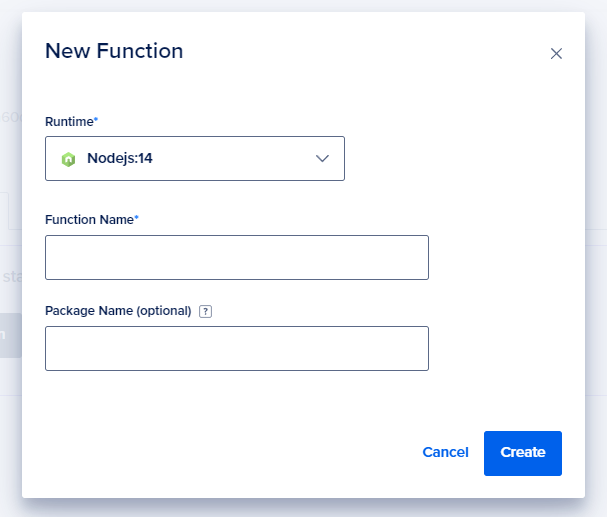
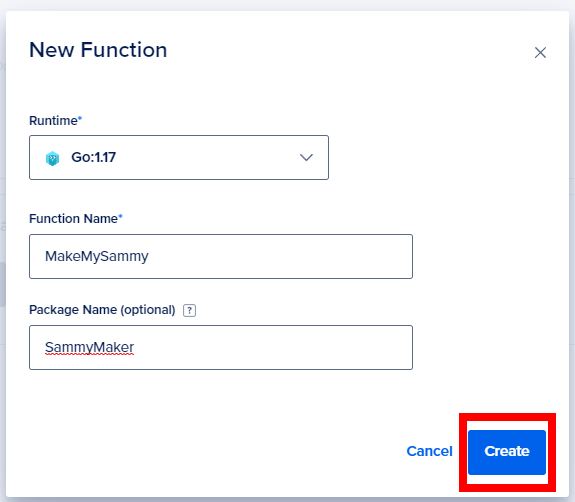
This opens a New Function dialog box where we need to select the Runtime, Function Name and Package Name (optional).
As you would have noticed now, there are 4 available runtime options namely, Go:1.17, Nodejs:14, Php:8.0 and Python:3.9.
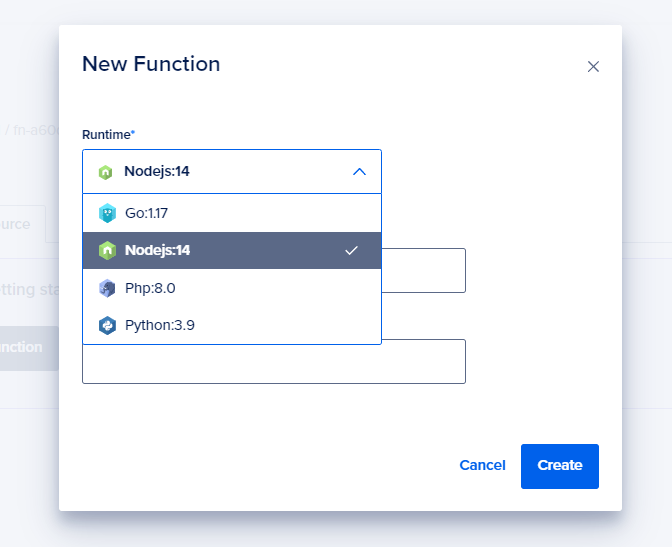
So, in this tutorial, we will go ahead and create Functions for each of these runtimes separately and deploy a Sammy in each case. However, deploying the function for any one of the runtimes completes the challenge for you and you're eligible to win some swag.
Walk-throughs for the Challenge
Now we are ready to deploy some Functions to create a Sammy in the Aquarium, let us first understand what exactly we need to do with the function that we create.
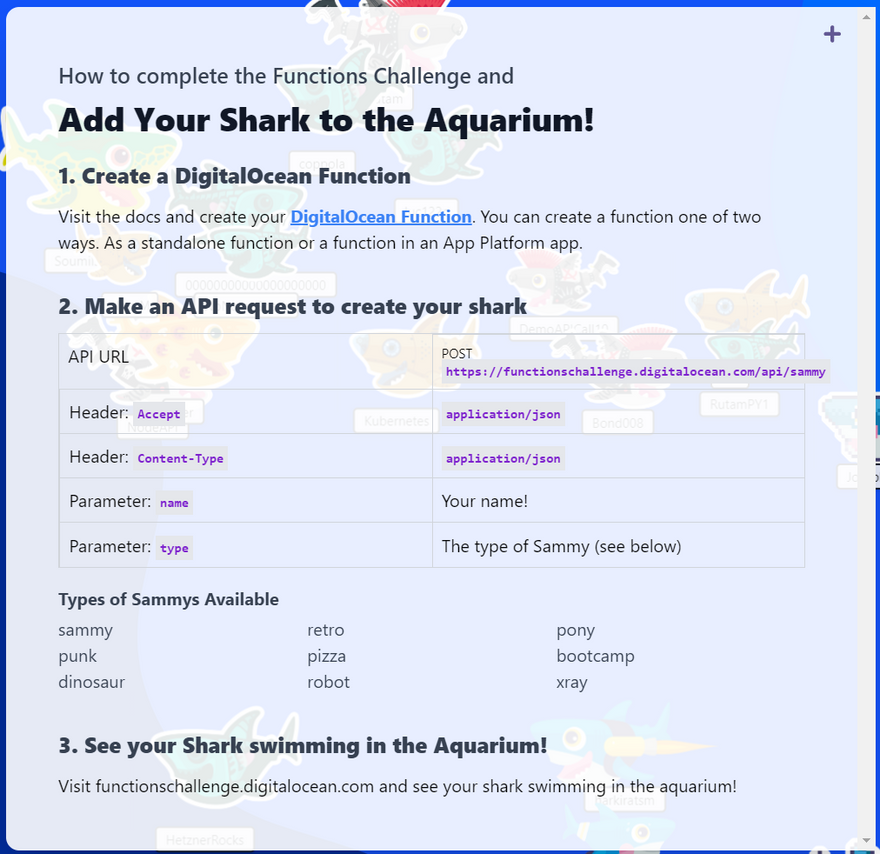
So, basically, we need to do a POST API request to the challenge end-point URL with the specified headers and body parameters containing the name of the user and the type of Sammy they want to deploy. You can view the detailed completion steps and the Aquarium here.
Walkthrough for Go:1.17 Runtime
Step 1: After you click on New Function, in the New Function dialog box, select Go:1.17 as the runtime, give a name as you want and then a package name if you wish to and finally hit the Create button.
Step 2: As we know what the endpoint URL, method type, payloads and the headers to be included, we can now design a function like the one below to do the API call.
package main

import (
    "fmt"
    "io/ioutil"
    "net/http"
    "strings"
)

func apiCall() []byte {
  url := "https://functionschallenge.digitalocean.com/api/sammy"
    method := "POST"

    payload := strings.NewReader(`{"name" : "YourNameHere","type" : "SammyTypeHere"}`)

    client := &http.Client{}
    req, err := http.NewRequest(method, url, payload)

    if err != nil {
        fmt.Println(err)
    }
    req.Header.Add("Accept", "application/json")
    req.Header.Add("Content-Type", "application/json")

    res, err := client.Do(req)
    if err != nil {
        fmt.Println(err)
    }
    defer res.Body.Close()

    body, err := ioutil.ReadAll(res.Body)
    if err != nil {
        fmt.Println(err)
    }
    fmt.Println(string(body))
  return body

}

func main(){
  apiCall()
}
Step 3: Simply, replace the YourNameHere and SammyTypeHere placeholders with exact values as you want, click on Save and then hit the Run button to execute the function. This will successfully create the Sammy in the aquarium with your name and type selected.
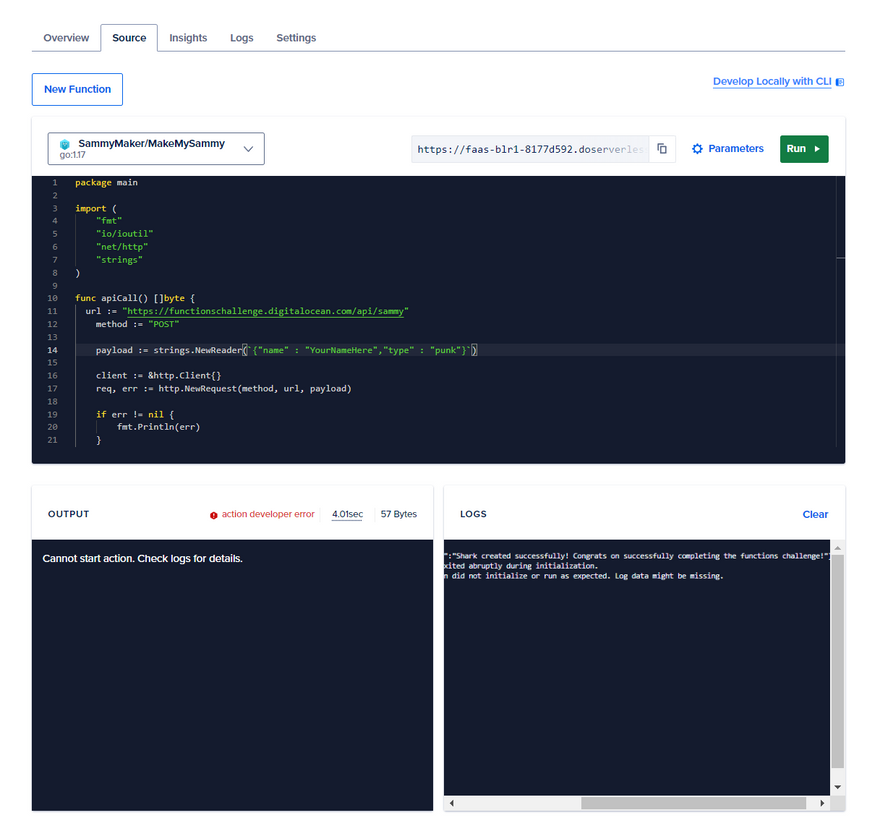
Note: You may find some developer errors when you run this code in the
Outputviewer, but do not worry, this doesn't fail the Sammy Creation process as you can find a success message in theLogsviewer. Feel free to go to the aquarium link above to find your Sammy swimming there.
Walkthrough for Nodejs:14 Runtime
Step 1: From the Source tab, click on New Function again and choose Nodejs:14 as the runtime this time. Make sure your Function names are unique if you are putting them inside the same package.

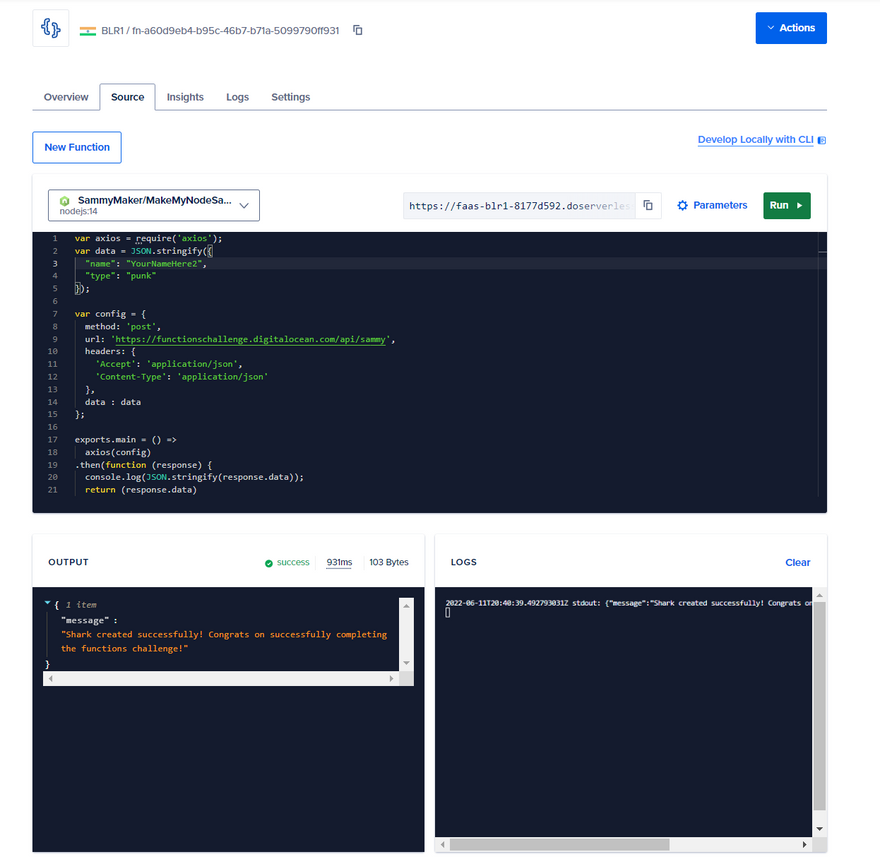
Step 2: Similarly, we can formulate a NodeJS function with all the given API request payloads in the following way.
var axios = require('axios');
var data = JSON.stringify({
  "name": "YourNameHere",
  "type": "SammyTypeHere"
});

var config = {
  method: 'post',
  url: 'https://functionschallenge.digitalocean.com/api/sammy',
  headers: {
    'Accept': 'application/json',
    'Content-Type': 'application/json'
  },
  data : data
};

exports.main = () =>
  axios(config)
.then(function (response) {
  console.log(JSON.stringify(response.data));
  return (response.data)
})
.catch(function (error) {
  console.log(error);
  return (error)
});
Step 3: Now replace the YourNameHere and SammyTypeHere here placeholders with your details, click on save and then hit the Run button. This should easily create the specified Sammy in the aquarium and you can see the response on both the Output and Logs viewers.
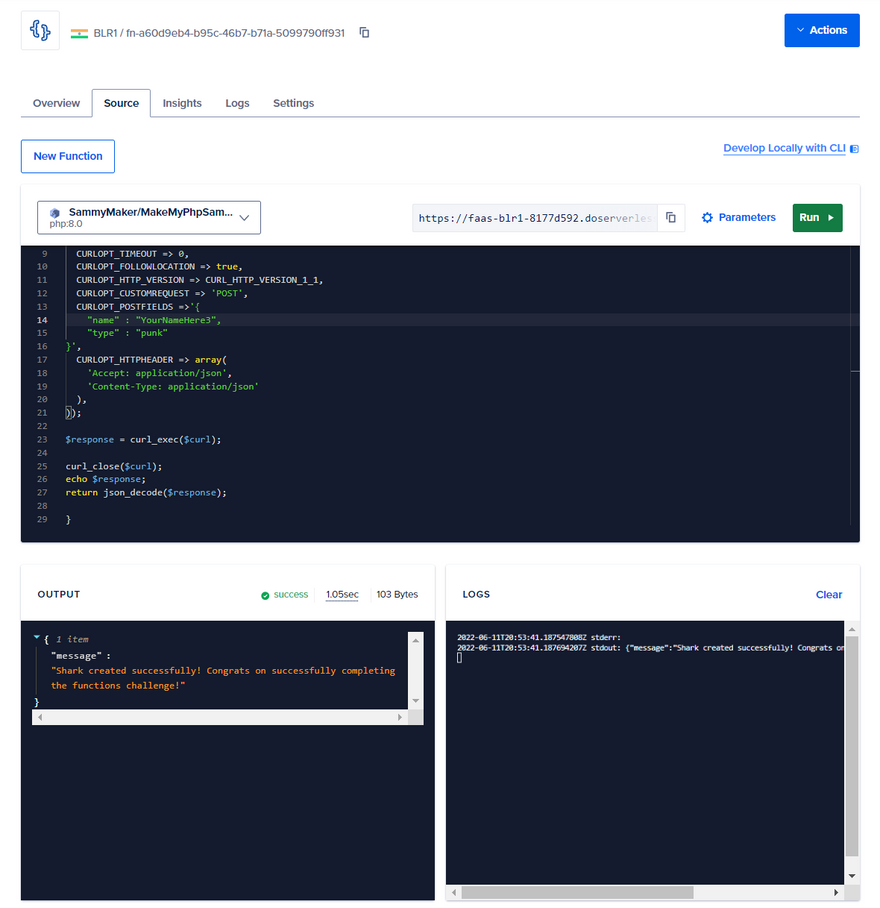
Walk-through for Php:8.0
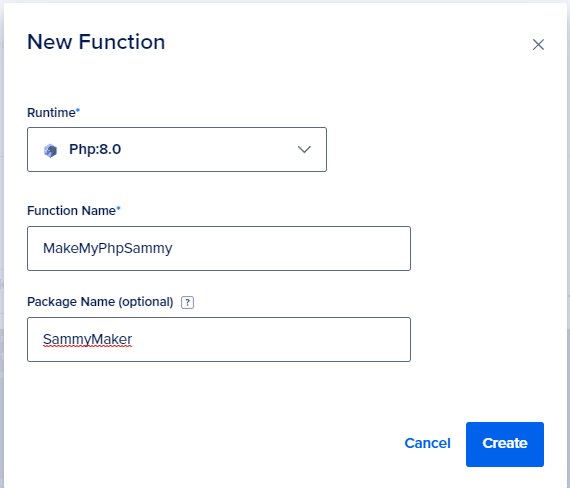
Step 1: Click on the New Function button in the Source tab, select Php:8.0 as the runtime this time, fill in the name and package as you want and click on Create.
Step 2: Now in a very similar way, we can write the Php function in the following way to do the POST API call to the end-point.
<?php
function main() {
  $curl = curl_init();
  curl_setopt_array($curl, array(
  CURLOPT_URL => 'https://functionschallenge.digitalocean.com/api/sammy',
  CURLOPT_RETURNTRANSFER => true,
  CURLOPT_ENCODING => '',
  CURLOPT_MAXREDIRS => 10,
  CURLOPT_TIMEOUT => 0,
  CURLOPT_FOLLOWLOCATION => true,
  CURLOPT_HTTP_VERSION => CURL_HTTP_VERSION_1_1,
  CURLOPT_CUSTOMREQUEST => 'POST',
  CURLOPT_POSTFIELDS =>'{
    "name" : "YourNameHere",
    "type" : "SammyTypeHere"
}',
  CURLOPT_HTTPHEADER => array(
    'Accept: application/json',
    'Content-Type: application/json'
  ),
));

$response = curl_exec($curl);

curl_close($curl);
echo $response;
return json_decode($response);

}
Step 3: As we have already done before, let's replace the YourNameHere and SammyTypeHere placeholders with the values we want, click on Save and then Run the function. This creates the Sammy as we specified and we have done this using the Php:8.0 runtime.
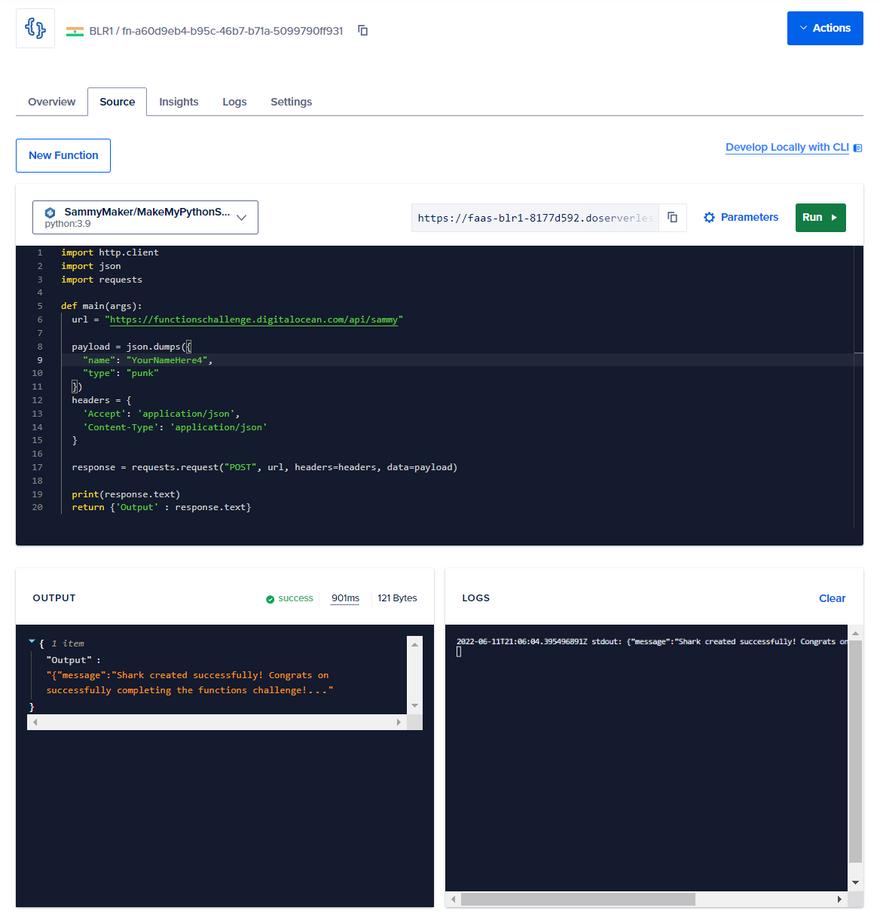
Walk-through for Python:3.9
Step 1: One last time, let's click on the New Function button and then give the function name & package name and select Python:3.9 as the runtime. Now click on Create to proceed.
Step 2: We will now write a function similar to the one below providing all the request payloads needed to do the API call.
import http.client
import json
import requests

def main(args):
  url = "https://functionschallenge.digitalocean.com/api/sammy"

  payload = json.dumps({
    "name": "YourNameHere",
    "type": "SammyTypeHere"
  })
  headers = {
    'Accept': 'application/json',
    'Content-Type': 'application/json'
  }

  response = requests.request("POST", url, headers=headers, data=payload)

  print(response.text)
  return {'Output' : response.text}
Step 3: Now click on Save, followed by the Run button to execute the function. Make sure to replace the YourNameHere and SammyTypeHere placeholders with your desired values. This is how we can deploy Sammy in the aquarium using the Python:3.9 runtime.
Note: The name you choose for Sammy should be completely unique. You can't use a name if it's already been used to deploy a Sammy in the aquarium.
Conclusion
Well, we have reached to the end of this walk-through now where we figured out how to trigger the serverless functions for this challenge using all the 4 available runtimes. But as I mentioned earlier, this is not the only way to complete this challenge. Everyone is welcome to use their creativity and come up with more amazing ways to achieve this.
DigitalOcean is always striving to better the user experiences and is committed to it. More runtimes will be added gradually to the platform so that the developers have more options to choose from as per their preferences.
Lastly, if you found this article really helpful, then do give it a like and feel free to drop in your feedback.
Note: All the dashboard images used here are sole properties of DigitalOcean, and are used here only for illustrative purposes.


Latest comments (2)
Nice piece!!
Thanks a lot for your positive feedback.