Introduction
Kubernetes has been a known player in the market for container orchestration systems for automating software deployment, scaling, and management. With the growing use of Kubernetes at the ORG level and also by the developers, there have been a lot of cloud service providers in the market who offer their managed Kubernetes services.
Today in this article we are gonna try and learn to create a cluster using the Vultr Kubernetes Engine (VKE). Vultr has been a key player in the cloud-hosting solution space and they aim to provide highly reliable and high-performance cloud computing environments across all geographical regions.
Creating a Cluster
We will now go ahead and deploy our first cluster using VKE.
Step 1: Create a new Vultr account if you don't have one yet or simply log in using your existing credentials if you're already a user.
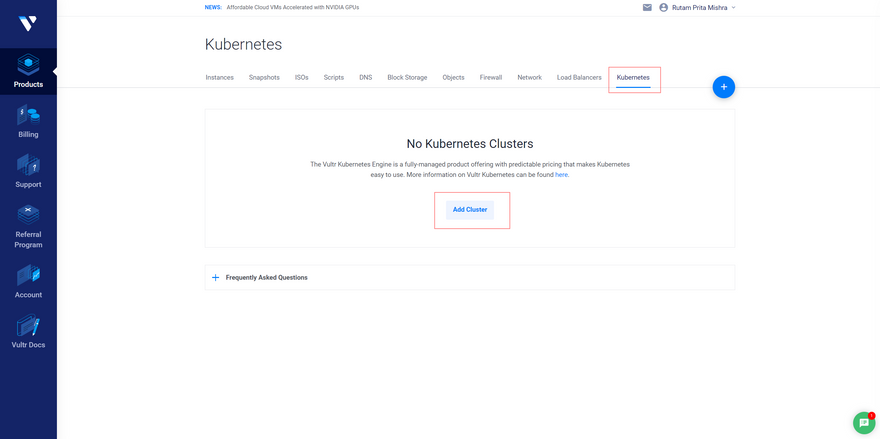
Step 2: Once you're logged in, click on the Kubernetes tab from the dashboard and then hit the Add Cluster button.
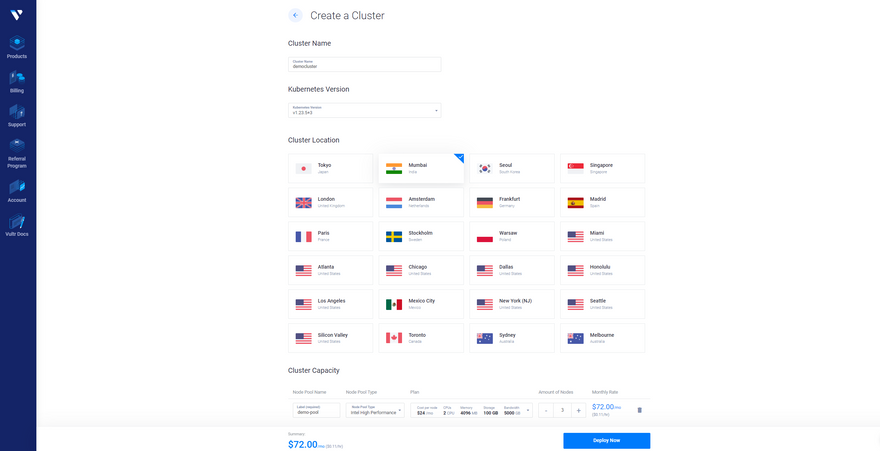
Step 3: On the Create a Cluster dashboard, we need to define the specs we want to use for the cluster. Feel free to choose them as per your requirements, or you can always follow the specs mentioned below for the sake of this tutorial.
- Cluster Name- Name it as you wish (democluster for now)
- Kubernetes Version- Choose the latest one (v1.23.5+3 for now)
- Cluster Location- Choose the closest one (Mumbai for me)
- Cluster Capacity- Fill in the details mentioned below
-> Node Pool Name- Assign a name as you wish (demo-pool for now)
-> Node Pool Type- Intel High Performance
-> Plan- $24/mo (2CPUs, 4096 MB Memory, 100GB Storage)
-> Amount of Nodes- 3
Now click on Deploy Now button to provision the cluster.
Step 4: Now it should take a few moments for the cluster to complete its installation and be ready for use. Keep checking the status until it shows Running.
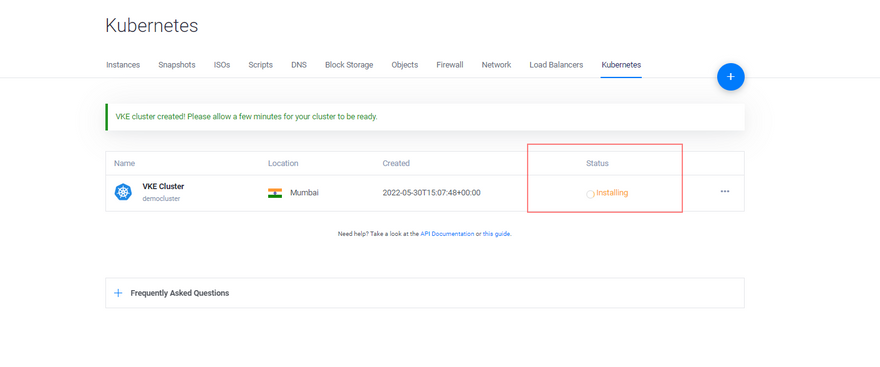
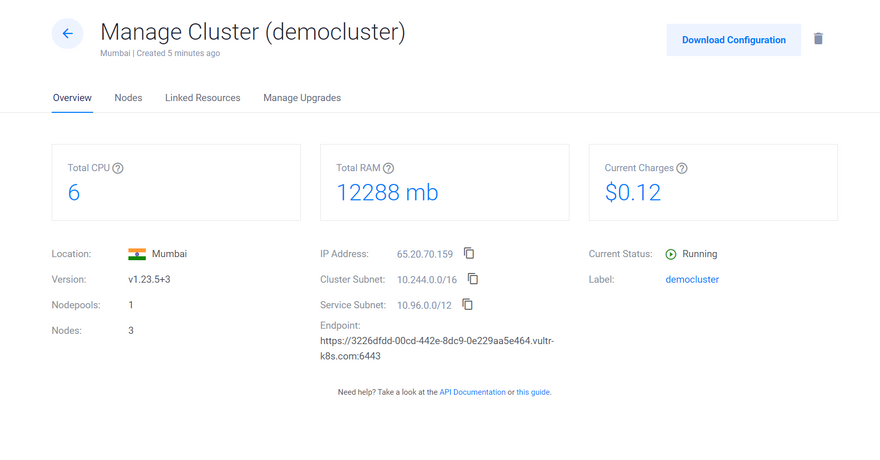
Once the status is set to running, click on the cluster name to navigate to the cluster dashboard page where you can find all the details about the cluster.
Connecting to the Cluster
Our cluster is now created and is running. We now need to connect to our cluster from our local system to start using it. To do that, simply follow the steps below.
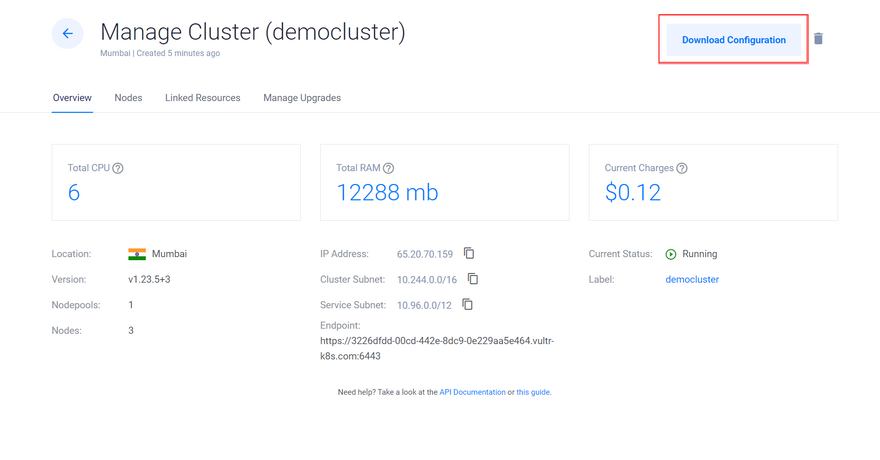
Step 1: Download the cluster config by hitting the Download Configuration button on the cluster dashboard page.
Step 2: Once you've downloaded the config file to your system, you can either use it explicitly by mentioning its path in the terminal or you can simply add/overwrite your current config file in the .kube folder and start using it directly using kubectl with the following command.
kubectl get nodes
This should return you the list of nodes in our node pool.

Note: If you don't have
kubectlconfigured in your local machine, then you follow the steps here to get it done.
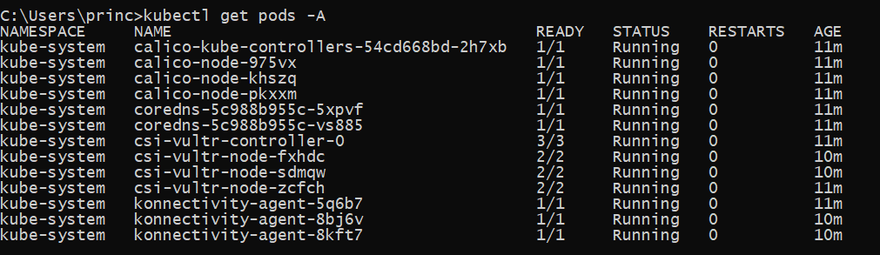
Step 3: You can also go ahead and fetch the list of pods in all namespaces with the following command.
kubectl get pods -A
This should return the list of pods in all namespaces.
Now you're ready to use your cluster in any way you want using the terminal.
Conclusion
This completes the tutorial here. We have successfully deployed a cluster using Vultr Kubernetes Engine and also connected it from our local machine using the cluster configuration file.
I hope all of you had a good time reading this and do show some love to this article if you found it useful.
Note: All the dashboard images used here are sole properties of Vultr and are used here only for illustrative purposes.


Top comments (0)