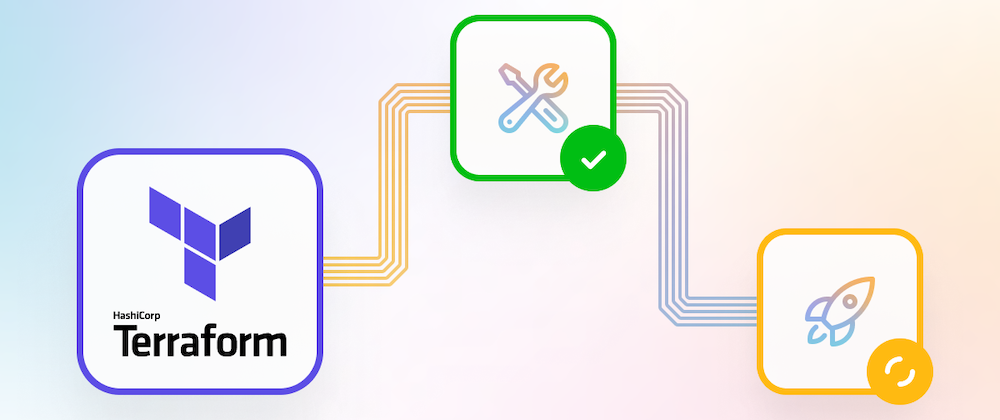
Most engineers get started with Terraform using the command-line interface (CLI) to deploy and manage infrastructure directly from their local machine. However, as projects evolve, so does the need for collaborative, scalable, secure, and resilient workflows. Transitioning from a local Terraform workflow to a shared CI/CD pipeline can seem like a daunting task but if you take the leap, you won’t look back.
In this guide, I'll cover some best practices and the things you'll need to consider for your Terraform CI/CD workflows.
Table of Contents:
- Version control
- Project structure
- Managing Terraform configuration for different environments
- Managing secrets
- Terraform state and state locking
- Handling concurrency
- Version constraints
- Enforcing code quality
- Using policies for governance and compliance
- Pre-preparing the build environment
- Using a shared plugin cache
- Approval gates
- Managing CI/CD with Terraform
Version Control
Like any other code, Infrastructure code, including Terraform, should be version controlled too. Using a Source Code Management (SCM) system like git with platforms such as GitHub, GitLab, or Bitbucket ensures that all infrastructure changes are auditable, collaborative, and reversible. Being able to revert to a previous configuration to see what changes were made, when they were made, and who made them is critical when managing your infrastructure using code. This also means everyone on the team can view and contribute to the projects consistently, and means you can utilize fully-automated CI/CD by setting up triggers for your pipeline on repository actions like commits and pull requests.
# Local .terraform directories
**/.terraform/*

# .tfstate files
*.tfstate*.tfstate.*

# Crash log files
crash.log
crash.*.log

# Exclude all .tfvars files, which are likely to contain sensitive data, such as
# password, private keys, and other secrets. These should not be part of version
# control as they are data points which are potentially sensitive and subject
# to change depending on the environment.
*.tfvars
*.tfvars.json

# Ignore override files as they are usually used to override resources locally and so
# are not checked in
override.tf
override.tf.json
*_override.tf
*_override.tf.json

# Include override files you do wish to add to version control using negated pattern
# !example_override.tf

# Include tfplan files to ignore the plan output of command: terraform plan -out=tfplan
# example: *tfplan*

# Ignore CLI configuration files
.terraformrc
terraform.rc
🙋♀️ When storing your Terraform code in version control, make sure you use a terraform .gitignore file like this one](https://github.com/github/gitignore/blob/main/Terraform.gitignore) to ensure files with sensitive data aren't accidentally committed.
Project structure
There are many different approaches for how to structure and store Terraform code, and there is no one-size-fits-all approach. It all comes down to how you want to manage your code, any contributions, and how it will end up being used in projects and teams.
Terraform files can be stored in:
- a project repository (alongside application code)
- a separate repository (for the Terraform files)
- multiple repositories
The best way to get started is to store your Terraform code in the same repo as the application code. This is also a common approach for smaller, less-distributed teams. It's always best to start simple! Understand how you like to work, really feel any pain, so you can better understand the most suitable abstractions that work for your team moving forward. Abstracting too early on leads to ill-informed decisions.
Separating Terraform code into reusable and composable modules that live in separate repositories is also a great solution, especially for teams with a lot of projects, and complex infrastructure requirements. Besides keeping your Terraform DRY, a benefit of this approach is that you can have a mix of private (restricted) repositories for managing more secure things such as roles and permissions, and engineers are still able to compose their own Terraform configurations by including these pre-defined (and locked down) modules.
The standard module structure is a great guide that provides a recommended file and directory layout structure for reusable modules distributed in separate repositories. Or if you’re interested in further assessing the differences between two more common approaches (Mono repo vs. Multi repo), this blog post from HashiCorp dives into more detail and explains the pros and cons of each approach.
Managing Terraform configuration for different environments
There are a variety of conventions for how to handle different environments (e.g. development, staging and production) in Terraform.
You can:
- Create variables prefixed by the environment i.e.
dev-s3-bucket,staging-s3-bucket,prod-s3-bucket. - Use a git branch naming convention and long-lived environment branches.
- Use Terraform workspaces.
- Separate environment specific configurations in into their own folders i.e. development, staging, production.
- And/or use supplementary tools like Terragrunt.
A common approach is to separate environment configurations into individual folders within the same project.
my-application/
└── terraform/
  ├── main.tf
  ├── variables.tf
  ├── outputs.tf
  └── environments/
  ├── development/
  │ └── main.tf
  ├── staging/
  │ └── main.tf
  └── production/
    └── main.tf
When working in a specific environment, scripts automatically locate and execute the Terraform commands in that environment’s directory. This is a great way to ensure each environment’s configuration and state remains isolated.
If you’re just getting started with Terraform, it's best to start simple with something that works for your immediate and short-term needs. As you learn what works and what doesn't work you can always adapt your approach.
Managing secrets
What not to do
When we're working locally we’ll often handle secrets in pretty "simple" ways. We'll commonly use environment variables on our local machines, and sometimes we might even hard-code them during the initial stages of development 😓. These methods might be quick, but they don't scale and they pose significant security risks, configurations can be accidentally pushed to version control with sensitive data included and it happens more often than you think.
resource "aws_db_instance" "my_db_instance" {
  # ...
  username = "admin"
  # DO NOT DO THIS!!!
  password = "myS3cretp@ssw0rd"
}
Use a secrets manager
Secrets management is serious business, especially in shared, collaborative CI/CD workflows. You should use a dedicated centralized secrets manager such as:
These tools store, manage, log, and control access to tokens, passwords, certificates, and other secrets and offer greater control and visibility. When managing access with tools like these, it's important to apply the principle of least privilege – that is to restrict access to the users and systems that absolutely need it.
Tips for working with secrets
Once the required secrets are made available to your build system or build agents:
- Use environment variables and Terraform data sources to reference your secrets in your Terraform code.
- Make sure state files are not tracked in version control, and that they’re included in your
Terraform.gitignore - Use a remote state file along with advanced linting and validation techniques to prevent exposing secret values
Most CI/CD tools allow you to choose and integrate with any secrets management platform in various ways. For example, in Buildkite you can use environment hooks to conditionally allow access to secrets based on the requesting repository, team, pipeline, commit author, or any other logic you choose.
State and state locking
Terraform maintains the "state" of your infrastructure in a state file (it's a snapshot of the current infrastructure resources). It's usually named terraform.tfstate. State files should not be tracked in version control because they can potentially contain sensitive information.
In a local Terraform workflow, this state file is stored on a developer's machine. Using local state in Terraform projects that have multiple collaborators can cause some pretty frustrating problems. Changes can confusingly get mixed up, and that usually results in more errors (that can be very difficult to untangle). Also, to make things worse, without a clear, consistent record of changes to state rolling back to a previous version cleanly can be problematic.
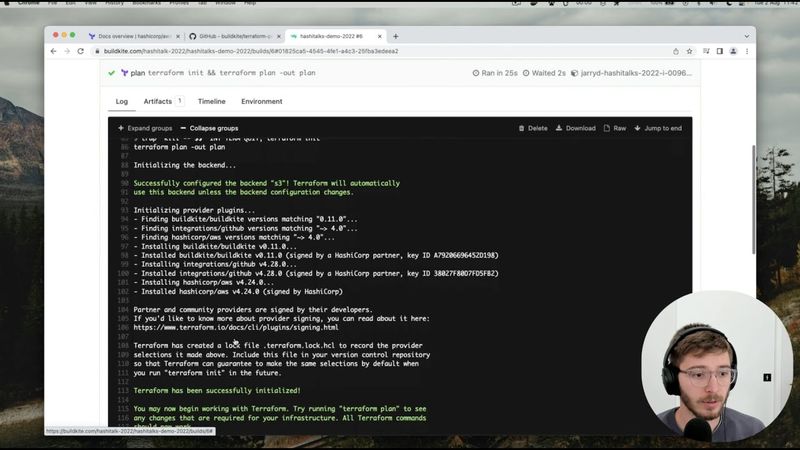
Fortunately Terraform provides an option for storing state remotely by configuring a backend in your Terraform code, usually in the root module.
terraform {
  backend "s3" {
    bucket         = "my-tfstate-bucket"
    key            = "path/to/my/key"
    region         = "us-west-2"
    dynamodb_table = "my-lock-table"
    encrypt        = true
  }
}
This example configures a backend using Amazon S3 combined with DynamoDB for state locking, so that when Terraform detects a supported backend is in use, it will automatically lock the state.
State locking is especially important in team environments or CI/CD pipelines where there can be multiple attempts to modify infrastructure simultaneously. When Terraform state is locked, it prevents multiple concurrent operations (e.g. terraform apply or terraform plan) from being performed on the same state. This mechanism ensures that state changes are atomic and mitigates the risk of state corruption or inconsistencies due to overlapping operations. If another user or process tries to perform an operation while the state is locked, Terraform will return an error and prevent that action from proceeding until the lock is released.
Restrict access to the remote state file, to highly privileged administrators, and build systems in certain build contexts i.e. main branch builds, and even a set of specific users.
Handling concurrency
We can’t talk about state locking without also looking at how to handle concurrency, a major concern for anyone making changes in a shared environment, be it infrastructure, or application. Most CI/CD platforms will have a way of controlling concurrency to ensure jobs and tasks don't collide with each other, for example, only one job can ever deploy to an environment at a time.
In Buildkite, you can use concurrency groups and/or concurrency gates to control concurrency and still benefit from running CI jobs in parallel.
- command: "deploy.sh"
  label: ":rocket: Deploy production"
  branches: "main"
  agents:
    deploy: true
    concurrency: 1
    concurrency_group: "my-payment-gateway/deploy"
In the Buildkite pipeline step definition above, only one job in the 'my-payment-gateway/deploy' concurrency group will be executed at a time, across an entire Buildkite organization’s pipelines and builds.
Creating strict CI/CD concurrency rules combined with Terraform state locking ensures that infrastructure deployments won’t conflict with each other, and that updates will always happen sequentially.
Version constraints
Making sure that the installed versions of components remain consistent between developer workstations and build environments reduces inconsistencies, errors and confusion. Using strict versioning is one way to ensure consistency, which becomes especially important when working at scale, on a shared codebase, or in a distributed team.
There are three components in Terraform which use of versioning:
- Terraform CLI
- Terraform providers
- Terraform modules
Terraform uses Semantic Versioning's major.minor.patch format, ie. 2.3.11 to specify versions and requirements for these components.
Understanding the trade-offs
- Adopting and maintaining strict versioning takes effort, but provides consistency and increased reliability.
- A more lenient, low-effort approach makes taking advantage of new features and bug fixes slightly easier without having to update your terraform configuration, but this trade off can result in errors and confusion.
Before you decide to adopt strict versioning, consider the size and experience of your team, along with:
- The amount of time you can dedicate to monitoring, reviewing, updating, and testing new versions.
- Whether you can live with the technical debt generated if you fall behind new versions.
- Whether you can guarantee changes are thoroughly tested and simulated.
- How well your development, test, and staging environments reflect your production environment. How critical the infrastructure or service is.
- Whether you can rollback if an issue is identified at a later stage, outside of testing.
You might decide to accept the relatively low risk of using a more lenient, less strict versioning standard, or decide the risk is not acceptable, and enforce strict versioning constraints.
HashiCorp recommends using the ~> version constraint to pin only major and minor versions, meaning patch versions are used without needing to update the Terraform configuration.
terraform {
  required_providers {
    aws = {
      version = "~> 2.13.0"
    }
  }
  required_version = "~> 0.12.29"
}
The ~> symbol in the above required_version = "~> 0.12.29" allows the patch version to be greater than 29 but requires the major and minor versions (0.12) to match the version that the configuration specifies.
Enforcing code quality with formatting, linting and validation
Linting Terraform code is incredibly valuable, it enforces a consistent style across Terraform projects, making code easier to read and understand. When integrated into CI/CD, it catches syntactical errors early, minimizing things going wrong with infrastructure deployments. Automated quality checks significantly speed up the code review process by ensuring only high-standard code is ready to review and deploy. Linting can improve code reliability, reduce cognitive load and help developers learn by setting clear coding styles and standards.
There are some great features and tools to help improve Terraform code quality:
Terraform CLI:
- terraform fmt and terraform validate are built in methods to help with formatting and validating
- Extending Terraform's native linting and validation:
- tflint offers more comprehensive linting, catching resource-specific errors and allowing custom rule checks.
- tfsec scans Terraform code for potential security vulnerabilities, providing in-depth security insights.
- checkov evaluates Terraform configurations against hundreds of security and compliance benchmarks, ensuring robustness beyond basic validations. Together, these tools fortify the Terraform workflow, ensuring code quality, security, and compliance.
Checking code formatting and validation should be automated and happen in CI/CD pipelines. If the checks don't pass – conditionally block or fail builds so that the issues need to be fixed before being merged. To avoid the inevitable “it worked on my machine” moments, consider using a git pre-commit hook to enforce checks being run locally before code is committed and pushed. Incorporating container images into your project development workflow and documenting a process around how they are built and used can also help address other consistency issues.
When it comes to consistency and code quality, what automation can’t solve, open communication, collaboration, good documentation (such as engineering manuals) and README files can.
Using policies for governance and compliance
Limiting and restricting the resources that can be created, and the configuration of those resources is essential. This kind of governance can usually be set in the platform in which the resources are being created, using features like AWS Control Tower. But tools like Open Policy Agent (OPA) offer an even more powerful layer of governance and compliance for Terraform projects.
OPA provides fine-grained, programmable control over Terraform configurations. Being able to codify policies means best practices and any organizational and regulatory standards set are automatically enforced.
Automating governance and compliance policies fosters a secure and compliant infrastructure-as-code practice by:
- Preemptively catching violations, reducing the risk of deploying non-compliant resources, and strengthening security posture and operational reliability.
- Streamlining the review process, ensuring consistent adherence to policies without manual oversight.
- Providing contributors with a guardrail to:
- Ensure their infrastructure changes remain within defined boundaries
- Get feedback early in the development lifecycle before deploying to a target environment and getting a permission error The challenge with having multiple layers of governance is that it can often lead to conflicting policies between those defined within your project, and those enforced by maintainers of the target platform, so it’s important for these teams to collaborate closely and define a clear process for how governance can remain aligned across teams.
Pre-preparing the build environment
For Terraform to run consistently and efficiently in CI/CD, the build environment should be prepared in advance. Ahead of any jobs being run, install any build dependencies such as the Terraform CLI, and other required command-line tools. Additionally, build any machine images or container images used in CI/CD pipelines on a regular basis. Dependencies will be kept up to date, and considerable time saved by not having to do this set up every time a job runs or a container/machine is started. You can also fetch an up-to-date clone of any git repositories used as part of these image builds. And to really speed things up, run a terraform init to pre-fetch the required Terraform providers and plugins, so that the job in CI/CD is already ready to go.
Using a shared plugin cache
To speed things up even more, consider a shared plugin cache. By default, Terraform looks for plugins in a project’s local .terraform directory, which is generally unique to each job. You can override this by leveraging the TF_PLUGIN_CACHE_DIR environment variable to specify a different local directory as a shared plugin cache. This means each distinct plugin binary is only downloaded once, and shared by all terraform workloads on the same machine.
As a bonus, if you’re using container images for this process, these same pre-built container images can be re-used for local development on developer machines, for a consistent and fast development and testing environment.
Approval gates
Branch protection rules are commonly used to disable forced pushes, ensure that pull requests (PR’s) are reviewed, and ensure that required CI tests have passed before allowing a change to a protected branch.
In most scenarios, when a PR is raised, an associated CI/CD pipeline is triggered. On successful execution of the pipeline, and when the required tests and validations have passed, this is often sufficient evidence that the PR can be merged, either automatically or with additional reviews and approvals. This can often be enough, but in some cases you might want to conditionally block a build from proceeding, and require a privileged user to review the status and results of steps within the build, and optionally unblock it.
Requiring approval in a CI/CD pipeline instead of relying solely on branch protection rules can be more adaptable and situationally responsive. There are scenarios where it might be preferable to block a CI/CD pipeline and require manual approval. These include:
- Sensitive infrastructure changes: Certain modifications, such as those affecting security groups, databases, or critical services, can have broad implications. For these high-stakes changes, an additional layer of manual oversight in the CI/CD pipeline, regardless of the branch being used, can prevent potential mishaps.
- Resource cost implications: If a change might spin up numerous resources or higher-tiered services that could increase costs substantially, having an approval step can help teams manage and be aware of budgetary impacts.
- Production deployments: When pushing changes to production environments, extra caution is often warranted. Even if code has passed all branch-related checks, a final approval before production deployment ensures that changes are validated in the context of the production environment.
- Stateful operations: Operations that can cause data loss, like database migrations or schema changes, may benefit from a pipeline approval process. This ensures a deliberate confirmation step before proceeding with potentially irreversible actions.
- Complex multi-service deployments: For changes spanning multiple services or microservices, coordinating deployments can be challenging. An approval step can allow teams to ensure that interdependencies are correctly managed.
- Regulatory and compliance concerns: For organizations subject to regulatory requirements, having a manual approval step can assist in maintaining compliance, ensuring that changes align with legal and industry standards.
- Incident response and outages: During active incidents or outages, it might be necessary to halt all deployments temporarily. Even if the code change isn't directly related to the ongoing issue, introducing new changes could complicate mitigation efforts.
- Maintenance windows: Some organizations have predetermined maintenance windows where changes are allowed. Outside of these windows, deployments might be blocked, requiring manual approval to proceed.
- Validation of external resources: If a change relies on external APIs, datasets, or services, you might want to have an approval gate to ensure these external resources are available, updated, and working as expected.
Branch protection rules are valuable for enforcing coding standards and collaborative practices. However approvals that are embedded as part of the CI/CD workflow provide a more flexible way to address real-time operational, financial, and security concerns.
Buildkite has block steps, these can be used at any point in the middle of a build to conditionally block a build from proceeding using custom logic. For example, a build provisioning new infrastructure can be blocked (or paused) following the terraform plan or terraform apply in Staging, and only be progressed to terraform apply in Production following a review and approval by a particular user. Block steps, when used together with dynamic pipelines, can provide a framework for deciding the next course of action to take, based on user input.
Managing CI/CD with Terraform
Terraform isn't just for orchestrating application resources and infrastructure; it can also be used for managing CI/CD pipelines, and other resources in your CI/CD platform. While managing the CI/CD platform is often out of scope for an individual project, utilizing Terraform in this capacity allows for a unified, version-controlled approach to both infrastructure and CI/CD configuration.
Buildkite has an official provider in the Terraform Registry that can be used to configure and manage pipelines, teams, clusters, and more.
Managing CI/CD resources with Terraform - Demo - YouTube
Discover how to use Terraform to manage a build and deploy stack. This demo show you how to:– Integrate and manage Github and Buildkite– Create and manage Bu...
Conclusion
There are heaps of best practices, tools, and strategies available for working with Terraform, but it's important to remember that it's not always necessary —or feasible— to adopt them all at once.
I've explored a number of practices and configurations that I hope will help enhance your Terraform workflows. Remember, starting simple is perfectly acceptable and honestly, advisable too! Don't abstract or over-engineer too early, let your needs, and your project's requirements guide the evolution of your Terraform CI/CD workflows. Every team and project is unique, so it's vital to choose practices that work for you! Have fun!
Originally published on the Buildkite blog

Top comments (3)
Terraform workflows in CI/CD help automate the process of managing infrastructure. Using version control, testing, and automatic deployments makes everything smoother. It’s a smart way to keep things organized and safe while building projects.
A friend from Vancouver recommended spinwinera for some high-quality poker games. I decided to give it a try last weekend here in Canada. The level of play was quite good, and I lost a bit of money at the start. I was thinking of calling it a night, but I stayed for one last table. I ended up winning a big hand that completely recovered my losses. I’m very satisfied with the overall experience and the quality.
Hi there! I recently started exploring online slots in Nigeria and found pin up through a social media ad. I was looking for something new and this site definitely delivered. The variety of themes and game mechanics is very interesting. I had a bit of a losing streak at first, but I stayed patient and eventually hit a big win. It was a great moment and I’m very satisfied with how everything works on the site.