This article was originally posted on Everything DevOps.
A few months ago, while deploying an application in Amazon Elastic Kubernetes Service (EKS), my pods crashed with a standard_init_linux.go:228: exec user process caused: exec format error error.
After a bit of research, I found out that the error tends to happen when the architecture an image is built on differs from the architecture it is running on. I then remembered that I was building the image on a MacBook with Apple M1 Chip which is based on ARM64 architecture, and the worker nodes in the EKS cluster I deployed on are based on x86 architecture.
I had two options to fix the error: create new ARM-based worker nodes or build the image on x86 architecture. I couldn’t create new worker nodes for obvious reasons, so I had to figure out how to build x86 images on my Apple M1 chip.
In this article, I will walk you through how I built my application’s Docker image with x86 architecture on an Apple M1 chip using Docker Buildx.
What is Docker Buildx?
Docker Buildx is a CLI plugin that extends the docker command. Docker Buildx provides the same user experience as docker build with many new features like the ability to specify the target architecture for which Docker should build the image. These new features are made possible with the help of the Moby BuildKit builder toolkit.
Before you can build x86-64 images on an Apple M1 chip with Docker Buildx, you first need to install Docker Buildx.
Installing Docker Buildx
If you use Docker Desktop or have Docker version 20.x, Docker Buildx is already included in it, and you don’t need a separate installation. Verify that you have Docker Buildx with:
docker buildx version
But if you are like me that use another tool to get the Docker runtime, install Docker Buildx through the binary with the following commands:
$ ARCH=arm64
$ VERSION=v0.8.2
The above commands set temporary environment variables for the architecture and version of the Docker Buildx binary you will download. See the Docker Buildx releases page on GitHub for the latest version.
After setting the temporary environment variables, download the binary with:
$ curl -LO https://github.com/docker/buildx/releases/download/${VERSION}/buildx-${VERSION}.darwin-${ARCH}
After downloading the binary, create a folder in your home directory to hold Docker CLI plugins with:
$ mkdir -p ~/.docker/cli-plugins
Then move the binary to the Docker CLI plugins folder with:
$ mv buildx-${VERSION}.darwin-${ARCH} ~/.docker/cli-plugins/docker-buildx
After that, make the binary executable with:
$ chmod +x ~/.docker/cli-plugins/docker-buildx
To verify the installation, run:
$ docker buildx version
Building x86-64 images on an Apple M1 chip with Docker Buildx
After installing Docker Buildx, you can now easily build your application image to x86-64 on an Apple M1 chip with this command:
$ docker buildx build --platform=linux/amd64 -t <image-name> .
In the above command:
-
buildxbuilds the image using the BuildKit engine and does not require theDOCKER_BUILDKIT=1environment variable to start the builds. - The
--platformflag specifies the target architecture (platform) to build the image for. In this case,linux/amd64, which is of x86 architecture. - And the
<image-name>is a placeholder for putting an image tag.
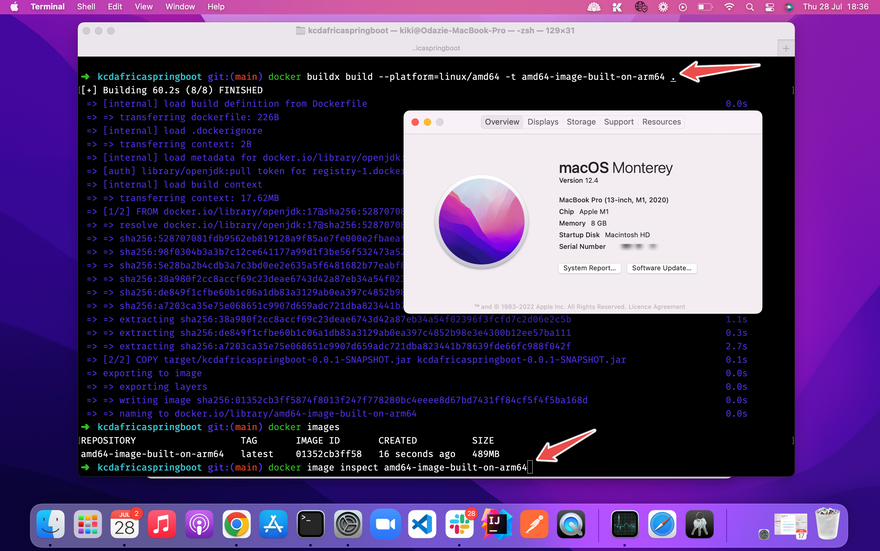
To verify that Docker built the image to linux/amd64, use the docker image inspect <image_name> command as you can see annotated screenshot above.
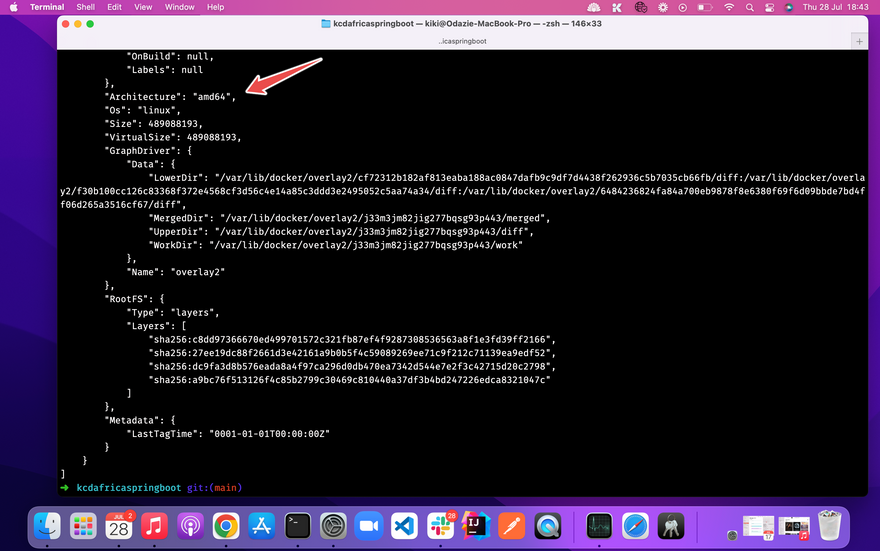
The inspect command will display detailed information about the image in JSON format. Scroll down, and you should see the Architecture and Os information as in the image below.
Conclusion
This article explored building images based on x86 architecture on an Apple M1 chip using Docker Buildx. There is so much more to learn about Docker Buildx. To learn more, check out the following resources:

Top comments (0)