In this blog I am going to introduce AWS CodeCatalyst a new service that AWS announced at re:Invent 2022.
It is a Unified software development service to quickly build and deliver applications on AWS.
CodeCatalyst project consists of blueprints which setup new software development projects without any human effort, including CI/CD, deployable code, issue tracking, and AWS services (IAM roles and policies) configured according to best practices.
You can know more about CodeCatalyst on their website .
Features of CodeCatalyst
Dev Environments: CodeCatalyst Dev Environments are automatically created with pre-installed dependencies and language-specific packages with integrated IDE.
Built-In Issue Tracking: It allows to create issues, add custom labels, and feedback on issues.
Customize pipelines: Create and customize automated workflows by configuring pre-defined actions using the desired IDE or directly editing the underlying YAML configuration. We can also use any GitHub Action in your workflows.
Built-in Code coverage, test support: built-in support for code coverage, software composition analysis, and unit tests.
Easy Deployment to AWS: Deploy applications to AWS services such as S3 or Cloudfront using CDK across accounts or regions.
Better Collaboration: Track project activity such as deployments, accepted pull requests through CodeCatalyst’s notifications and personalized activity feed.
Prerequisites
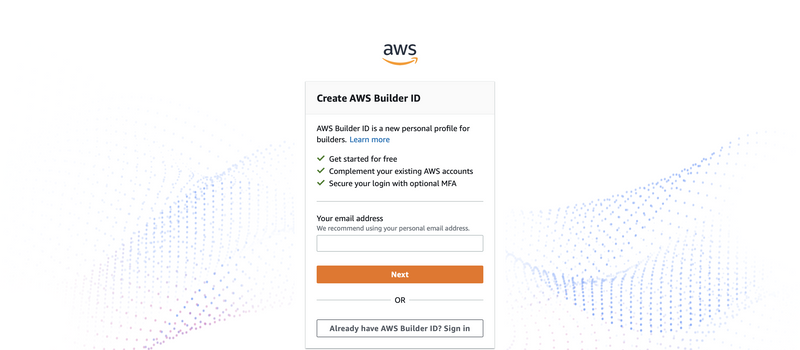
- You need to create AWS Builder ID ( to know more about it )
- At this moment, this service is in preview mode and only available in Oregon Region.
How to access CodeCatalyst?
CodeCatlyst can access from here.
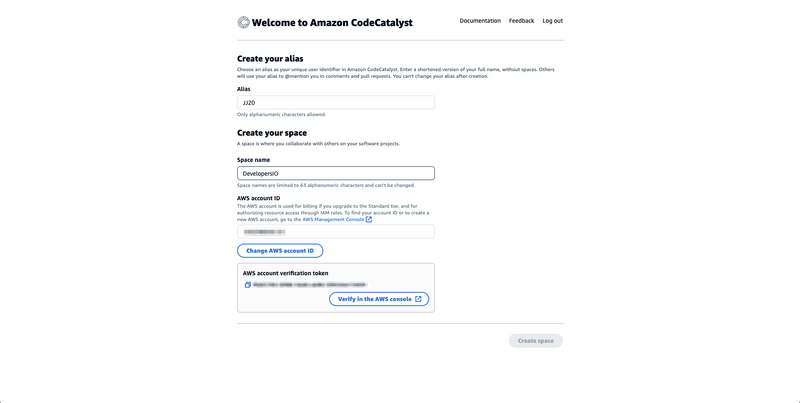
Set up an alias for CodeCatalyst. This is a unique identifier in CodeCatalyst. People will use this alias to mention in comments and pull requests.
Create a Space: Space is where you collaborate with others on your software projects, verify your space and create it.
Let's see CodeCatalyst in action.
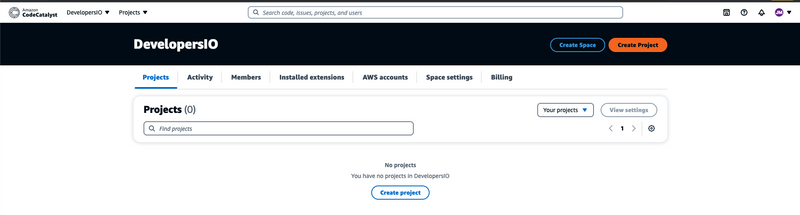
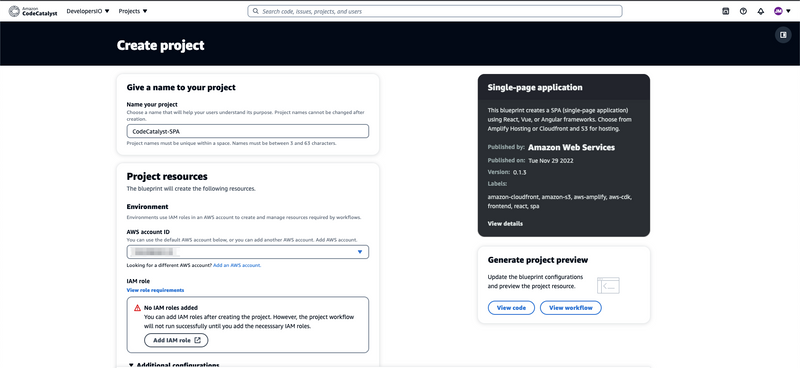
Create a project
- Can be either with a blueprint or from scratch. For this blog, we will use a Single-page application blueprint.
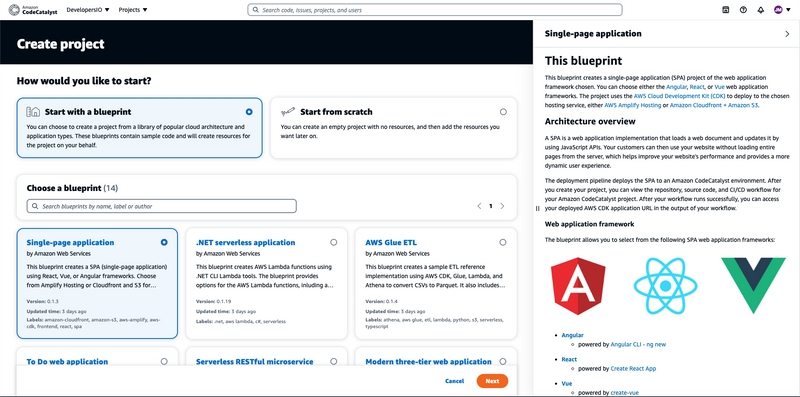
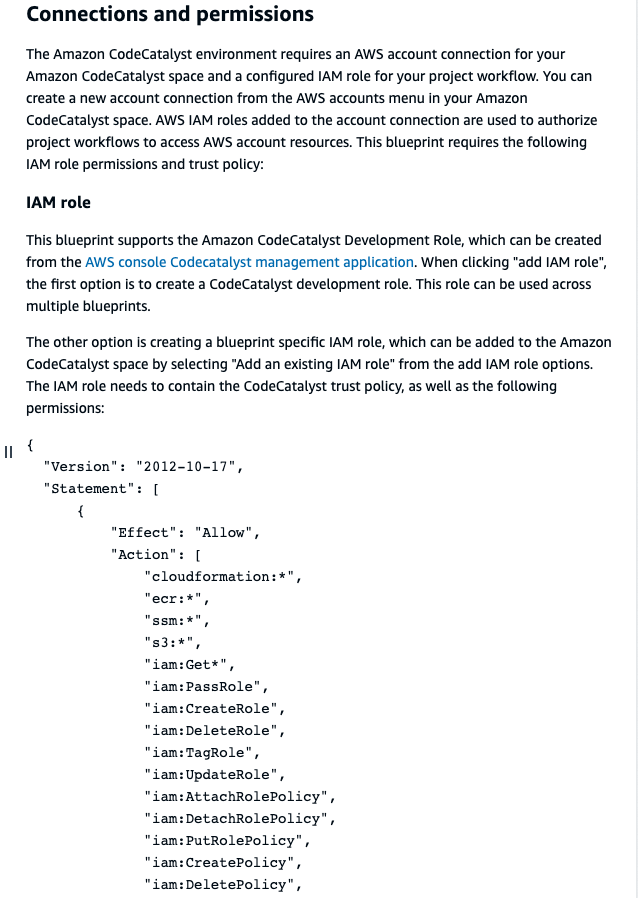
- After selecting the blueprint you can know more about it on the right pane. What does it do, about its architecture, which aws service components are being used and their explanation, about the IAM role, its permissions and trust policy it needs, account connections environment needs, and what resources it will create?
- About SPA Blueprint
This particular blueprint This blueprint creates a single-page application (SPA) project of the web application framework chosen. You can choose either the Angular, React, or Vue web application frameworks. The project uses the AWS Cloud Development Kit (CDK) to deploy to the chosen hosting service, either AWS Amplify Hosting or Amazon Cloudfront + Amazon S3.
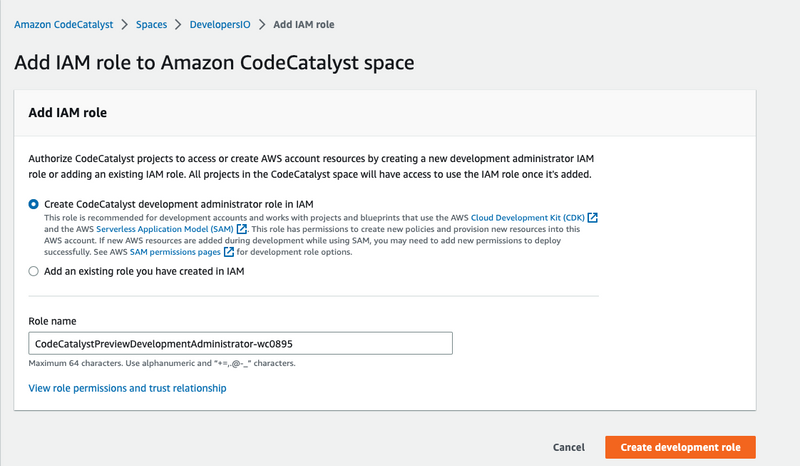
- On the next page, give a name to the project and click on add IAM role. It will redirect to role creation and page and after creation, it will be added to your spaces and then added this role to the project.
Note: If you don't add the role to your project, workflows will not able to run as they need permissions in order to interact with various AWS services.
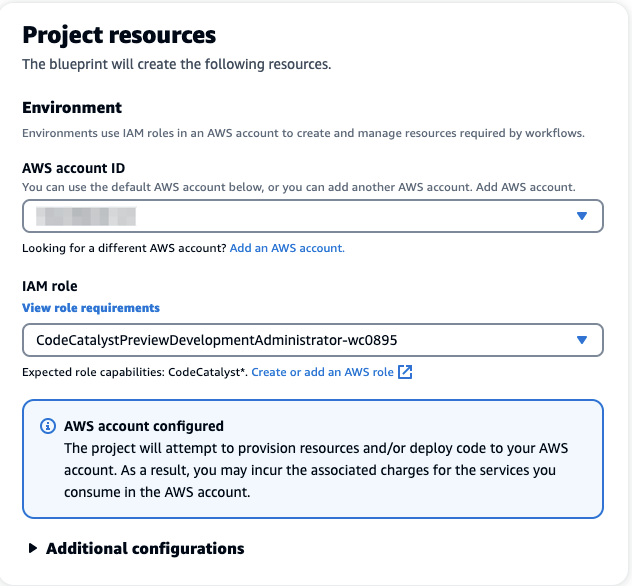
- Under additional configurations, you can configure configurations like what kind of framework, hosting and CDK programming language, region, repository name, and stack name. Of course, these configurations will change from blueprint to blueprint.
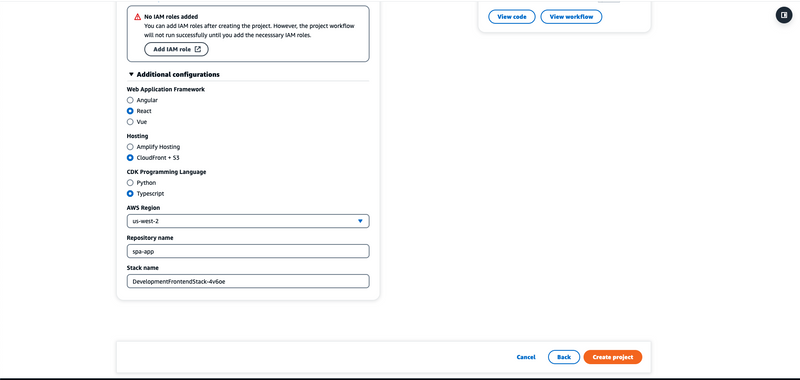
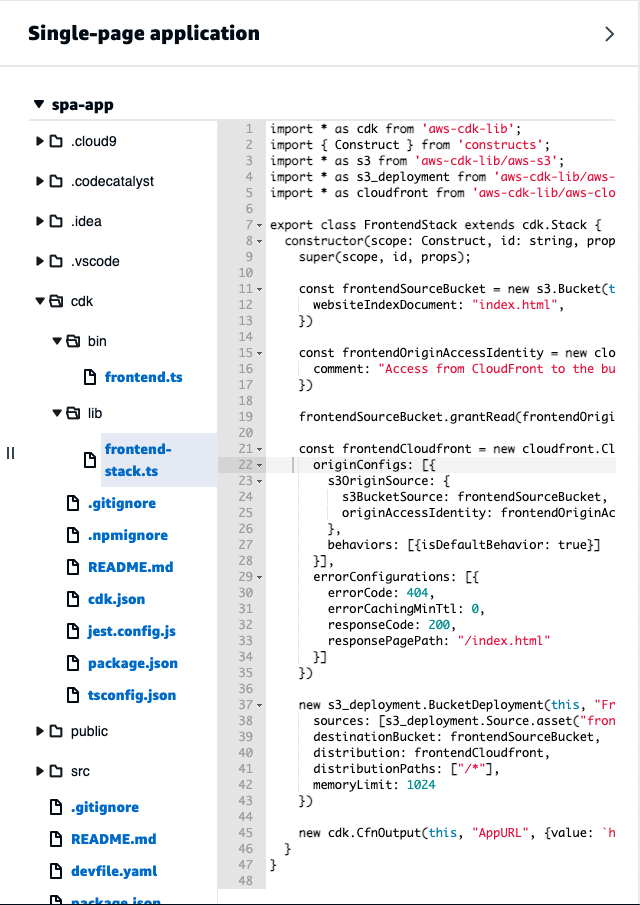
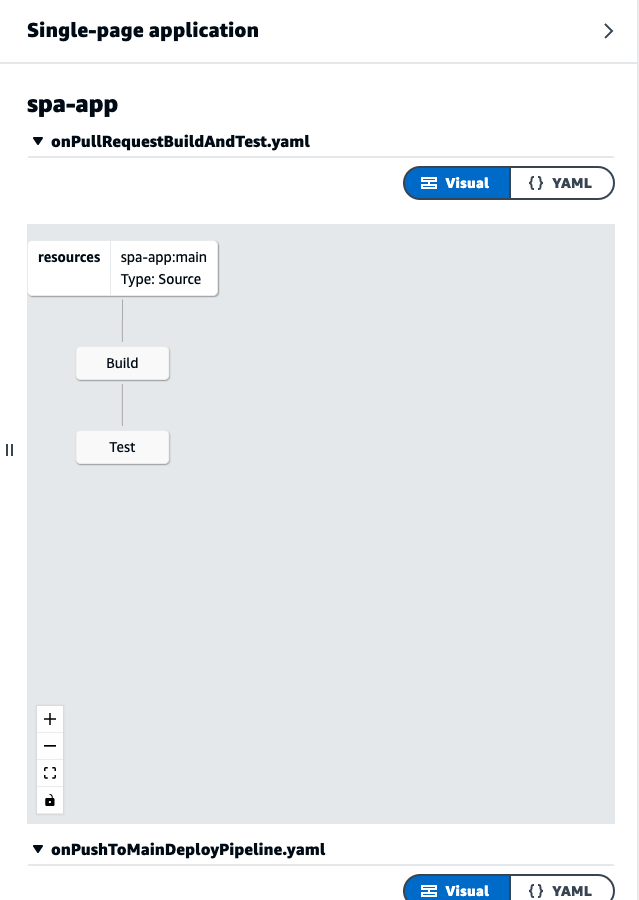
- You can also view the code and workflow defined in the blueprint.
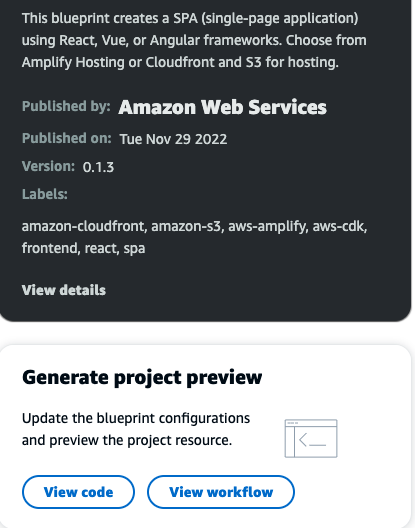
- Code tells about the code generated in the blueprint.
- Workflow tells what intermediary actions to be taken for events (like PUSH/PULL PR)
Create Project.
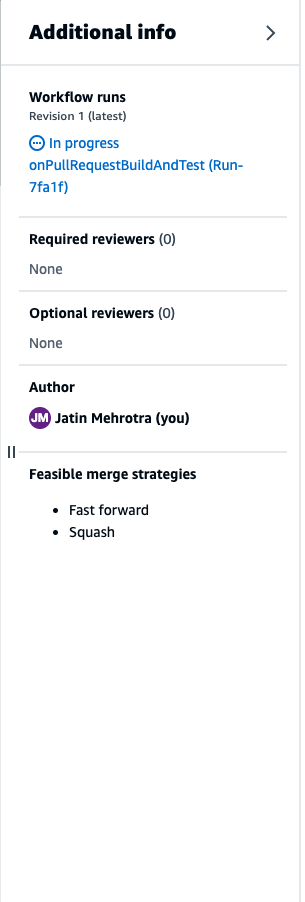
- Once the project is created you can view its repository, a README is populated automatically, and You can create a workflow, Create PR, and create Issues or Environments.
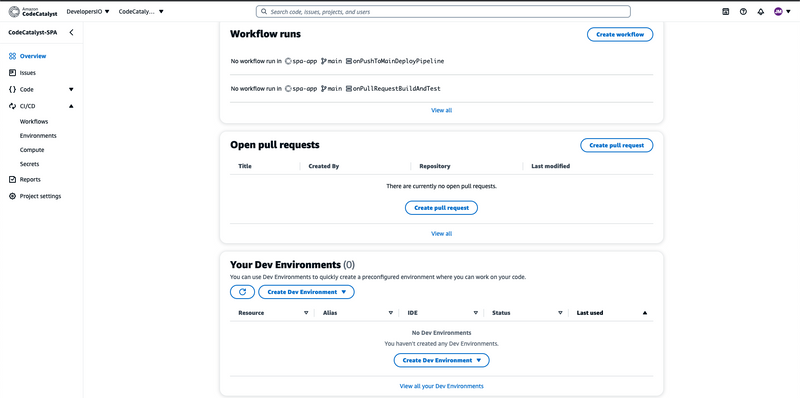
In order to deploy the application we need to run the workflow. URL for the application will be in the output of the workflow.
-
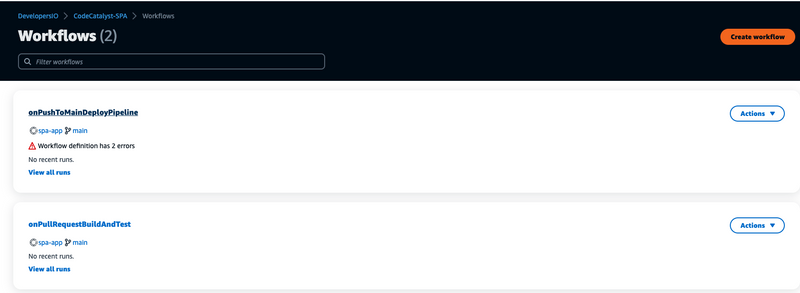
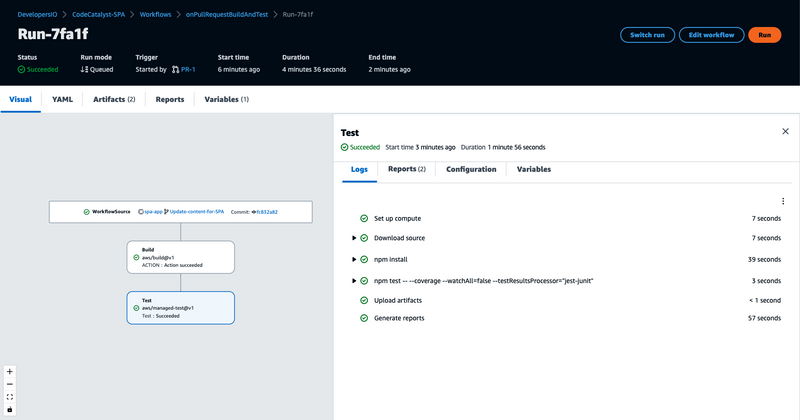
In this blueprint, there are 2 workflows already created:
- For Building and testing the code on PR.
- For running deploy pipeline for push to the Main branch.
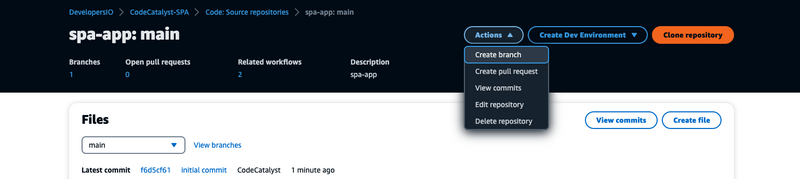
- In order to create a PR, we will create a branch. In this PR we will add the
<p> tagDeveloped and Deployed using CodeCatalyst and then commit it with a commit message.
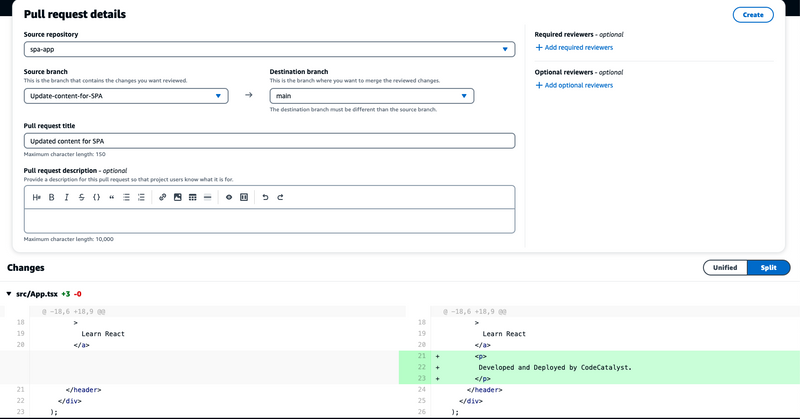
- After PR is created workflow for build and test will run. You can even see the workflow by clicking on its link.
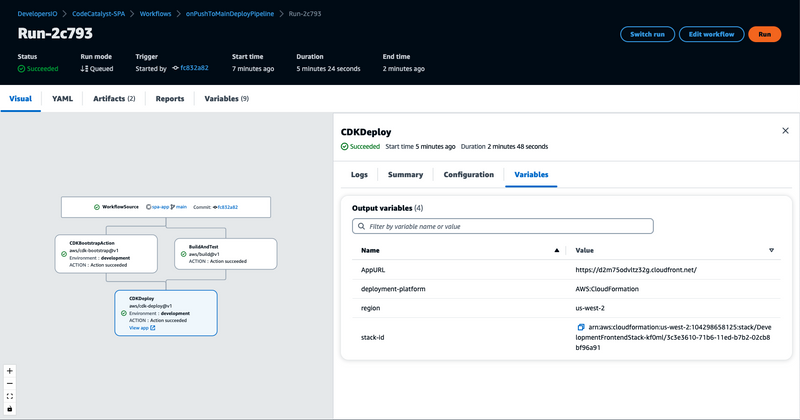
- Once the workflow is successful, you can ask for a review and then merge it. Upon Merge it will run the DeployPipeline workflow which will deploy the application.
- You can also check the code coverage and unit test details.

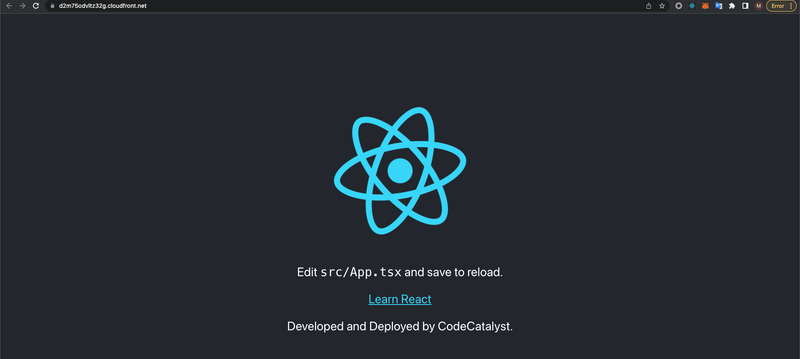
- Access the application by URL present in workflow.
From Developer and DevOps Perspective
CodeCatalyst took me a maximum of 10 minutes ( including deployment minutes) to create and deploy which is really, really fast. If I had to do this on my own using IaC, I would have to figure out role permissions, check the documentation, set up CI/CD, and integrate all the components and development environment which would have taken a lot of time.
With this all-in-one software development service, it is very easy and efficient to develop applications on AWS.
This is going to save a lot of significant time and resources that software teams spend on various infrastructure components, and development environments, which will enable to deliver to quickly deliver new features or software updates to customers.
Do you think CodeCatalyst will help your teams? Share your thoughts or feedback over Linkedin or Twitter.

Oldest comments (0)