
Windows Admin Center was announced at Microsoft Ignite 2021 and went generally available in October 2022.
With Windows Admin Center built into the Azure Portal, administrators can more granularly manage Windows Server virtual machines (VM). Manage server files and certificates, and view events.
Windows Admin Center in Azure Requirements
To be able to install the Windows Admin Center extension on your Azure VM, you need to have either Owner or Contributor rights within Azure.
Connecting to Windows Admin Center requires Reader or Windows Admin Center Administrator Login rights at the virtual machine level.
The Windows Admin Center extension must also be installed on each Azure VM you wish to manage. Your Azure VM must reside in an Azure public cloud region - Windows Admin Center is not supported in Azure China, Azure Government or other non-public clouds. There are also some requirements around Azure VM configuration:
- Windows Server 2016, Windows Server 2019 or Windows Server 2022
- At least 3 GiB of memory
- Outbound internet access or an outbound port rule that allows HTTPS traffic to the WindowsAdminCenter and AzureActiveDirectory service tags
It is possible to connect to your Azure VM through public IP addresses, but as with Remote Desktop, the recommendation is to use a private IP address to increase security.
On the machine you are using to connect to the Azure Portal, you need to use Microsoft Edge or Google Chrome. And will need to be on the same network as the Azure VM if there isn’t a public IP to connect to.
Windows Admin Center in Azure Use Case
Why would you use Windows Admin Center inside Azure?
- Single management console. It’s a cliché, but not having to open another window and not having to use another tool can save so much time.
- Reduces the reliance on having local administrator accounts or rights within the virtual machine. Permissions can be managed at the Azure level.
How to Set Up Windows Admin Center in the Azure Portal
I’m going to walk through setting up Windows Admin Center on an Azure VM with a public IP, and the process will be similar for those with a private IP, but there will also be some differences.
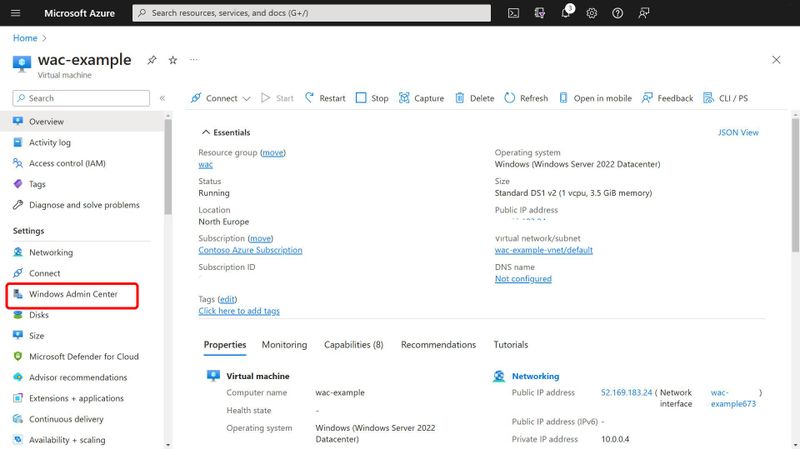
- In the Azure Portal, head to your virtual machines
- In the list of VMs, click on the VM you want to manage using Windows Admin Center
- On the Overview page, ensure that your VM is running
- Under Settings , click Windows Admin Center
Azure Virtual Machine Blade
- The Windows Admin Center blade will now be visible; click on Open this port for me (Recommended for testing only)
- Now click on Install
Windows Admin Centre can take up to 5 minutes to install for your VM. When it is finished, you will see a completed notification in the top right-hand corner of the Azure Portal.
You can automate the installation of the Windows Admin Center extension when you deploy your Azure VM. There is support inside an ARM template to do this.
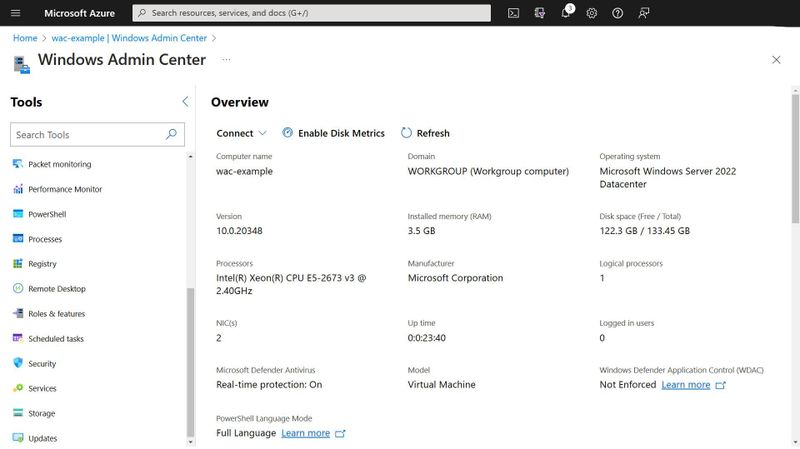
Connect to WAC in the Azure Portal
With Windows Admin Center set up within your Azure VM, it’s time to try it out.
- Within your Azure VM under Settings click on Windows Admin Center
- When the blade load, select the IP address you wish to connect through; in this case, I am going to use the Public IP and click on Connect
- Once the console has loaded, you are authenticated to the machine and start configuring or managing the Azure VM
Windows Admin Center in Azure
I’m a big fan of Windows Admin Center and love the flexibility and functionality it gives you to manage your Windows Servers, be sure to check it out, either within Azure or for your on-prem servers.

Latest comments (0)