Pulumi is a player in the infrastructure-as-software space that I find really interesting. One of the tools they provide is the Pulumi Service, which is a management platform for the infrastructure you define.
Pulumi recently introduced Pulumi Deployment, in preview. This simply means that Pulumi can run the deployments for you, instead of you running it yourself.
Running the Pulumi mini-deployments challenge
Pulumi has a series of challenges, aimed at getting people familiar with the various features they provide. Challenge 3 is about using this new deployments feature. You can use any solution template provided by Pulumi, and then set it up to be deployed.
I had already completed the two previous challenges and ran this challenge as well. Pulumi Deployment is still in preview only, so you need to request access to it for your Pulumi account. If you do not have an account already, create that first and then fill in the details when you apply for access to Pulumi Deployment. It may take a day or two to get the access approved.
Once I got the access, I set up the challenge. The instructions for the challenge are quite good. Thus, it was pretty straightforward to set up.
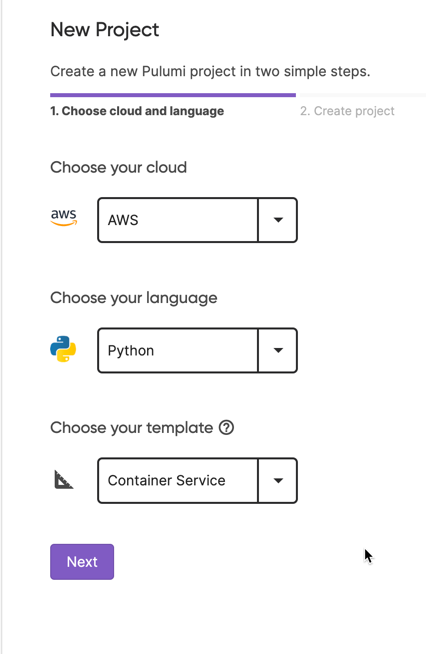
First, you need to be logged in to the Pulumi Service through its web interface. In there, you can create a new project. In my case, I picked to use AWS as the cloud provider, Python as the language to use for the infrastructure, and the Container Service template.
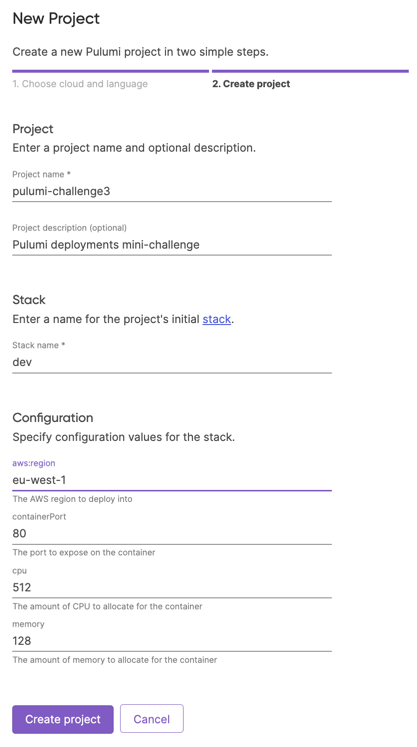
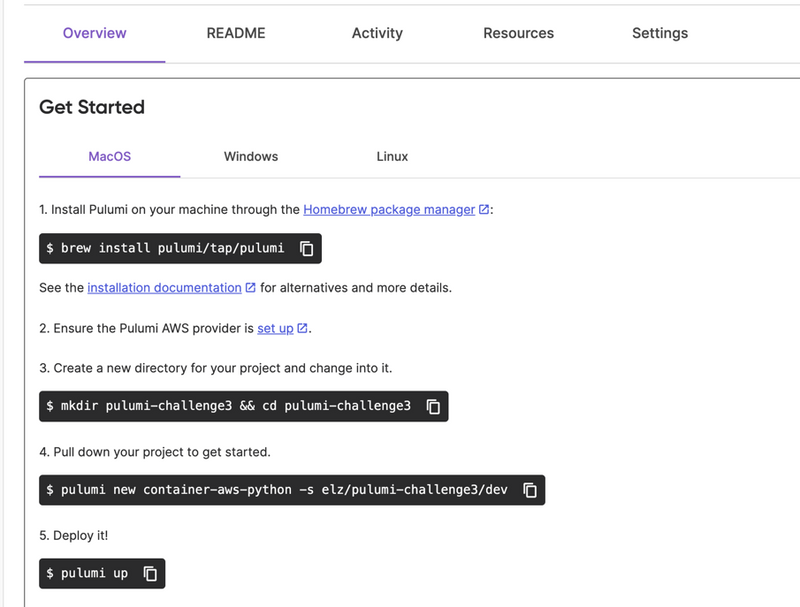
Next, it was time to fill in some details for AWS, and the specific template I selected. Once that was done, the wizard in Pulumi provided details on how to set up Pulumi and create an initial local copy of the project.
Next part was to put the local project into a hosted Git service, GitHub in my case. This is not included in the wizard and the challenge gave an example of the steps to do. If you are already familiar with setting up a repository in GitHub or similar services, this should be ok.
Once that was done, the next steps were to set up the deployment configuration in the Pulumi service. For this to work, you need to install the Pulumi GitHub app (if you are using GitHub), for which there is a link to do that directly from Pulumi. This is also the recommended approach, as this should put the proper settings in place for you.
When you install this app, you will pick the user or organisation to configure it for, and the repositories to give permission to access.
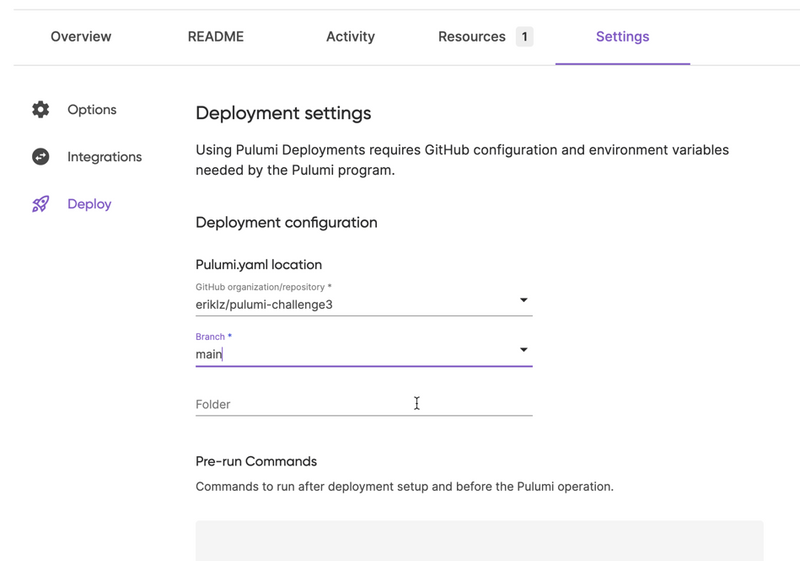
Once the app setup is done, you can continue with configuring the deployment for your project, which includes picking a repository, the branch, and possibly a specific folder in that repository for the deployment.
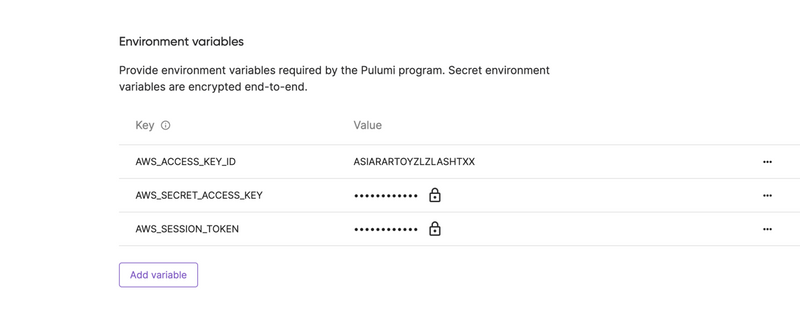
After this, you need to configure the credentials to access the cloud provider via environment variables. Environment variables can be secret, so their values will not be visible in the interface.
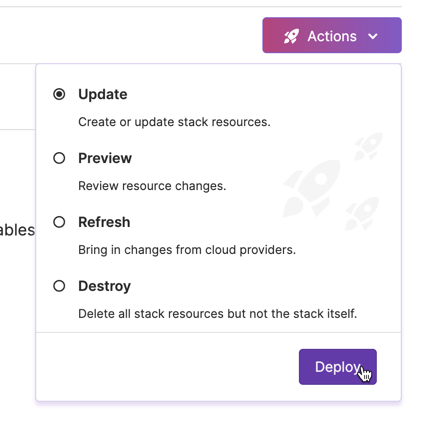
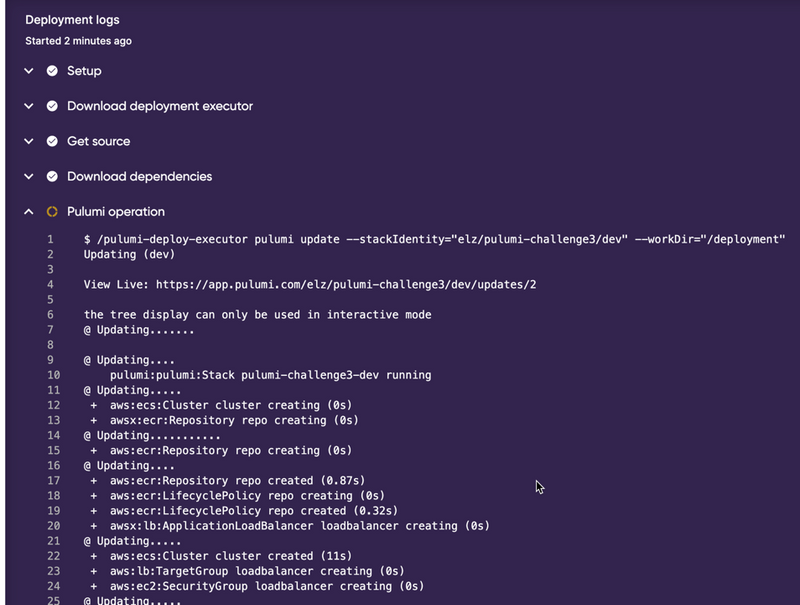
With the credentials in place, the next step is to actually start the deployment. In the Action menu on the web page, you can select what operation to perform (update in this case), and click on Deploy. The deployment started, and the progress shows in the web interface.
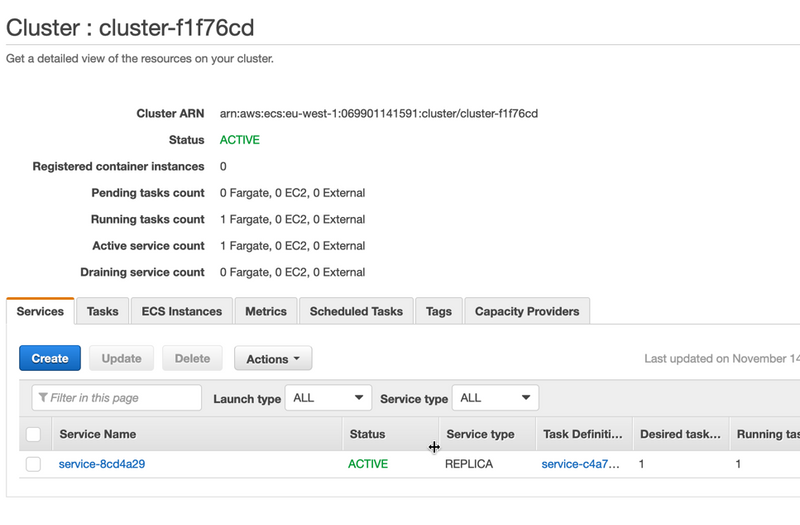
The deployment completed after a few minutes. A check in the AWS Console showed that the deployed cluster and container were there.
Challenge completed!
Extending beyond the challenge
There are more ways to trigger a deployment than the one in the challenge, and one of them is to perform a git push to trigger a deployment.
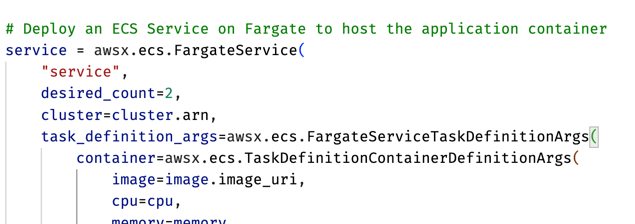
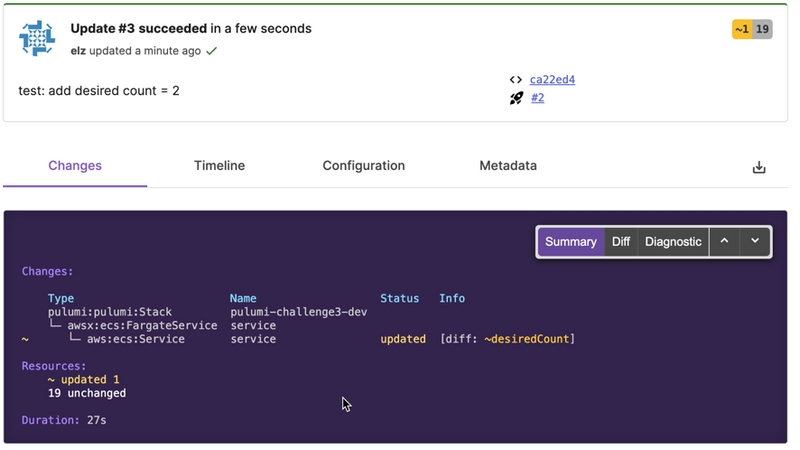
I updated the code for the solution to include two container instances as the desired count (the default is 1), pushed the changes to GitHub directly to the main branch and checked the Pulumi service. I could see in the web interface the update started, and it completed shortly after.
There were no additional changes I had to make for this to happen. Likewise, I also tested making a change via a pull request. Pulumi performed a preview of the pull request automatically, and when I merged the pull request into the main branch, it deployed the changes.
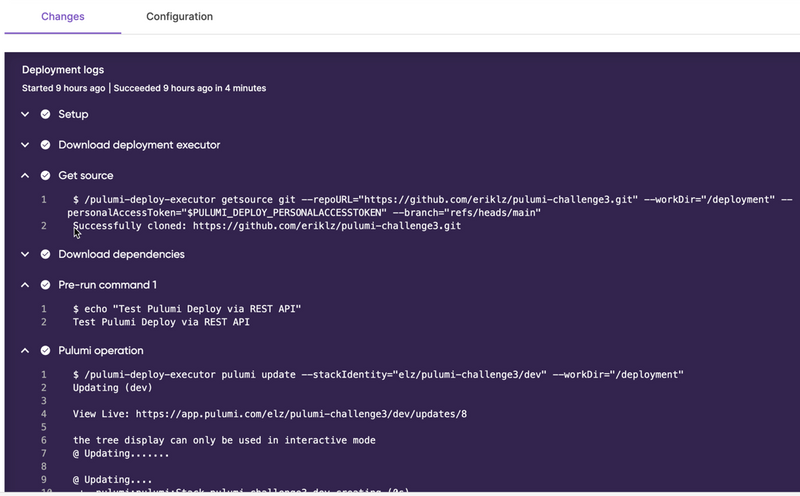
There is also a REST API for the deployment feature, and the documentation is fairly clear what a request should look like. I set up a deployment using this REST API as well, from the examples in the documentation.
import json
import os
import httpx

pulumi_token = os.environ.get('PULUMI_ACCESS_TOKEN')
github_token = os.environ.get('GITHUB_TOKEN')

organisation = 'elz'
project = 'pulumi-challenge3'
stack = 'dev'
github_repo = 'eriklz/pulumi-challenge3'

deployment_api_url = f'https://api.pulumi.com/api/preview/{organisation}/{project}/{stack}/deployments'
github_repo_url = f'https://github.com/{github_repo}.git'

headers = {
  'Content-Type': 'application/json',
  'Authorization': f'token {pulumi_token}'
}

body = {
  'sourceContext': {
    'git': {
      'repoURL': github_repo_url,
      'branch': 'refs/heads/main',
      'gitAuth': {
        'accessToken': {
          'secret': github_token
        }
      }
    }
  },
  'operationContext': {
    'operation': 'update',
    'preRunCommands': [
      'echo "Test Pulumi Deploy via REST API"'
    ],
    'environmentVariables': {
      'AWS_REGION': 'eu-west-1',
      'AWS_ACCESS_KEY_ID': os.environ.get('AWS_ACCESS_KEY_ID'),
      'AWS_SECRET_ACCESS_KEY': {
        'secret': os.environ.get('AWS_SECRET_ACCESS_KEY')
      },
      'AWS_SESSION_TOKEN': {
        'secret': os.environ.get('AWS_SESSION_TOKEN')
      }
    }
  }
}

response = httpx.post(deployment_api_url, headers=headers, data=json.dumps(body))
print(response.text)
This feature allows more ways to handle deployments. In this case you can use new temporary credentials each time, which is nice.
There are means to set temporary credentials outside of a deployment execution via the REST API also, but not yet part of the public API. It is still a preview only, after all.
Overall, I think the experience was nice and easy to get started with. It is a nice addition to the Pulumi service, and I am looking forward to see how it develops!




Top comments (0)