What is a Chatbot?
A chatbot is a software or computer program that simulates human conversation or "chatter" through text or voice interactions.
Amazon Lex is a fully managed artificial intelligence (AI) service with advanced natural language models to design, build, test, and deploy conversational interfaces in applications.
This article aims to create an automated agent that will retrieve information about the current prices and trends of the crypto market.
Requirements
- AWS account
- NPM / CDK / Python
- Coinmarketcap API key
- Twilio account (optional)
Walkthrough
Let's create an account in CoinMarketCap to get our API Key. Feel free to choose the plan that adjusts to your use case, but the basic plan is good enough for this example.
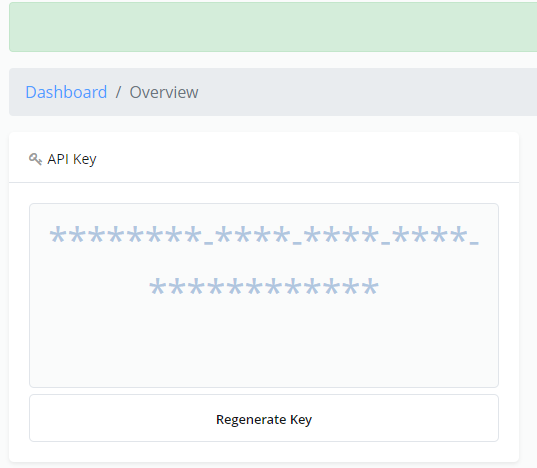
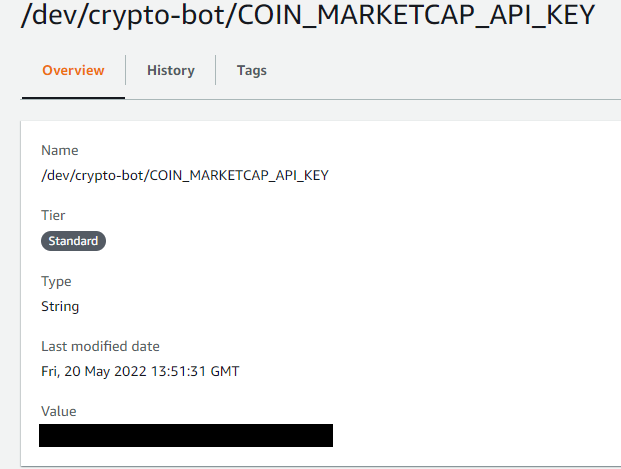
With our API Key, create a Parameter Store to store this value.
/dev/crypto-bot/COIN_MARKETCAP_API_KEY : <<your-api-key>>
For this example, I will use a clear string for the API Key value, but it is recommended to secure the string with an encrypted AWS KMS key.
Now lets begin creating our project with cdk, after we configure our aws credentials, run:
cdk init sample-app --language python
In our requirements.txt file lets add the following dependencies:
#requirements.txt
aws-cdk-lib==2.23.0
constructs>=10.0.0,<11.0.0
python-coinmarketcap==0.3
requests==2.27.1
boto3>=1.15.0
python-coinmarketcap is a dependency that wraps Coinmarketcap API very nicely; feel free to use this dependency or to use a direct implementation which you can find here.
boto3 is a dependency that acts as the AWS SDK for Python; this will be used to access the Parameter Store previously created.
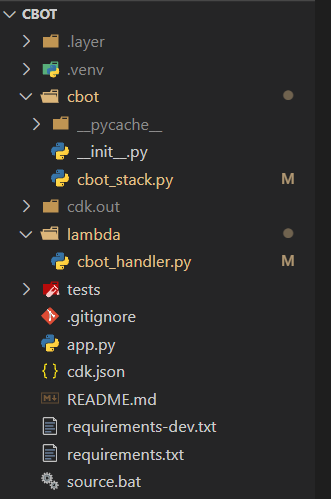
In our app.py file you can change the name of the project and the name of the stack, for this example I will name it cbot.
#app.py
import aws_cdk as cdk

from cbot.cbot_stack import CbotStack


app = cdk.App()
CbotStack(app, "cbot")

app.synth()
Create a folder with the name of your project (cbot), and create or rename the name of the stack file (cbot_stack.py). In this stack, we will create a lambda, give that lambda access to our Parameter Store, and create a layer to add our dependencies.
Create a folder named lambda, and create a cbot_handler.py. In this lambda, we will use the CoinMarketCap API, which will interact with our slot intent.
#cbot_handler.py
def search_crypto(intent_request):
    session_attributes = get_session_attributes(intent_request)
    slots = get_slots(intent_request)
    crypto = get_slot(intent_request, "crypto")
    api_key = ssm.get_parameter(Name="/dev/crypto-bot/COIN_MARKETCAP_API_KEY")
    cmc = coinmarketcapapi.CoinMarketCapAPI(api_key["Parameter"]["Value"])
    r = cmc.cryptocurrency_info(symbol=crypto.upper())
    text = repr(r.data[crypto]["description"])
    message = {"contentType": "PlainText", "content": text}
    fulfillment_state = "Fulfilled"
    return close(intent_request, session_attributes, fulfillment_state, message)
Our project should look a bit like this:
Run the cdk bootstrap command to prepare our account to handle cdk deployments.
cdk bootstrap
Now we are ready to deploy our lambda into our account
cdk deploy
Let's start with the final step, create a bot using the AWS Lex service
- Creation method > Create a blank bot
- Bot configuration > Name your bot
- IAM permissions > Create a role with basic Amazon Lex permissions
- Children’s Online Privacy Protection Act (COPPA) > No
- Language > English (US)
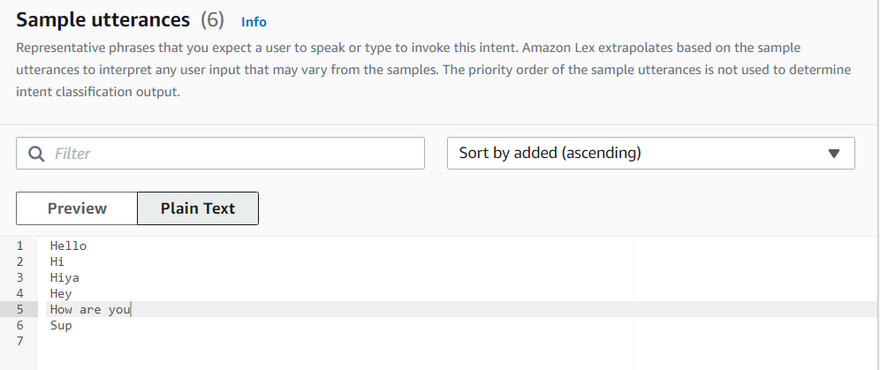
Create a Welcome Intent; let's add some examples that our bot will learn and detect our intent
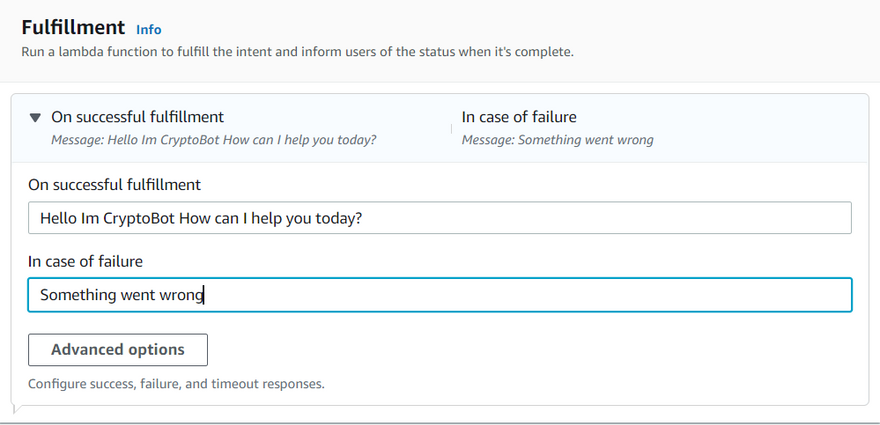
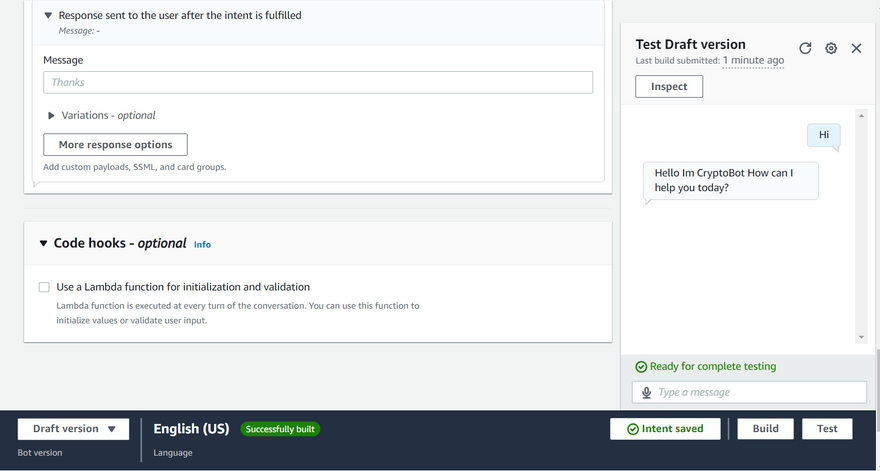
Add our bot response to the fulfillment section
Test our bot, if we configure our intents properly it should response with our fulfillment text
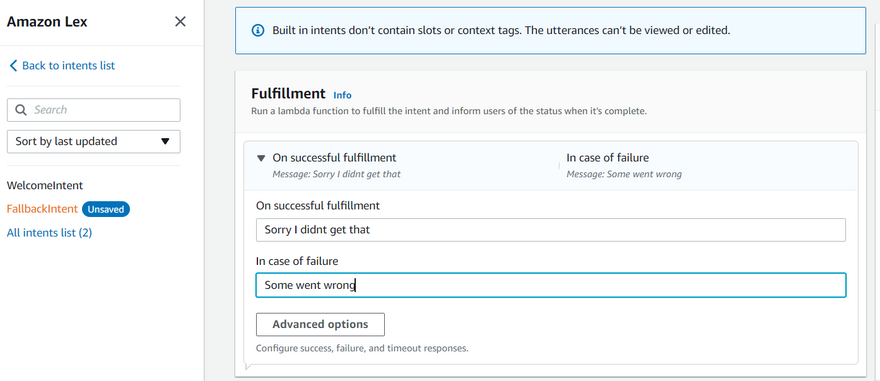
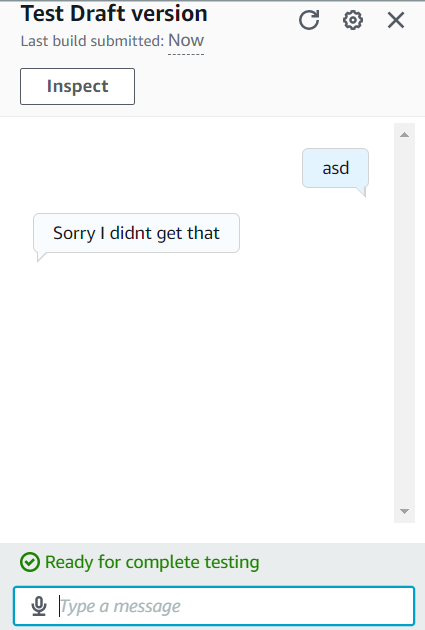
Configure the text of the fallback intent, if something goes wrong this intent should catch this error and show a generic error message
Save the intent, build and test. If you write something that we didn't add to the utterance examples, it should trigger our fallback intent.
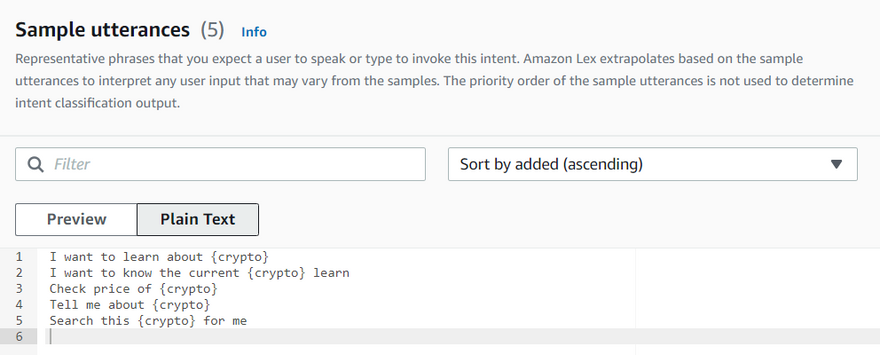
Create another intent named CryptoSearch; let's add some utterance examples to detect if a user wants to search about crypto
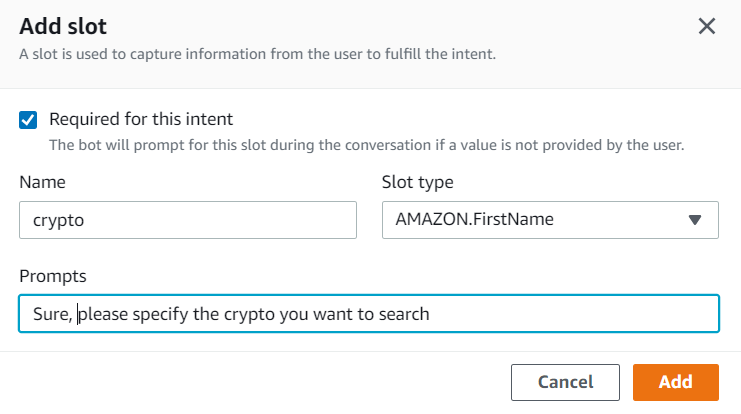
Add a slot. In this slot, we will capture the crypto symbol we would like to search with our CoinMarketCap API; you can define a specific type of data, but for simplicity, I will use the integrated type AMAZON.FirstName to capture the value inputed by the user. (Be sure to name it identical to our code in our lambda.)
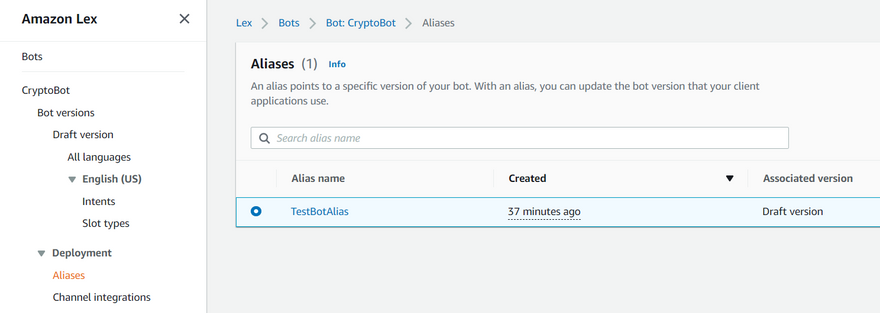
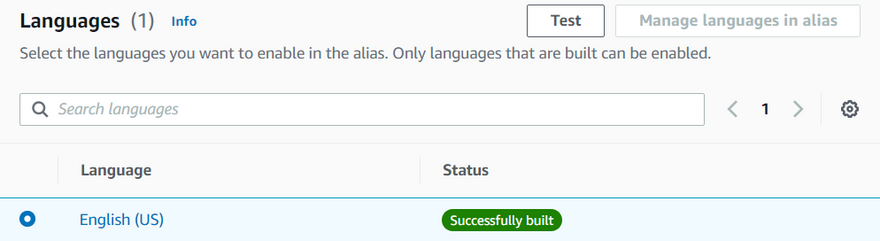
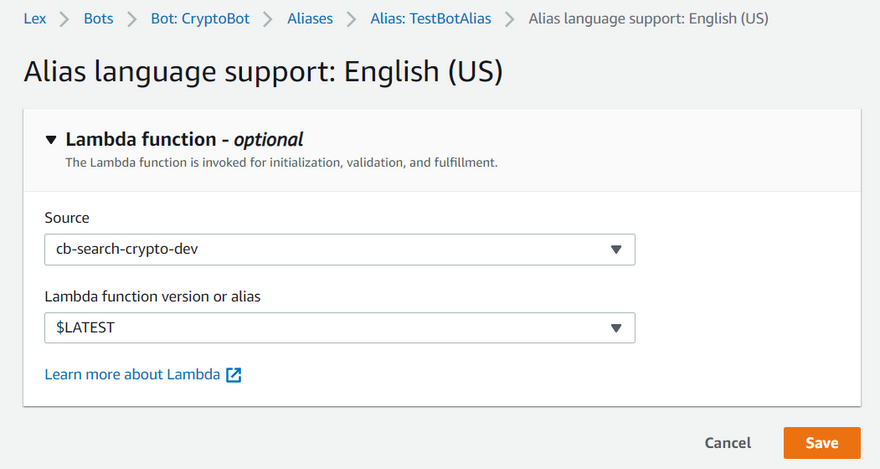
Under Deployment in Aliases, let's add our lambda, be sure to create a production alias when you move your bot to production. For this example, we will use the default alias
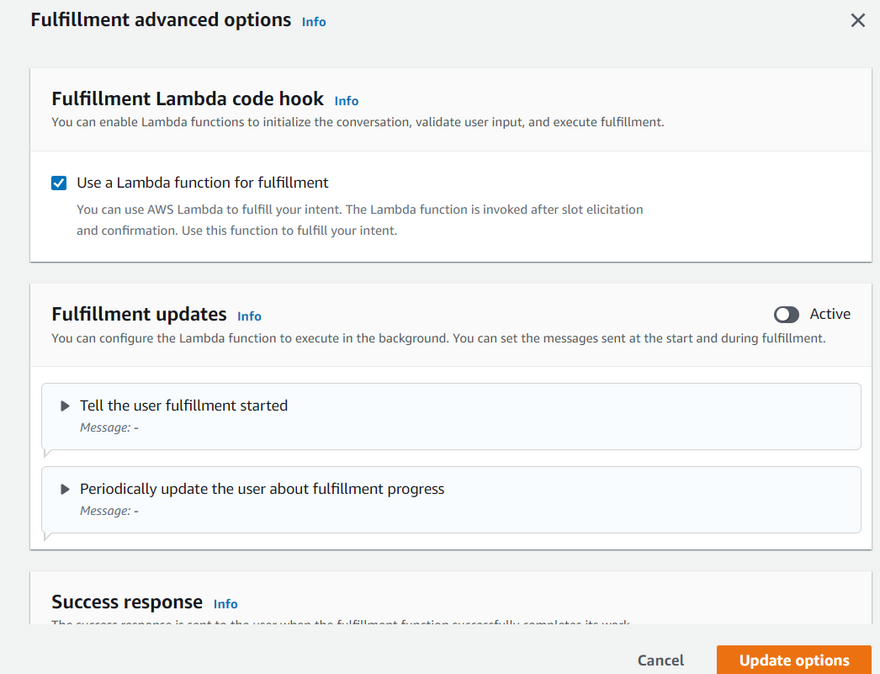
In the fulfillment section of our CryptoSearch intent, be sure to use our lambda function
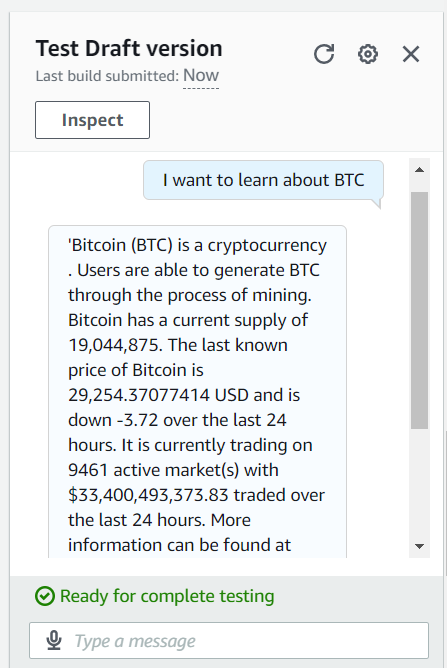
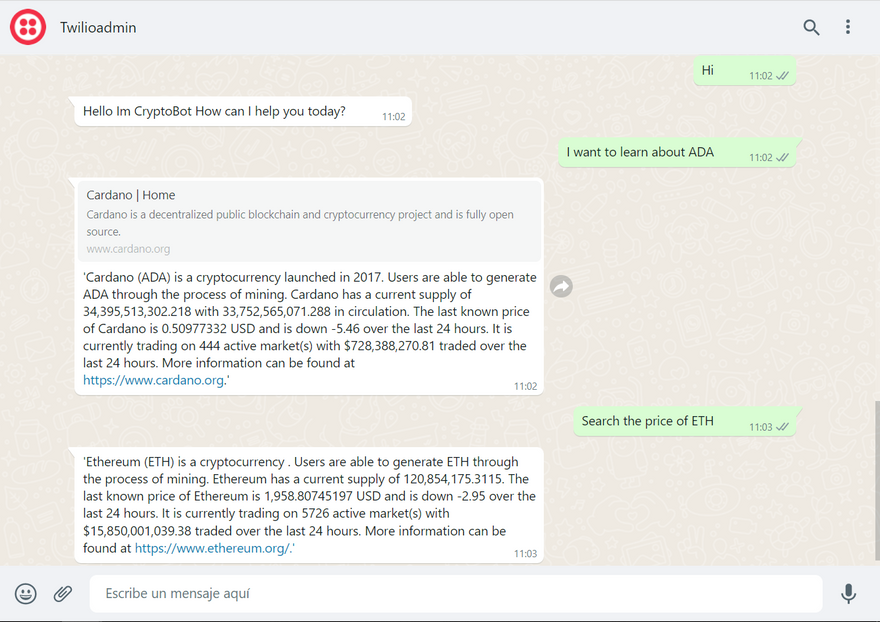
Save the intent, build and test our bot. Now we can retrieve information about any crypto that CoinMarketCap supports! We can even try fancy things like plotting, creating trends, or showing candle graphs.
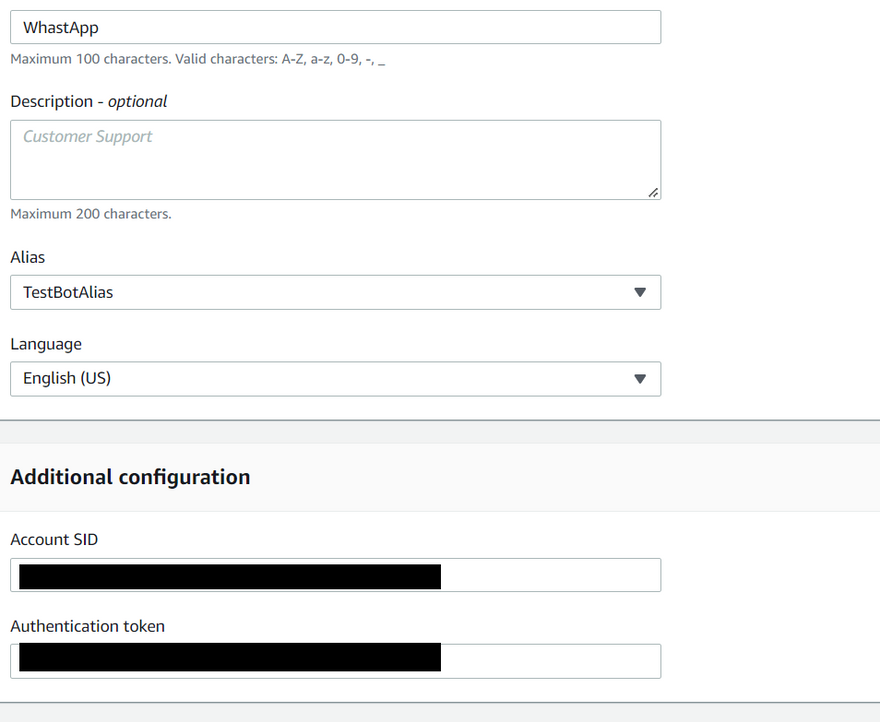
Now let's integrate our bot into social media. In this example, I will use Twillio to publish our bot into WhatsApp, create an account in Twilio and copy the SID and Authentication values.
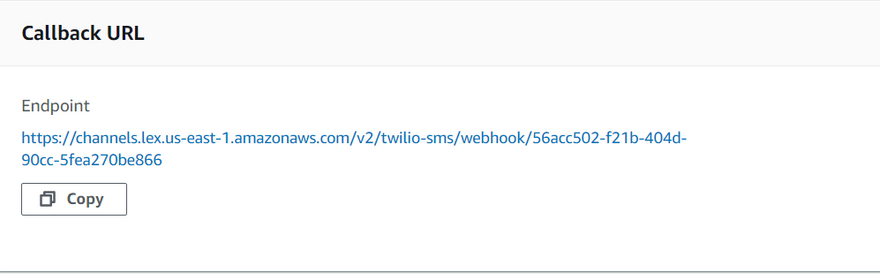
In AWS, lex select Channels, select Twilio and create the channel integration.
Copy the callback URL generated in our integration.
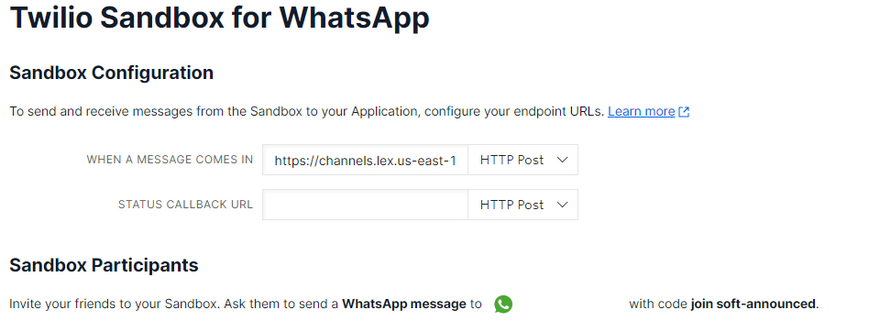
In the Twilio, dashboard, select message and set up a Twilio Sandbox for Whatsapp; here, we will copy our callback URL, which will connect the messages sent from WhatsApp to our bot in AWS Lex.
And.. that's it! Now our bot works with WhatsApp and Lex.
You can find the complete code here

Top comments (5)
Serious traders often look for breadth in market strength: not just one or two coins moving, but widespread increases in transaction count, network growth, and active addresses across multiple tokens. They check on-chain data (wallet activity, token flows) plus supply metrics (declining supply on exchanges tends to reduce immediate selling pressure). Also, macro environment matters — interest rates, regulatory clarity, institutional demand. The article technoxyz.com/how-to-spot-a-crypto... makes a point that real bull runs are supported by multiple pillars, not just social hype or short-term momentum.
Creating a WhatsApp Crypto Chatbot using AWS Lex, CDK, CoinMarketCap, and Twilio enables real-time cryptocurrency updates through conversational AI. Wikipedia explains that chatbots utilize natural language processing to simulate human interaction, enhancing automation and user engagement in finance and tech applications. Integrating such systems with WhatsApp allows seamless communication, making market data easily accessible to users worldwide.
Wracając z gór Świętokrzyskich, utknąłem w Kielcach na dworcu (pociąg widmo). Zimno, wieje (jak to w kieleckim). Odpaliłem duo-spin.pl na telefonie. Bałem się, że padnie bateria. Ale zagrałem szybką rundę w slots online. Wiatr za oknem i emocje na ekranie. Wygrałem trochę kasy, akurat na gorącą herbatę i kanapkę. Strona nie zżarła baterii do końca, więc mogłem sprawdzić rozkład. Działa sprawnie.
This post gives a thoughtful overview of chatbots as AI-driven conversational systems, similar to how Wikipedia explains them as programs designed to simulate natural human dialogue, and it walks through a practical example using Amazon Lex, AWS CDK, and CoinMarketCap APIs to fetch real-time crypto insights. It’s impressive how such tools mirror everyday communication platforms like whatsapp, making automated conversations feel familiar and user-friendly while still serving a meaningful technical purpose. The hands-on approach and focus on secure API handling add real value for learners exploring modern conversational technology.
thanks for info