In this blog we will see how to integrate sentry into an existing next.js application.
Installing
Add Sentry’s Next.js SDK to your next.js projects.
yarn add @sentry/nextjs
Automatic Configuration
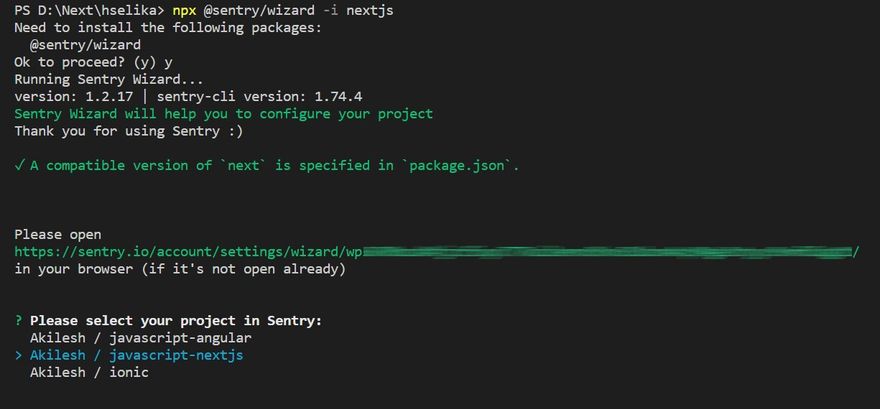
npx @sentry/wizard -i nextjs
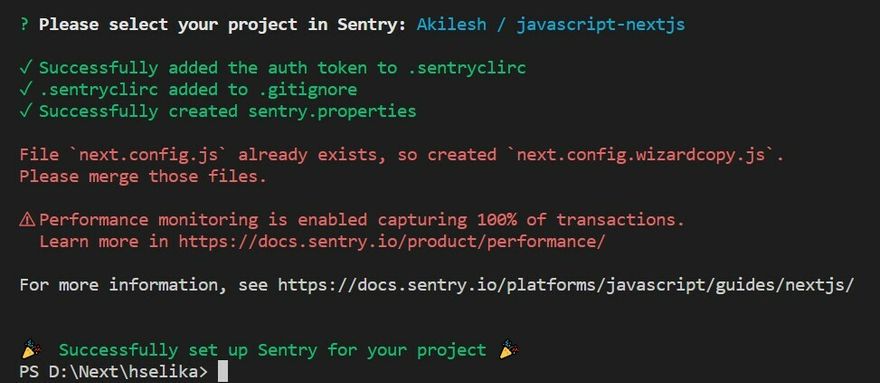
Choose your project from below listed options on your CLI then the setup wiz will automatically create configuration file's with default values and your API key.
Generated file's:
- sentry.client.config.js
- sentry.server.config.js
- .sentryclirc (Where the token key will be stored)
- sentry.properties
- next.config.wizardcopy.js (if next.config.js already exists).
Modify next.config.js
If next.config.js does already exist in your project, the app will automatically create a next.config.wizardcopy.js then we'll need to manually copy the snippet into next.config.js.
Paste this snippet in your next.config.js
/** @type {import('next').NextConfig} */
const { withSentryConfig } = require( '@sentry/nextjs' );

const nextConfig = {
  reactStrictMode: true
}

const sentryWebpackPluginOptions = {
  // Additional config options for the Sentry Webpack plugin. Keep in mind that
  // the following options are set automatically, and overriding them is not
  // recommended:
  //   release, url, org, project, authToken, configFile, stripPrefix,
  //   urlPrefix, include, ignore

  silent: true, // Suppresses all logs
  // For all available options, see:
  // https://github.com/getsentry/sentry-webpack-plugin#options.
};

module.exports = withSentryConfig( nextConfig, sentryWebpackPluginOptions );
Backend
In an application to capture errors and monitor server performance of the API, we will wrap the handlers with a Sentry function.
Syntax:
import { withSentry } from '@sentry/nextjs';

const handler = async (req, res) => {
  // your API calls...
}

export default withSentry(handler);
Reference:
import type { NextApiRequest, NextApiResponse } from "next"
import { withSentry } from "@sentry/nextjs";

const handler = async (req: NextApiRequest, res: NextApiResponse) => {
  res.status(200).json({ name: "Akilesh" });
};

export default withSentry(handler);
Testing
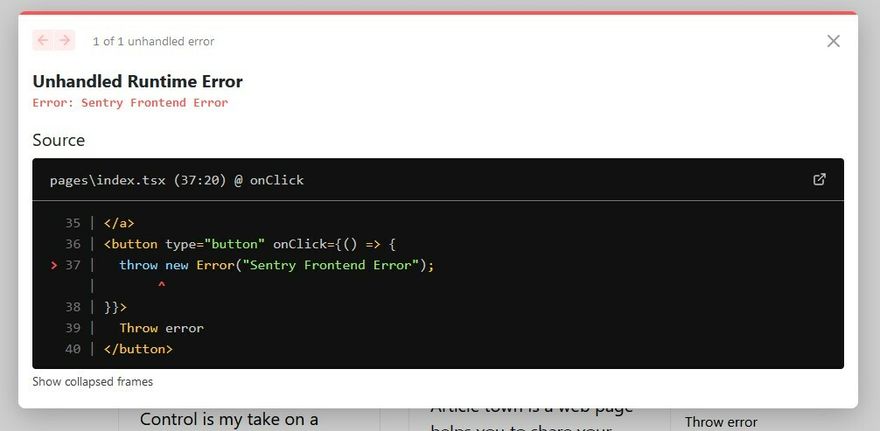
To check every thing works fine, we will trigger a button click event in a frontend component that throws an error.
            <button type="button" onClick={() => {
              throw new Error("Sentry Frontend Error");
            }}>
              Throw error
            </button>
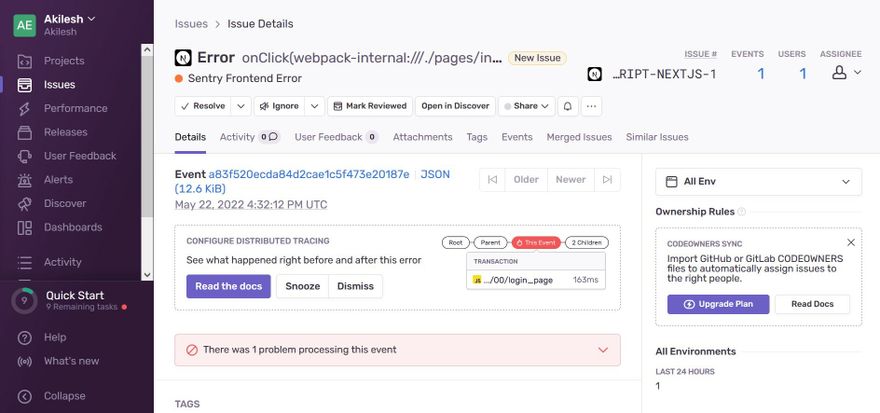
Now check your sentry dashboard to know more about the errors and performance metrics.
Deployment (Vercel)
Assuming that your next.js project has deployed on vercel.
Add environment variable to your project in vercel Project Settings > General > Environment Variables
SENTRY_AUTH_TOKEN: in environment variable with your sentry auth token which will be present in your .sentryclirc file.
Stay Tuned For Advanced Deployment Configuration.


Top comments (0)